This week’s theme is flash photography. Whether you just have the pop-up or small flash on your camera or an external flash, on or off camera, the below tips can help you achieve better flash photos. I’ll follow the tips with some examples and explain how I made them.
Tips for getting better flash photos:
- To get a more natural-looking light instead of the bright flashy look flashes often give, adjust your non-flash exposure to just a stop or two below zero before adding flash. This will make your background show up without flash and let the flash add a more subtle light to your subject. If you just use auto mode, the camera will often make the background very dark and the flash very bright.
- Bigger is usually better – a bigger light source will create a softer light, which is usually more flattering and natural-looking for photos of people. This is about relative size, not just the size of the light, so a light that’s closer to your subject will appear larger and create a softer light. For example, the sun is very large, but very far away, so it’s a fairly small light source and can create harsh shadows. A pop-up flash on camera is a small light source, even if you get close.
- You can make your small flash larger by using a diffuser or bouncing it off something. There are lots of diffusers you can buy for external flashes and even pop-up flashes, along with reflectors that go on the flash, like this Flash Bender that I’ve used. Even the tiny white card that’s built in to your external flash will help spread the light out a bit. You can also rotate your external flash to bounce off a white ceiling or wall, which creates a big, soft light source. If you just have a pop-up flash, you can try holding a piece of white paper under and in front of it to diffuse and direct the light towards the ceiling.
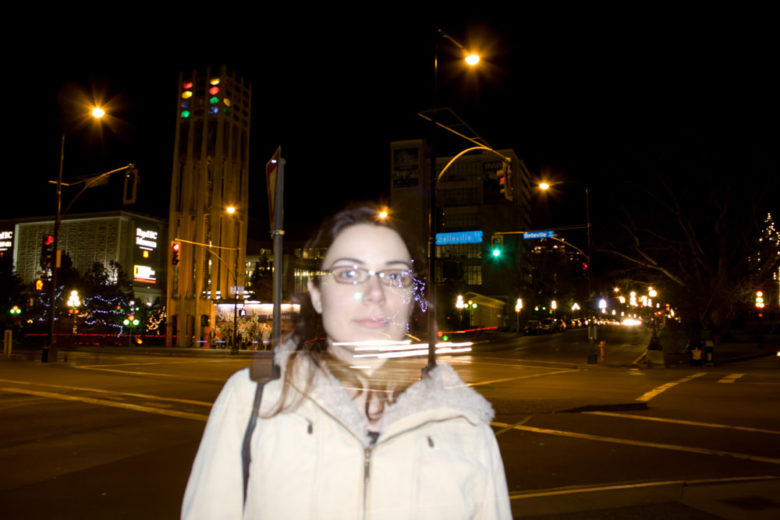
The above photo was taken in 2008 on my first DSLR, the Canon Rebel XSi, using the pop-up flash. Settings were 2 second shutter, f5.6 aperture, and ISO 100. I used a tripod to set up the camera and fired it remotely, then ducked out of the shot to create a ghostly image of me while the flash fired and capture the rest of the scene for the entire exposure.
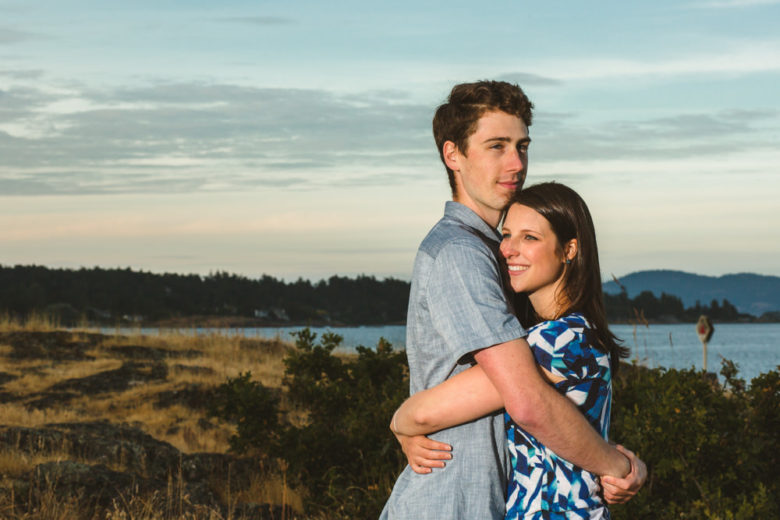
The above photo was taken with an external flash held by a friend to my left. Settings were 1/200, f11, ISO 100. The goal was to balance the background exposure with the flash exposure to allow the sky to show up and people to be well-lit at the same time. If I hadn’t used flash, since the sun was behind them, the people would either be shadows with the sky properly exposed or the sky would be close to white when the people were properly exposed.
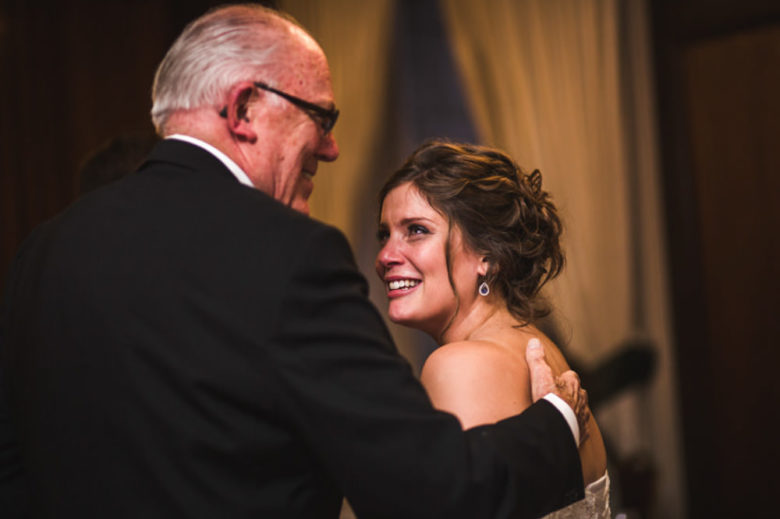
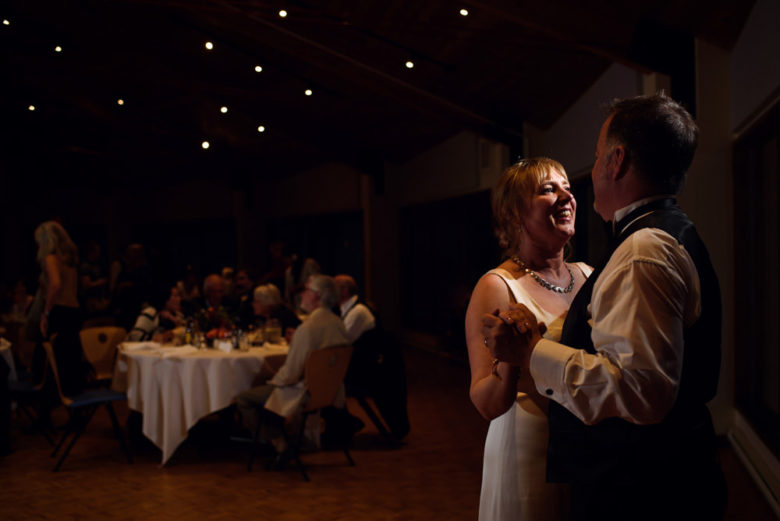
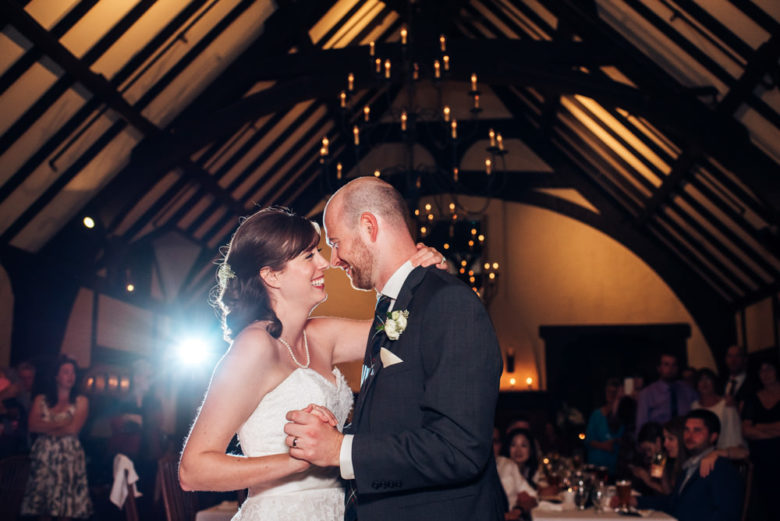
The above two wedding photos were taken using bounce flash, meaning I tilted the head of my external flash (on-camera) at the ceiling (first photo) and at a wall (second photo). Bouncing off a wall can create a more dramatic, dimensional look than bouncing off the ceiling. Settings for the first are 1/160, f2, ISO 1600 (I use higher ISO to keep the background well-lit). The second is 1/200, f2.8, ISO 3200.
The above photo was taken with an off-camera flash to my right, placed slightly behind the groom. I used a darker ambient (background) exposure to isolate the couple. Settings were 1/200, f2.5, and ISO 400.

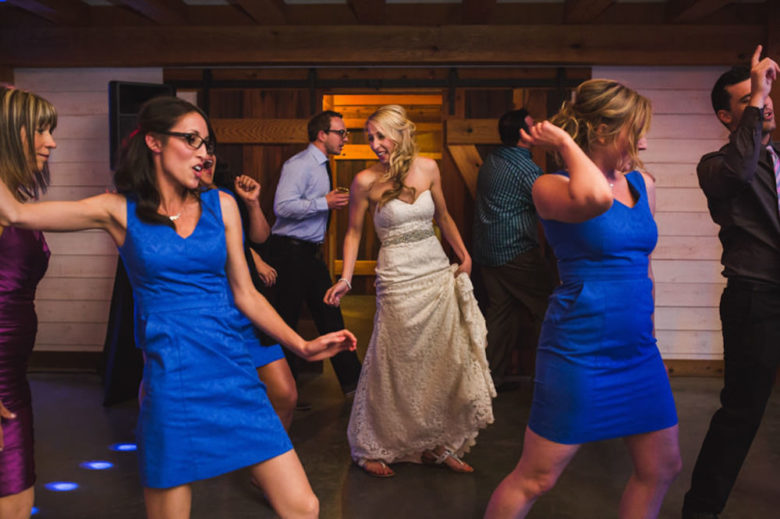
The above two photos are my most commonly used wedding lighting these days, though I occasionally use the ceiling/wall bounce method described above. I have an external flash on camera, usually aimed upward with a flag or the white card pulled up to bounce light forward. And then I’ll place another flash or two off to the side or behind to create a rim light for more dimension and interest. You kind of have to play with the background flash power settings to find the best look, which is where digital cameras really come in handy since you can review on the LCD. Settings on the first are 1/200, f2.8, ISO 500 and the second 1/200, f2.8, ISO 800. I made the background/ambient a bit darker on these to isolate the couples slightly.
If you have any questions, join us in the community. I’ll be checking in there daily to see your work and help you achieve the best results.
If you’re just finding this now, you can check out the full list and more information on the challenge here. You can follow me on Instagram at @documentyourdaytoday and use the hashtag #dtd52weeks so others doing the challenge can see your work.