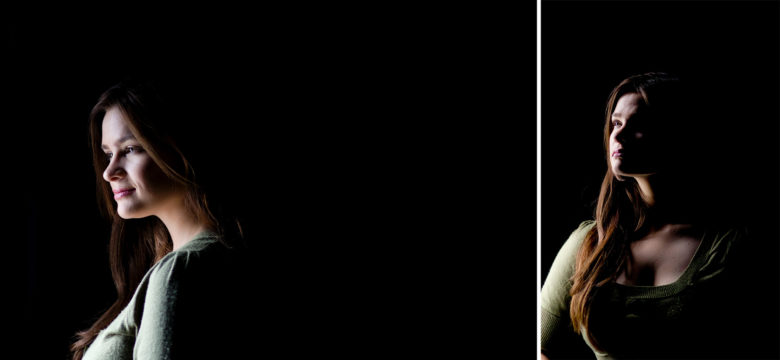
Rim light uses one of my favourite types of light: backlight. When you backlight something (i.e. put the light behind them), that thing ends up in the shade of itself, but with some light wrapping around and bouncing off surfaces in front of it. If you just have a bright sky or some other bright background behind your subject, you won’t see the bright light wrapping around its edges. But if you put something dark behind them, you’ll see a line of light around their edges. That’s rim light.
There isn’t too much to it. Just find a darker background and some light behind your subjects (or create either or both of those things). If you need some advice on getting a proper exposure, you can check out this post from when we did backlight.
Rim light often creates a pretty, glowy, kind of magical feeling. It also helps to separate your subject from the background. Think about using it in romantic or whimsical scenes or where your subject and background are similar in colour and brightness.
If you have any questions, join us in the community. I’ll be checking in there daily to see your work and help you achieve the best results.
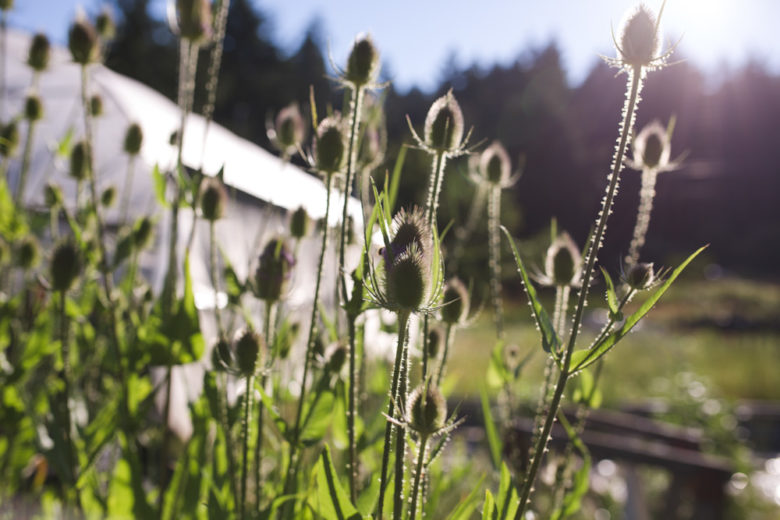
This week’s theme is sun flare or lens flare. Sun flare usually happens when the sun hits the front of your lens, creating effects including starbursts, colourful lens flare shapes or streaks, and haze. Below are some examples of each of these, followed by some tips on how to achieve it.
Here are some tips on getting sun flare in your images:
Place your subject with their back to the sun (i.e. have the sun in front of your camera). I’d recommend aiming at something in front of the sun, not at the sun itself. Looking at the sun through your camera can be very bad for your eyes.
Watch the flare through your viewfinder or LCD while composing your image. You should be able to see it, especially the colourful shapes created by it. Move your camera around to change the location and effect of the flare.
If you want flare, you need to let the sun hit the lens. Things that can prevent this are lens hoods (the plastic cylinder that you can remove from the front of your lens – they come with some lenses), standing under an overhang, or blocking the sun with trees or other objects. So, of course, if you want flare, avoid those things.
Lens flare is often considered undesirable, so more expensive and modern lenses are designed to avoid it. You may get more flare using an older or cheaper lens. A cheap filter that screws onto the front of the lens can also cause flare.
If you want a starburst effect, try using a higher aperture. The top left image here was taken at f13. It also helps to hide the sun partly behind something, so the rays are more obvious against the background.
It can be tough to focus with a lot of light coming into the lens. You can block the sun temporarily by holding your hand up in front of and above the lens to get your focus, the remove it before taking the photo. Once you’ve focused once, you can lock focus by switching to manual focus or using autofocus lock (look up AF lock or AF-on in the manual or Google) so you don’t have to keep refocusing, assuming you’re keeping the same distance from your subject for multiple photos.
Golden hour is a good time to get this effect because the sun is lower in the sky, so you can aim at the sun without crazy angles.
If you have any questions, join us in the community. I’ll be checking in there daily to see your work and help you achieve the best results.
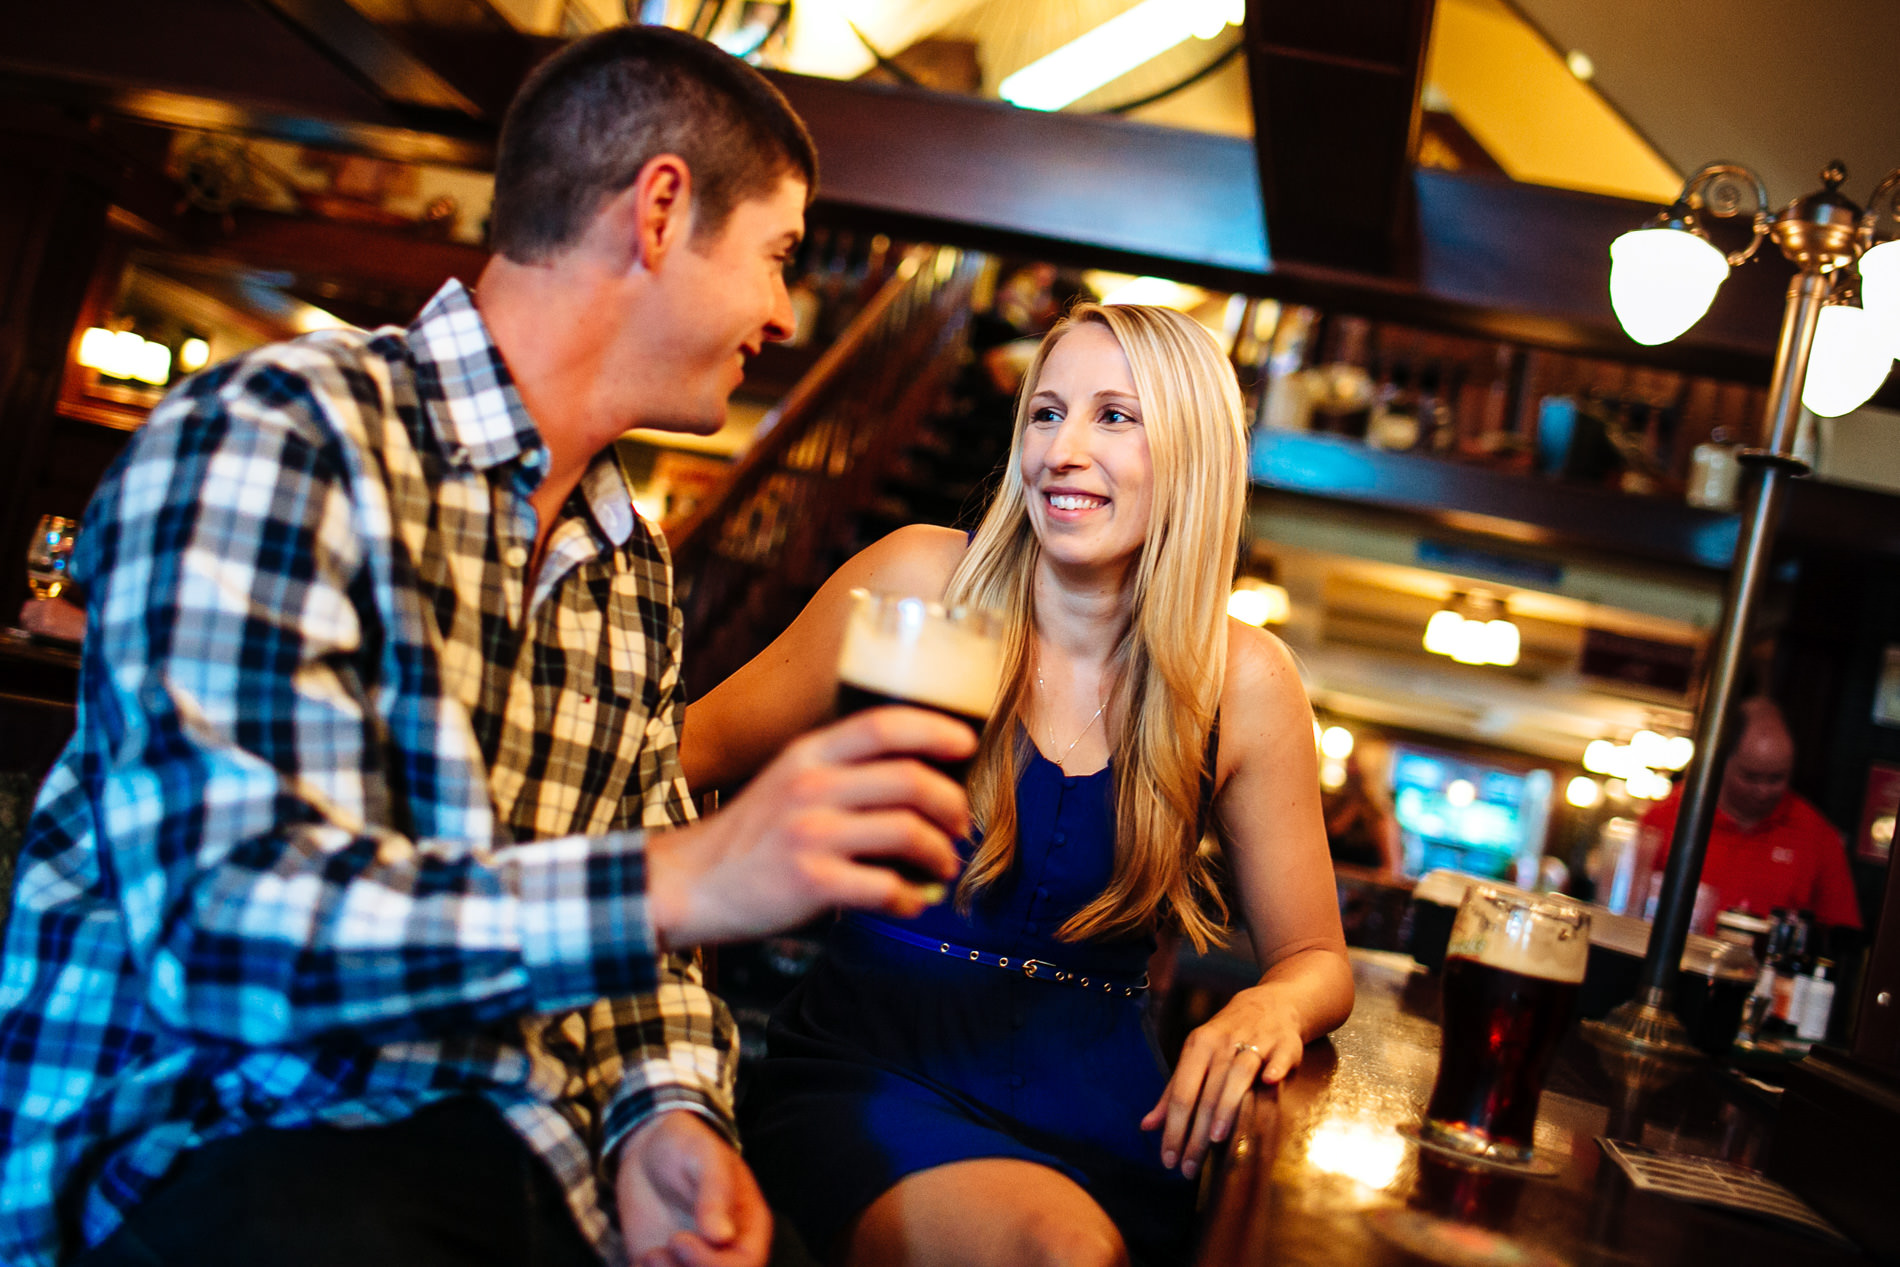
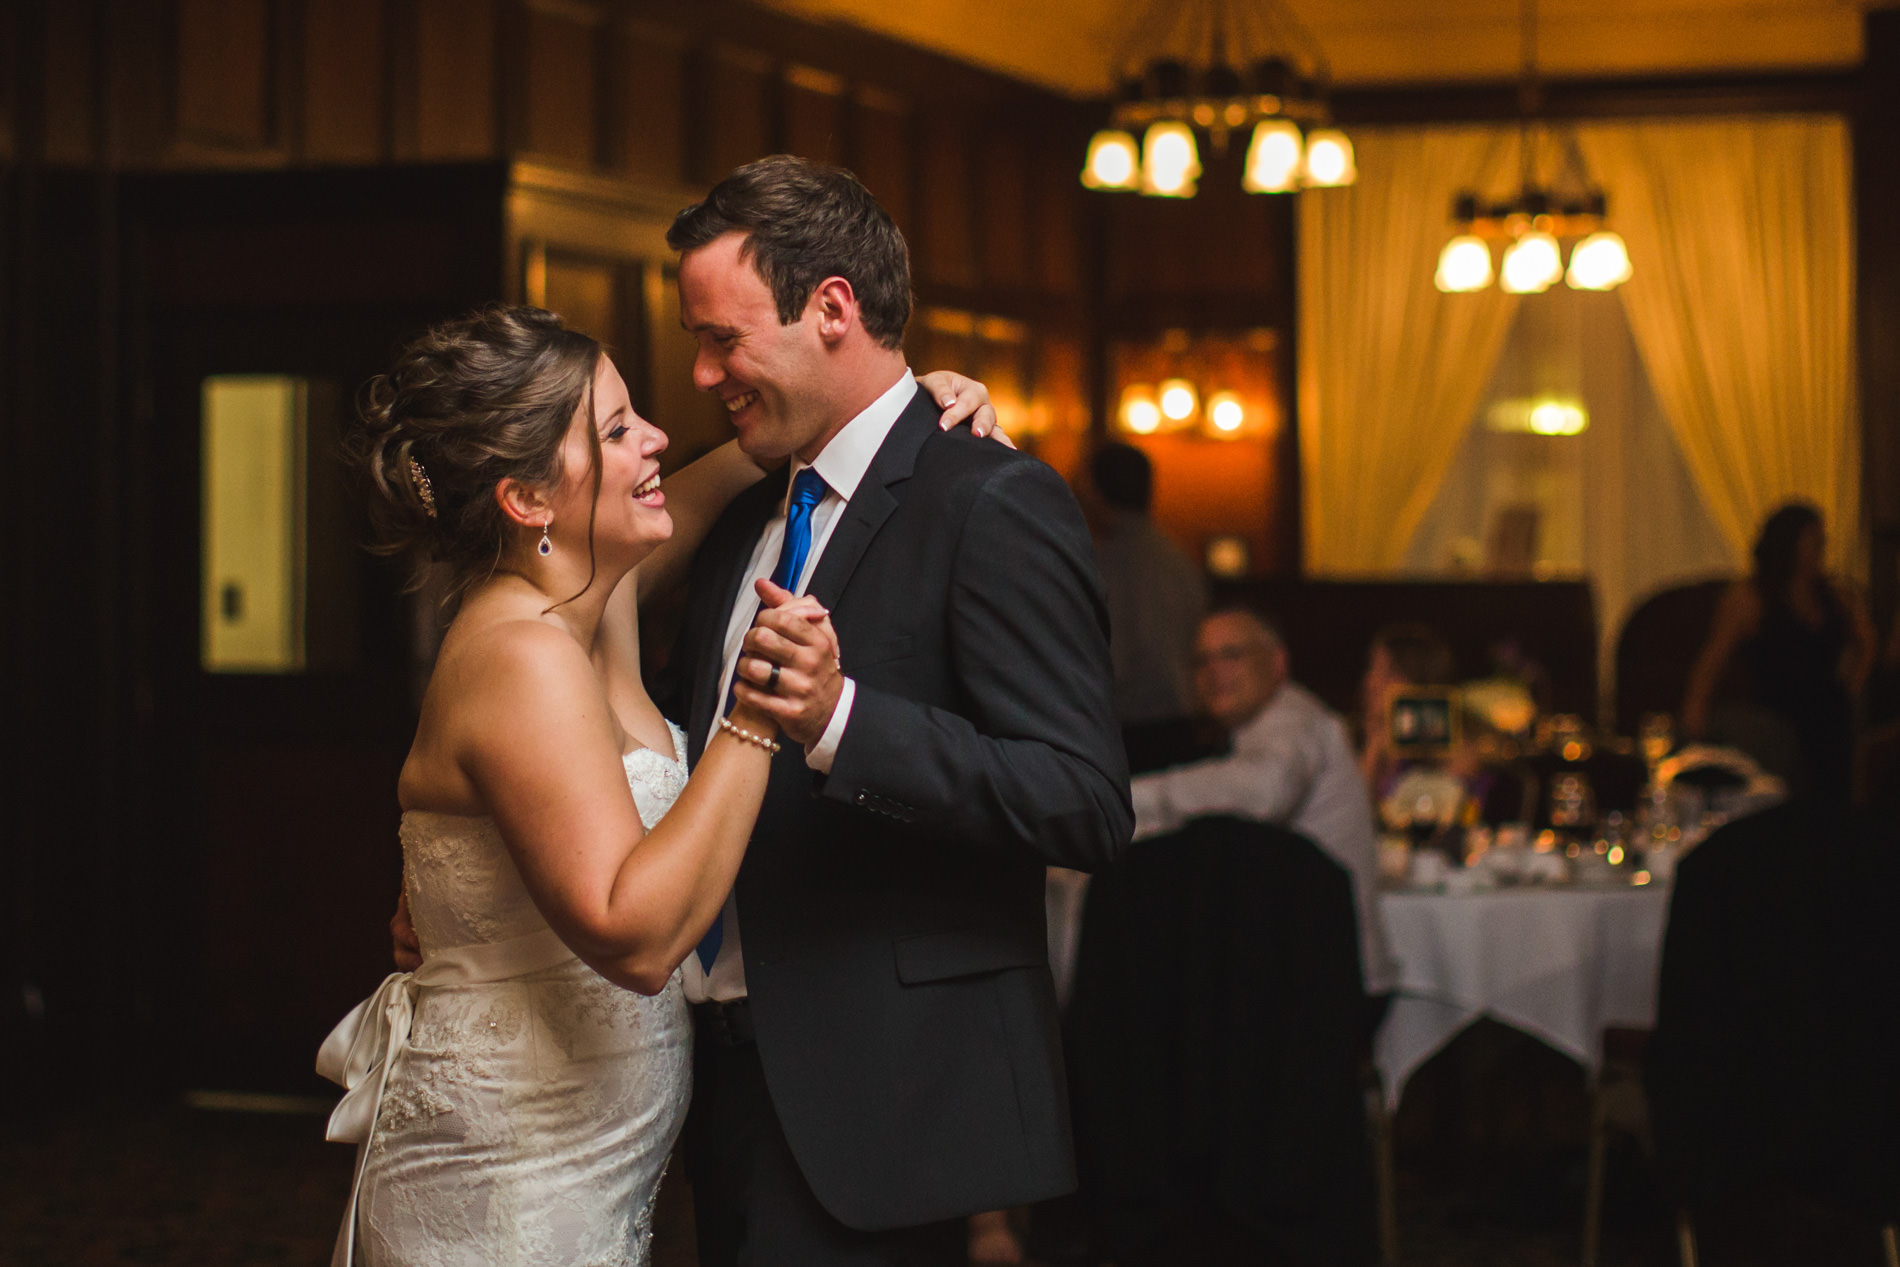
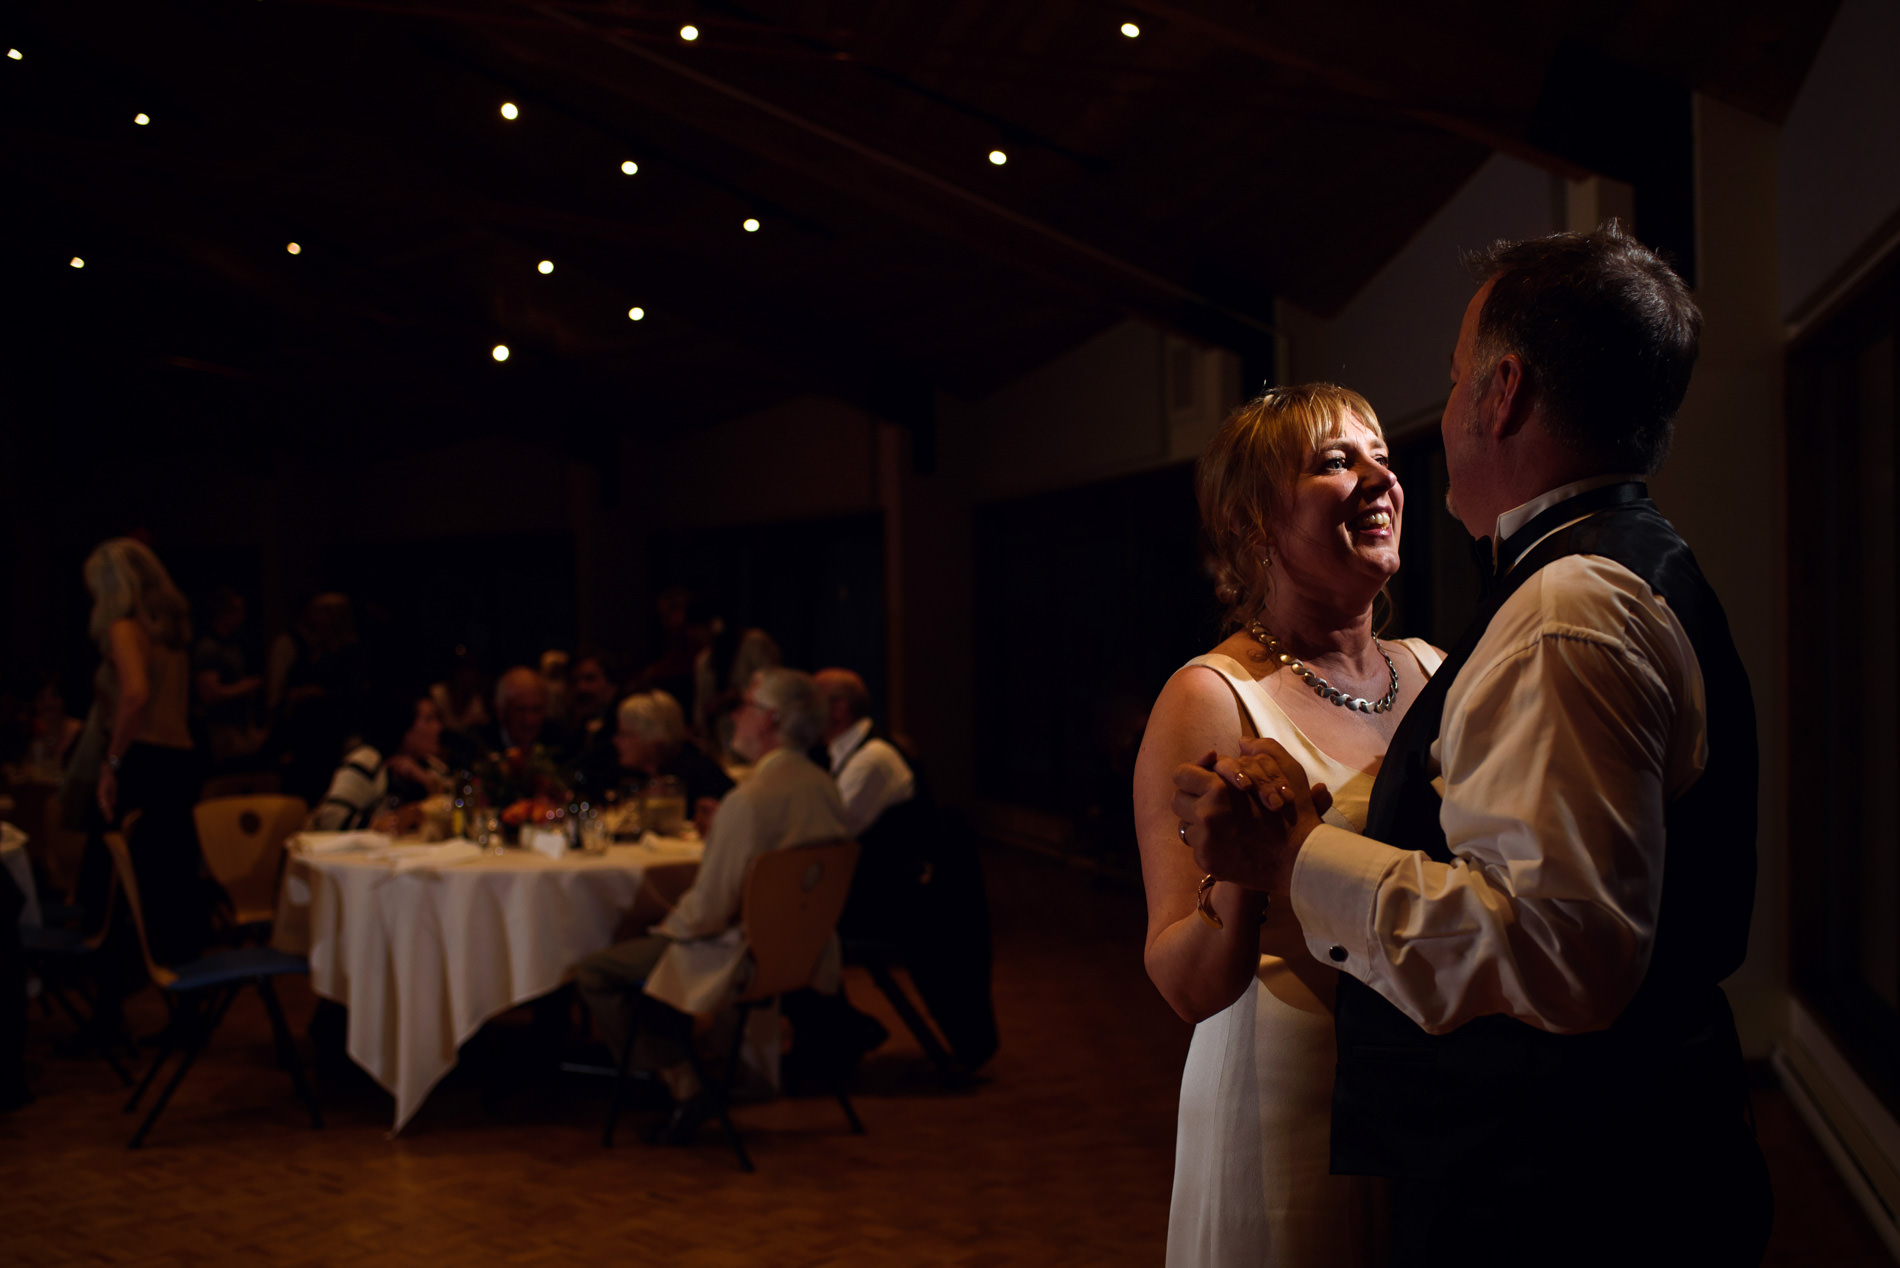
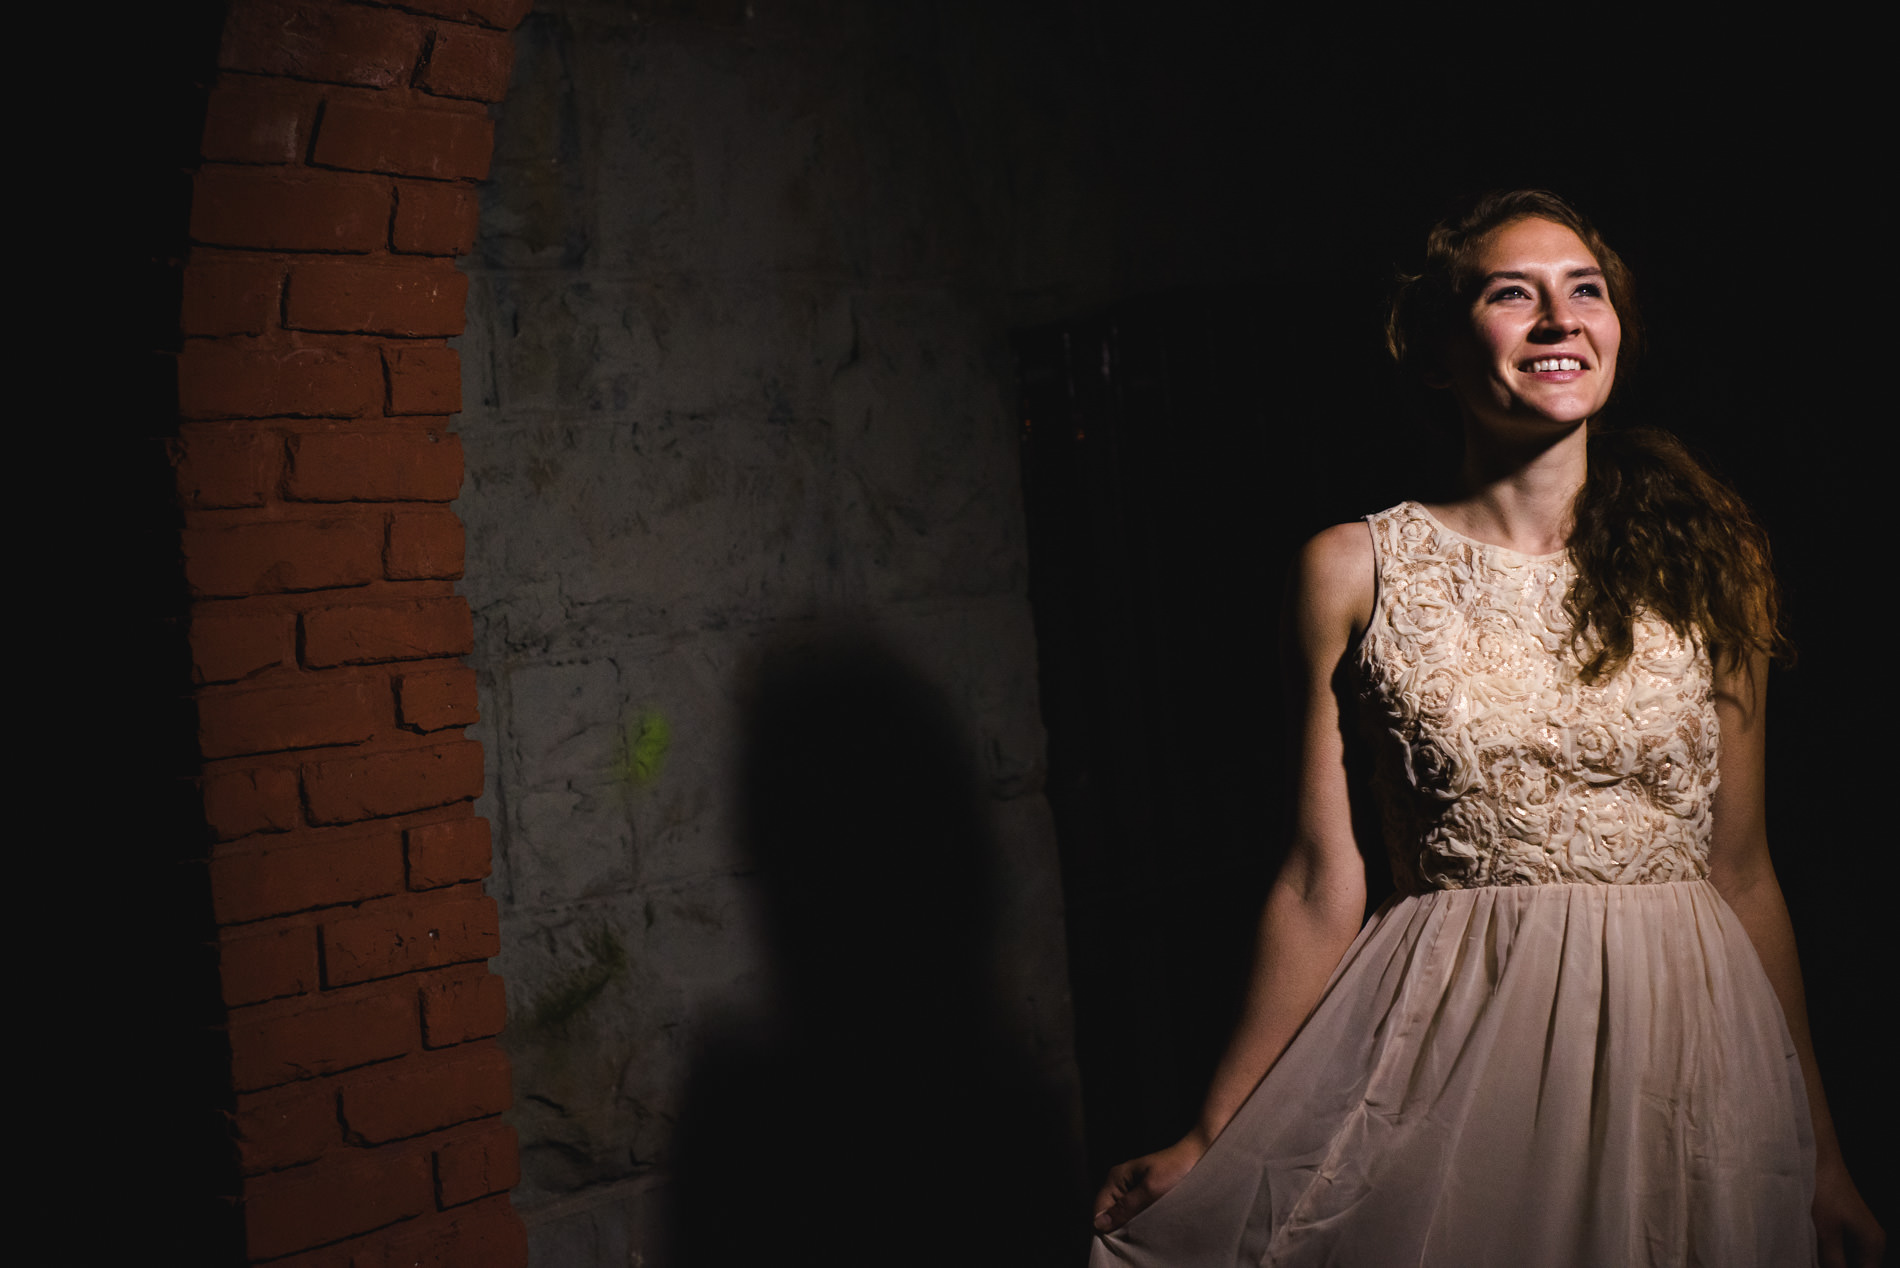
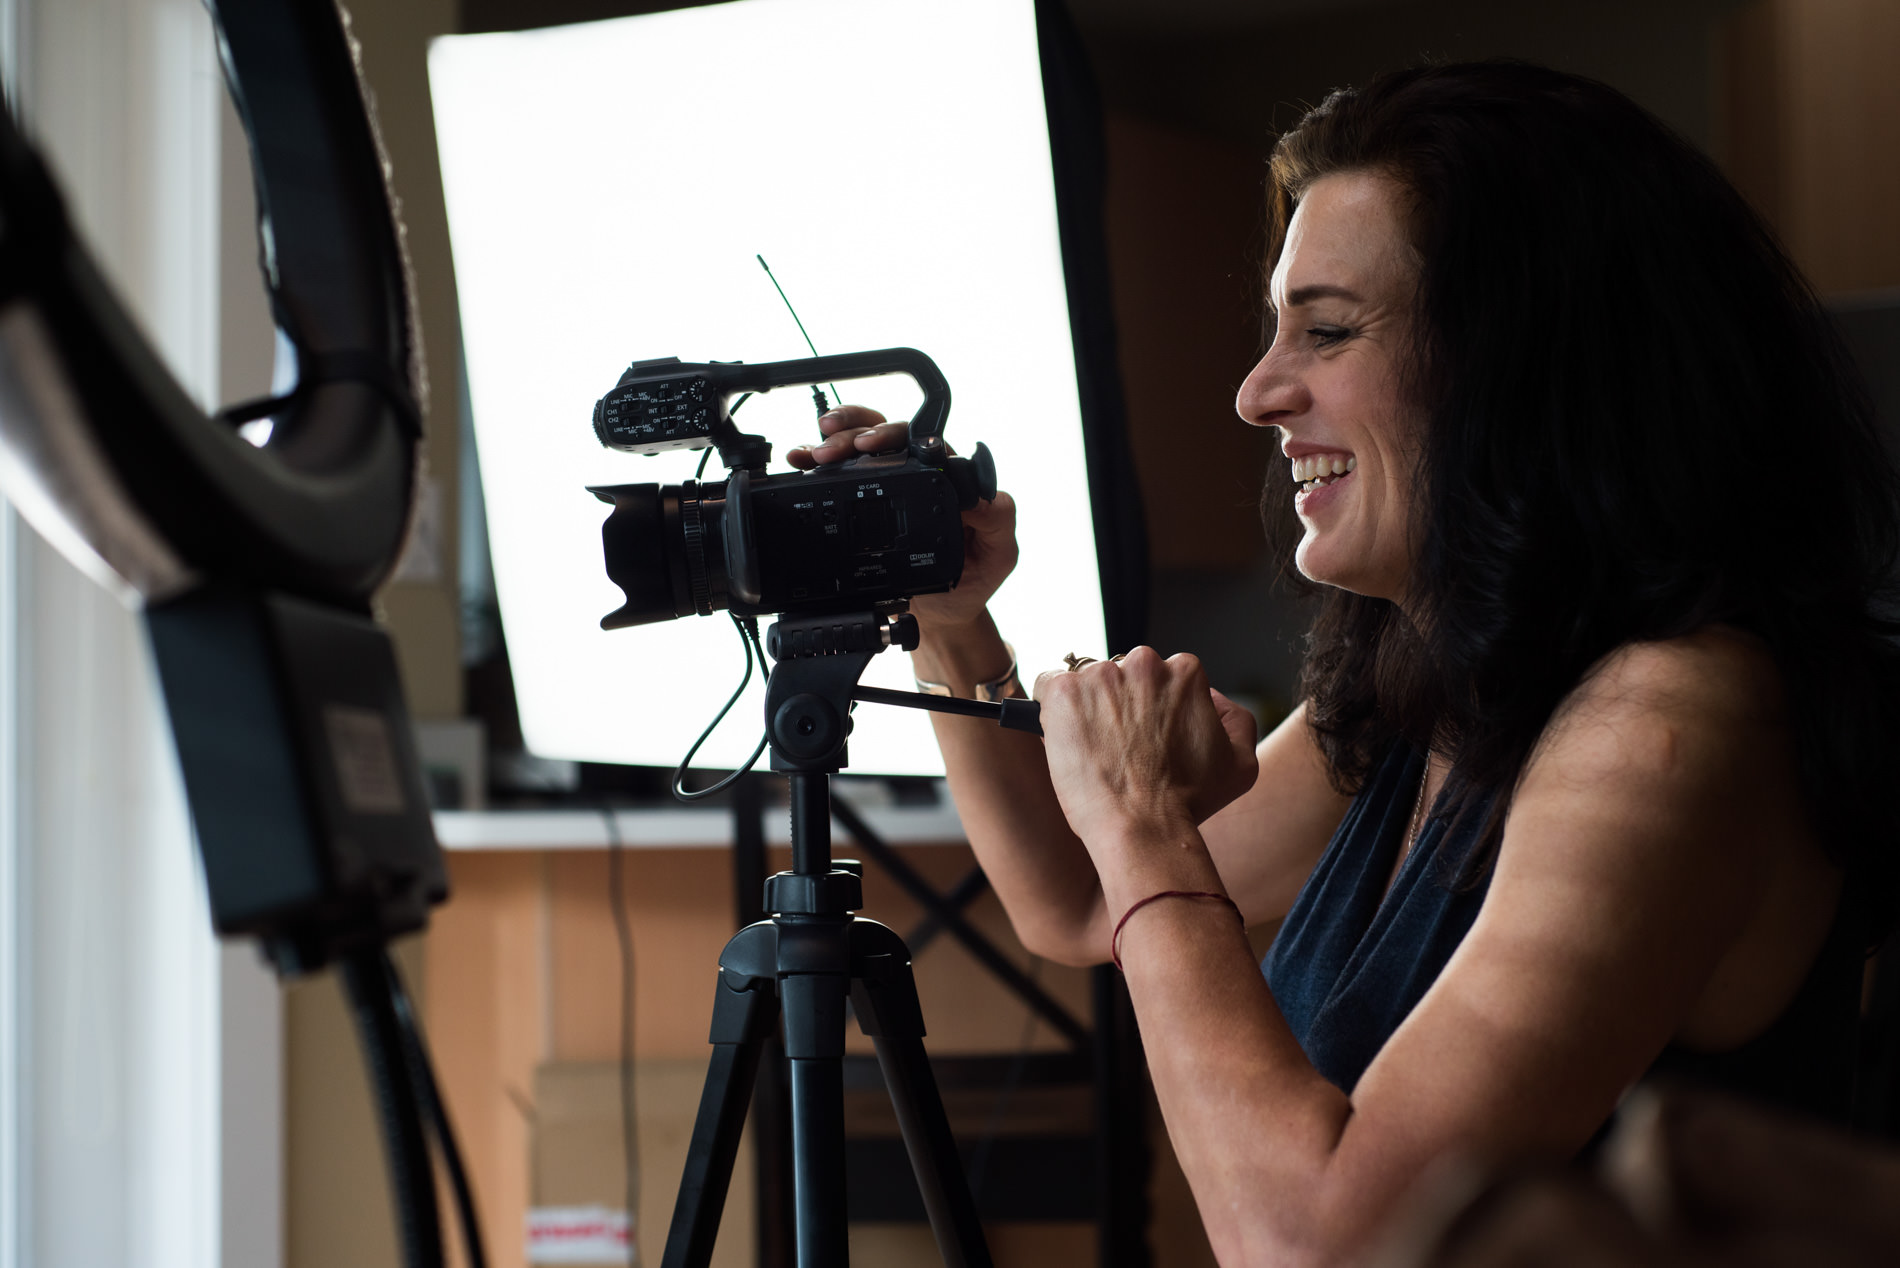
This week’s theme is artificial light. This can include flash, indoor lighting, video lights, or whatever else you can find (street lights, flashlights, sparklers, etc.) The examples below are lit by (from L-R for each row): indoor tungsten lighting in a pub, indoor fluorescent lighting in a store, subtle bounce flash on the couple with tungsten lighting in the background, harsher off-camera flash on the couple with tungsten background lighting that’s mostly drowned out by the flash being so bright, video light at front-side, video light behind the subject and mostly natural light on her face.
Here are some tips on using artificial light:
I might have talked about this when talking about window light, but be careful with mixed lighting. If you have indoor lighting and a lot of window light, you might end up with weird colours or skin tones. This is why I generally prefer to use natural light in the daytime (and turn off indoor lighting) and use indoor lighting alone at night. Fluorescent like they use in offices and stores tend to have weird colours either way, but tungsten and compact fluorescent lights are decent if there’s no other colours of light interfering.
Try using flash. If you have an external flash, you can point it at the ceiling or walls if they’re a neutral colour. This turns the ceiling or walls into a big, flattering light source. That’s what I did in the third image (with the couple dancing with a visible background). I exposed a bit darker than I would with no flash and then added some subtle flash, pointed at the ceiling, to put a nice, clean light on the couple. The image to the right of it was under exposed a lot, then off-camera flash was added to the side to create a more dramatic light on the couple. The background lighting (ambient exposure) is determined by your exposure before adding flash. The exposure of the subjects is determined by the flash and the ambient light combined. So if you set your exposure to be close to a proper exposure without flash, your flash will be less powerful and create a more natural-looking effect.
I used a video light in the last two images. Actually, the first was at a meetup lead by Christina Craft and someone else held the light and the second, I just used the light that the videographer set up. But sometimes I use my own video lights as an easy light source. Video lights are great because they provide a constant light source so you can see what your lighting will look like before you take the photo. Flash takes a bit more trial and error. If you don’t have an actual video light, you can try using a flashlight, a lantern, a lamp, or a shop light for a similar effect (though probably not as powerful).
If you have any questions, join us in the community. I’ll be checking in there daily to see your work and help you achieve the best results.
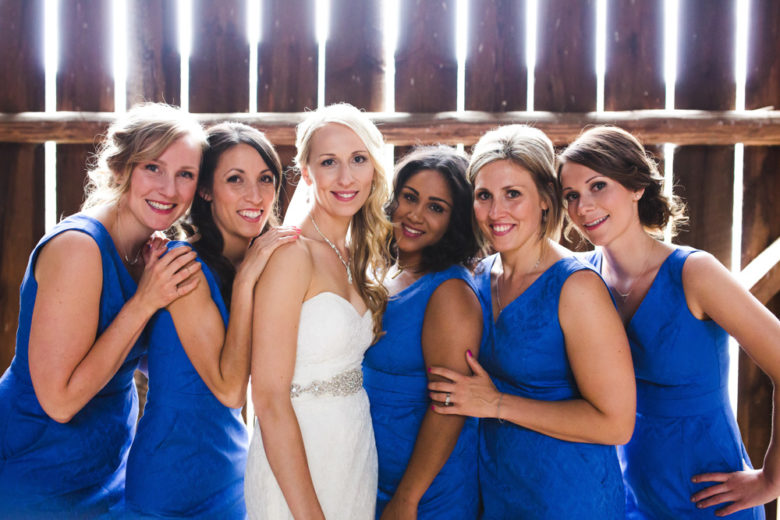
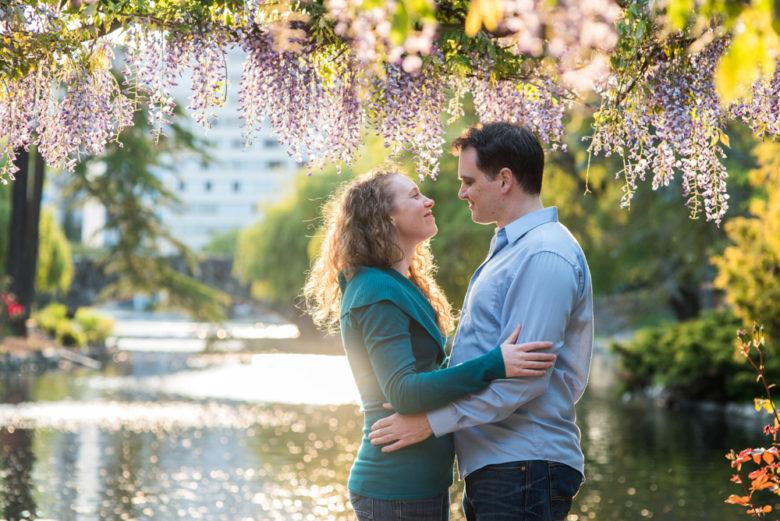
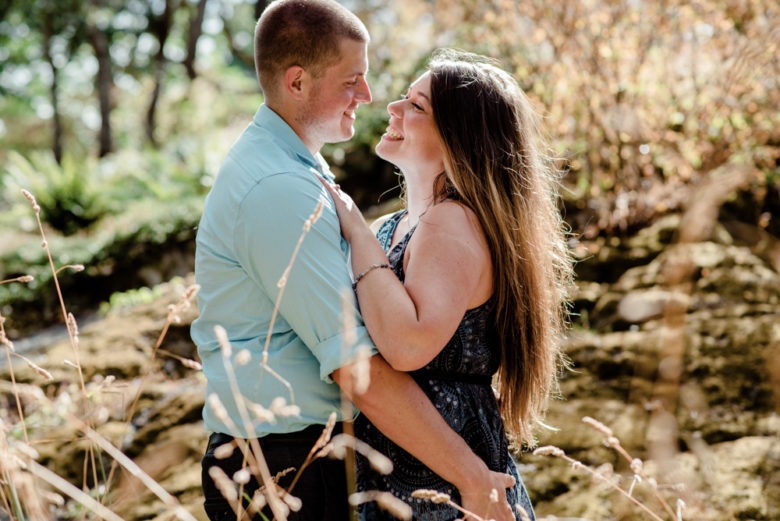
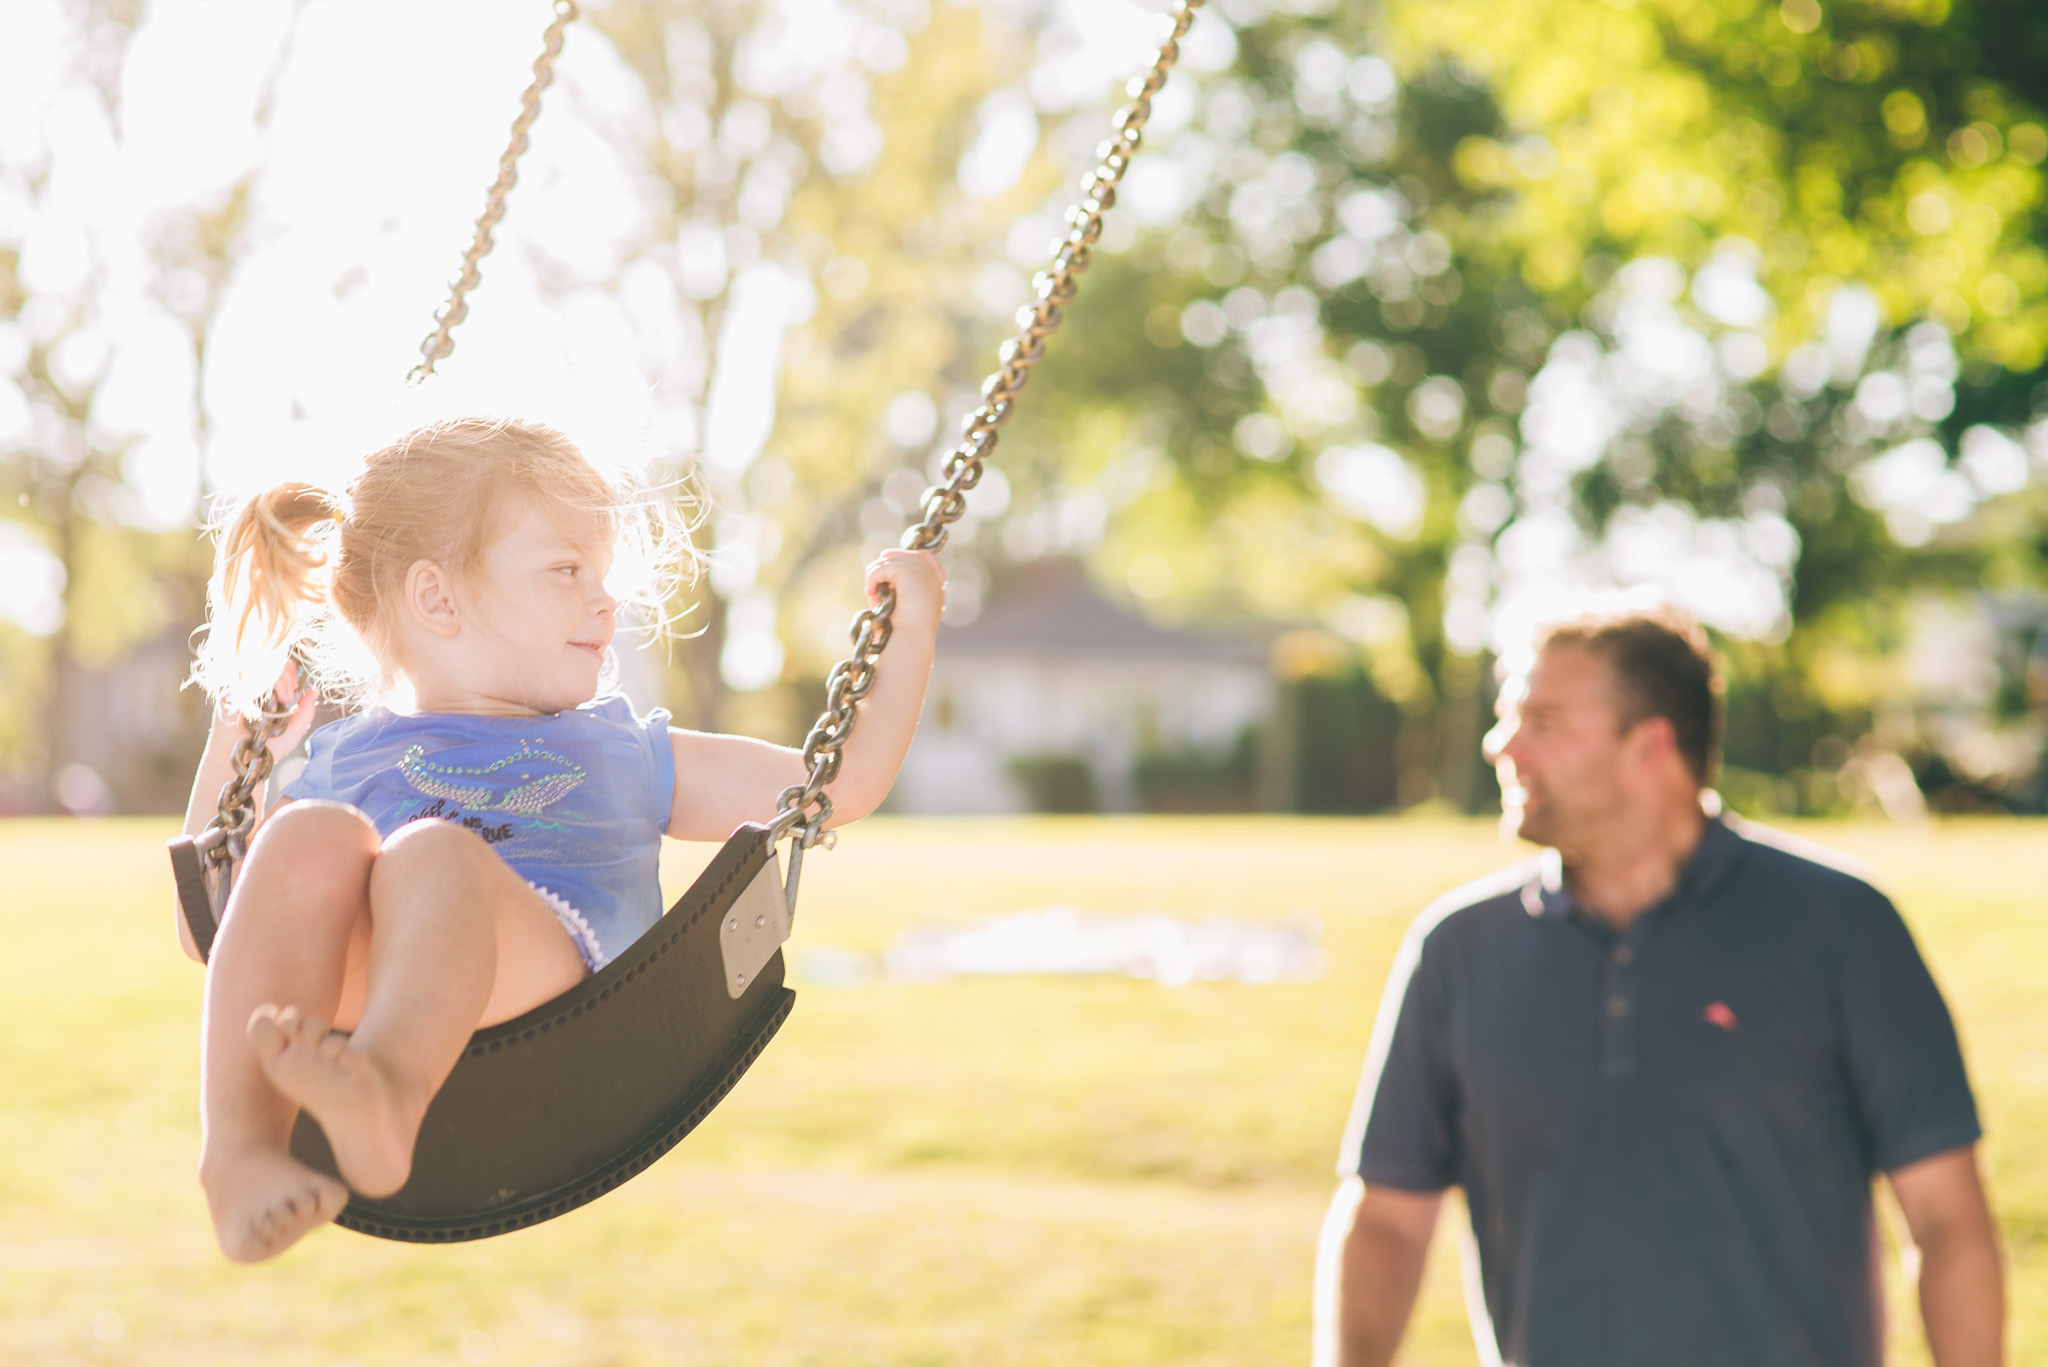
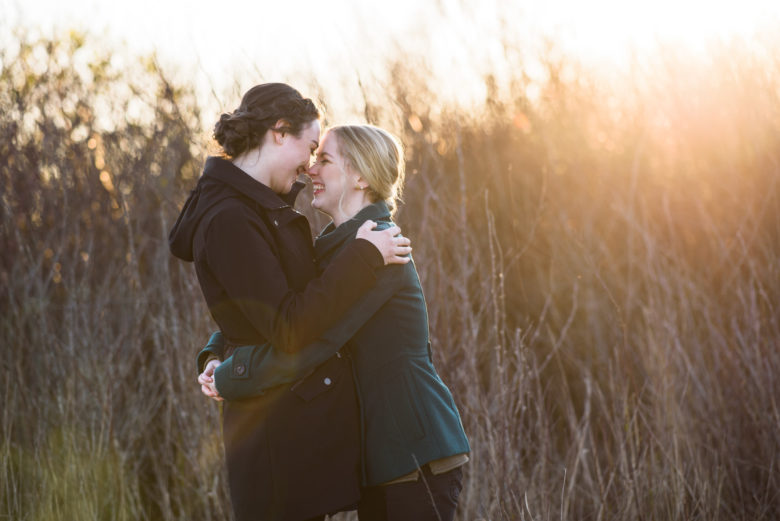
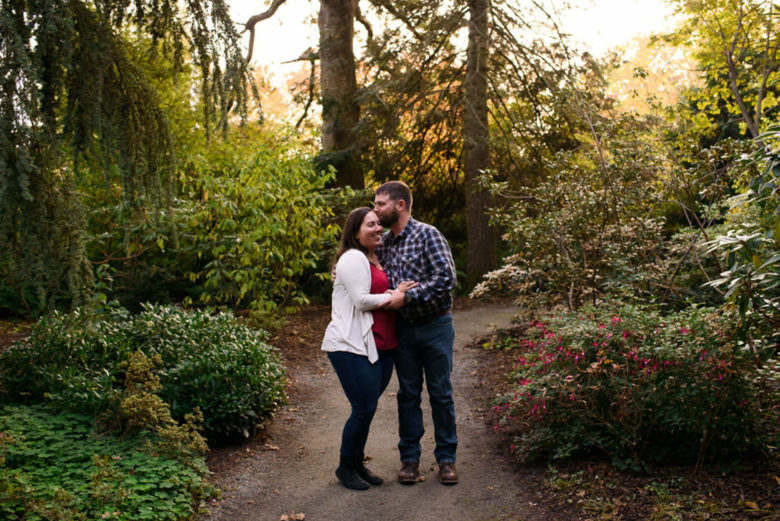
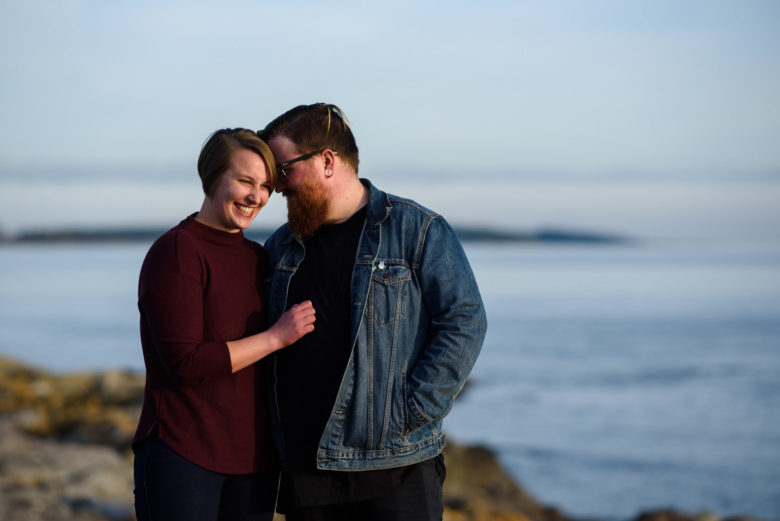
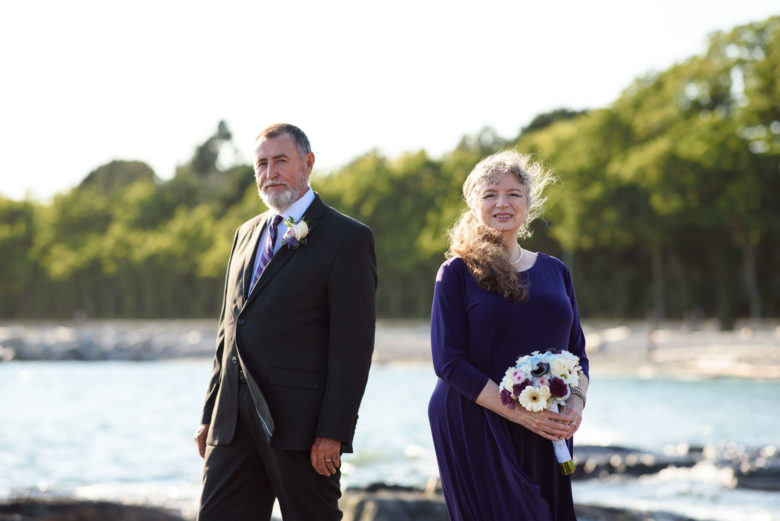
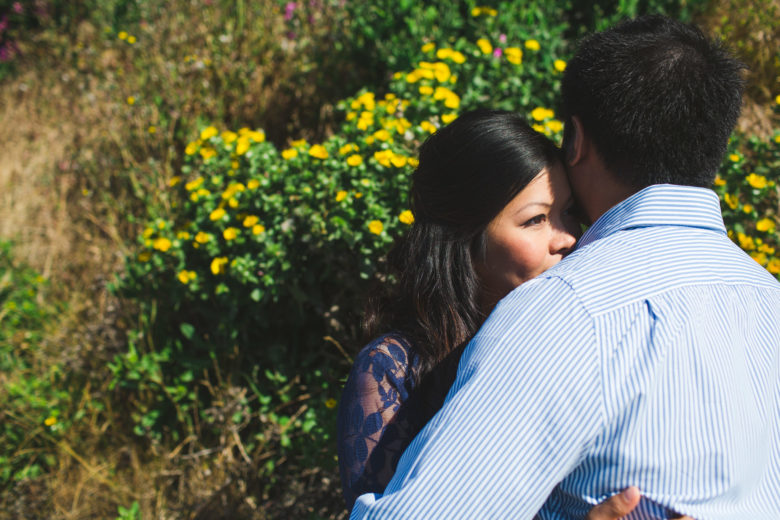
This week’s theme is golden hour. Golden Hour is the first or last hour of sunlight in the day, which features a soft, warm light and a low sunlight angle. I find it’s not very effective when it’s overcast since it just goes from bright to dark without that nice glow or a colourful sky. So you may need to attempt this more than once depending on the weather. Also, depending on where you live, you might find the sweet spot doesn’t last that long and may occur at a different time during that hour.
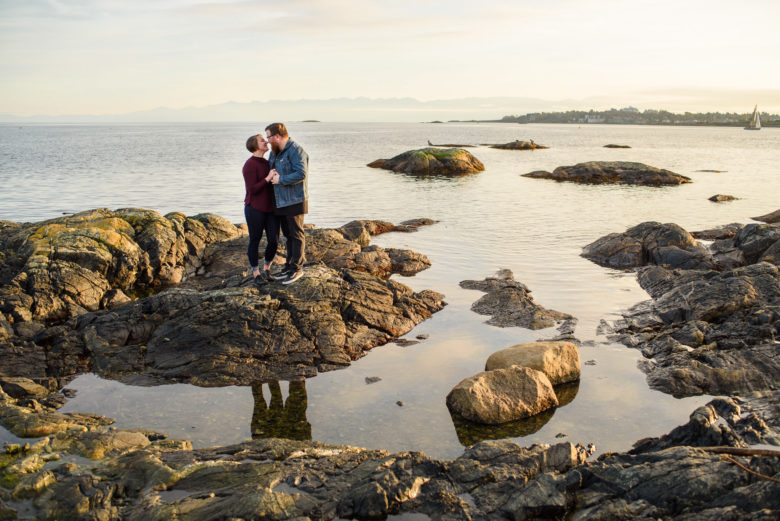
The examples above show a few ways to use golden hour light. The first two use backlight with a darker background, creating a warm, glowy rim light around their hair and bodies. More info on using backlight here.
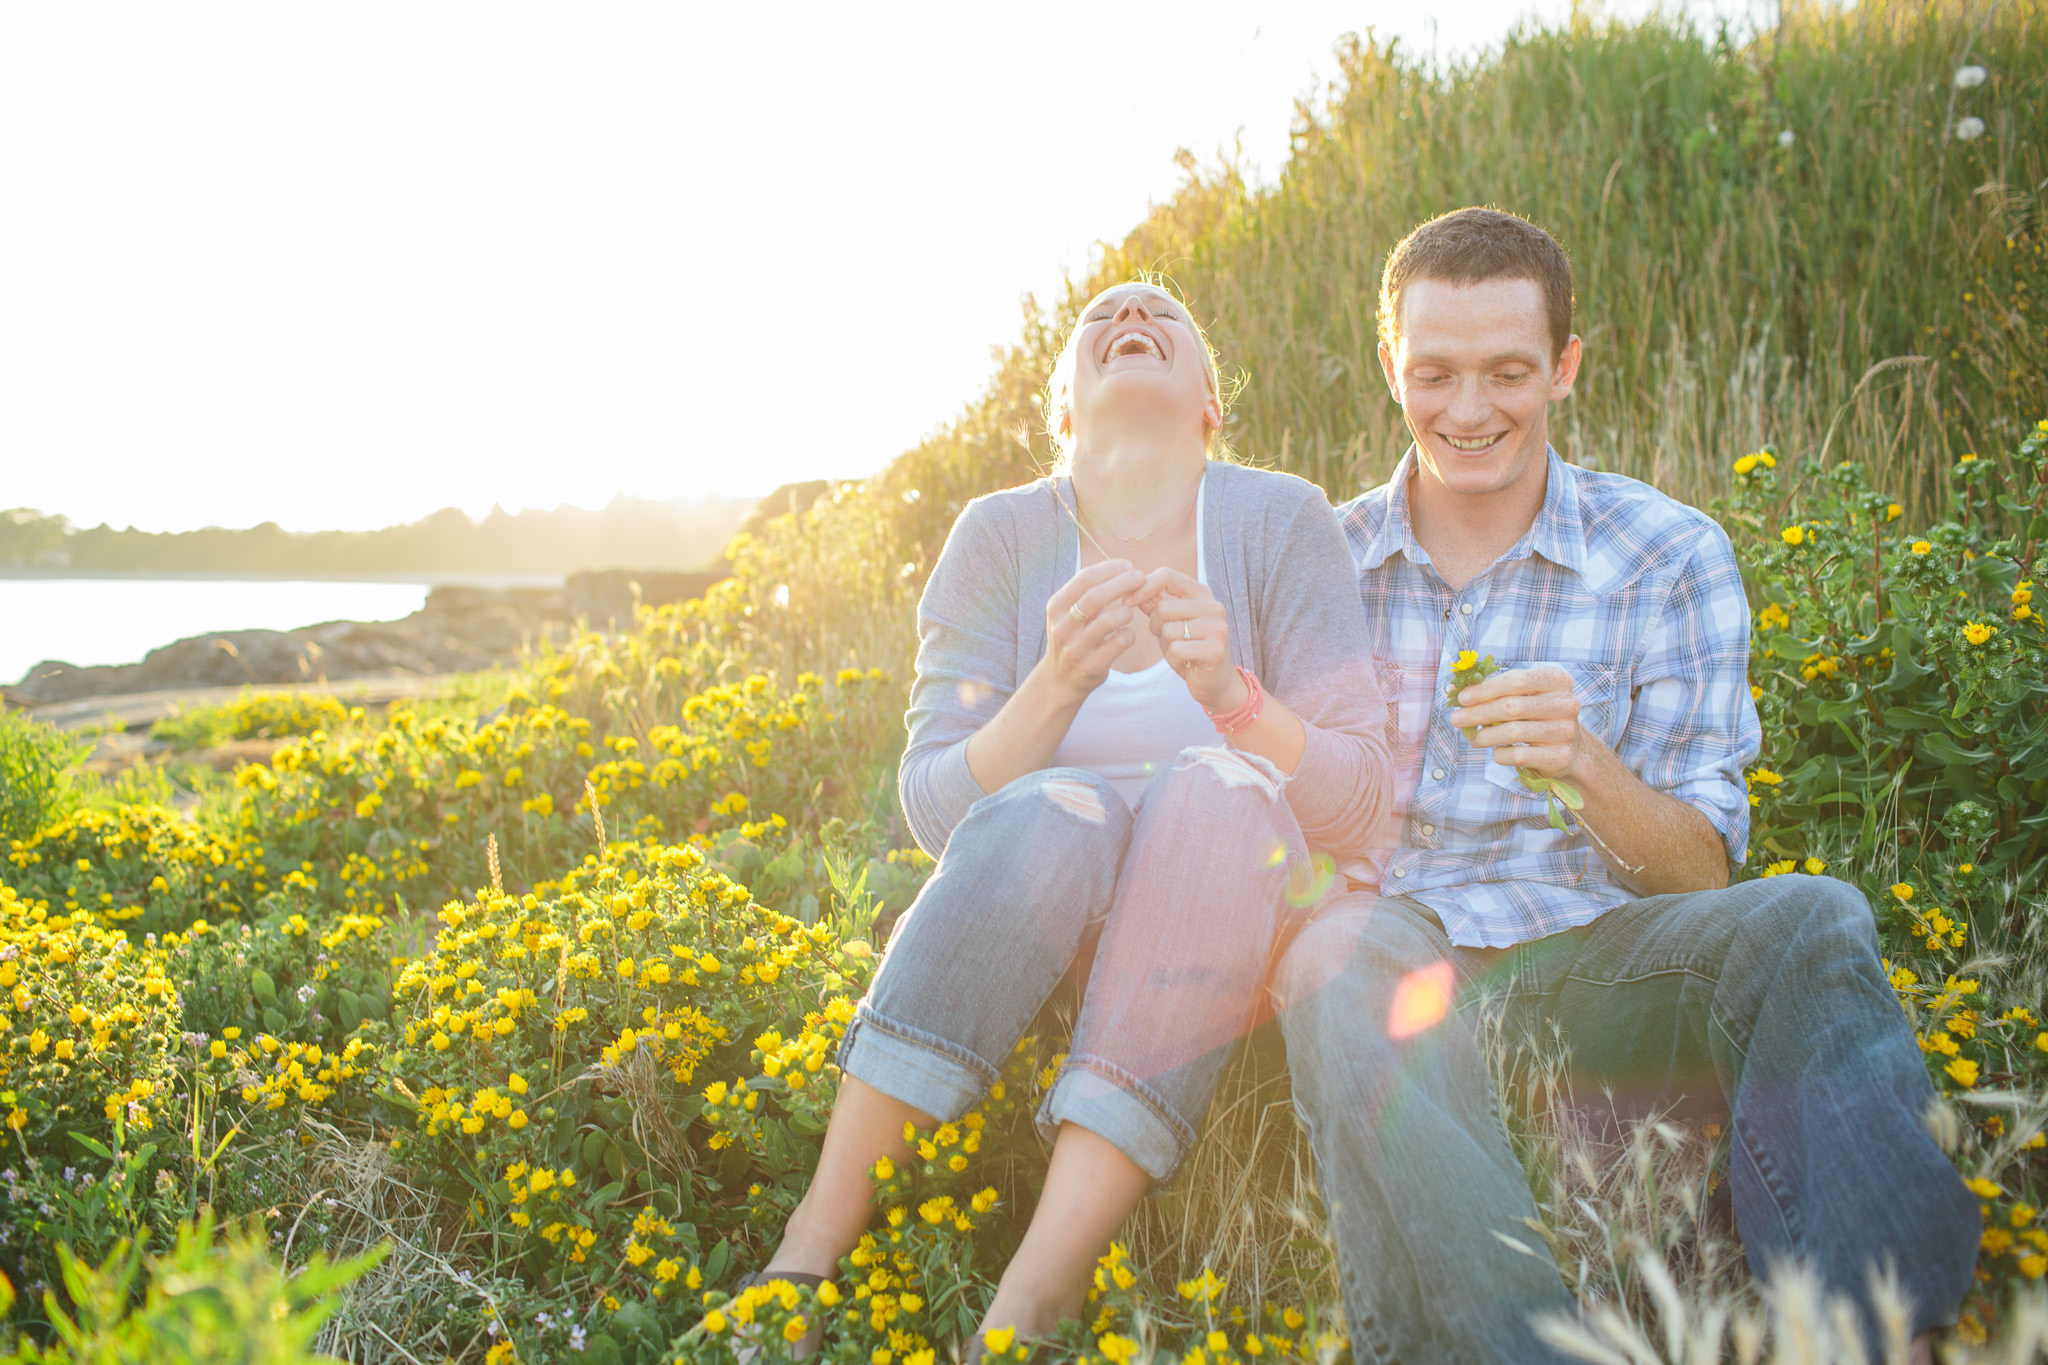
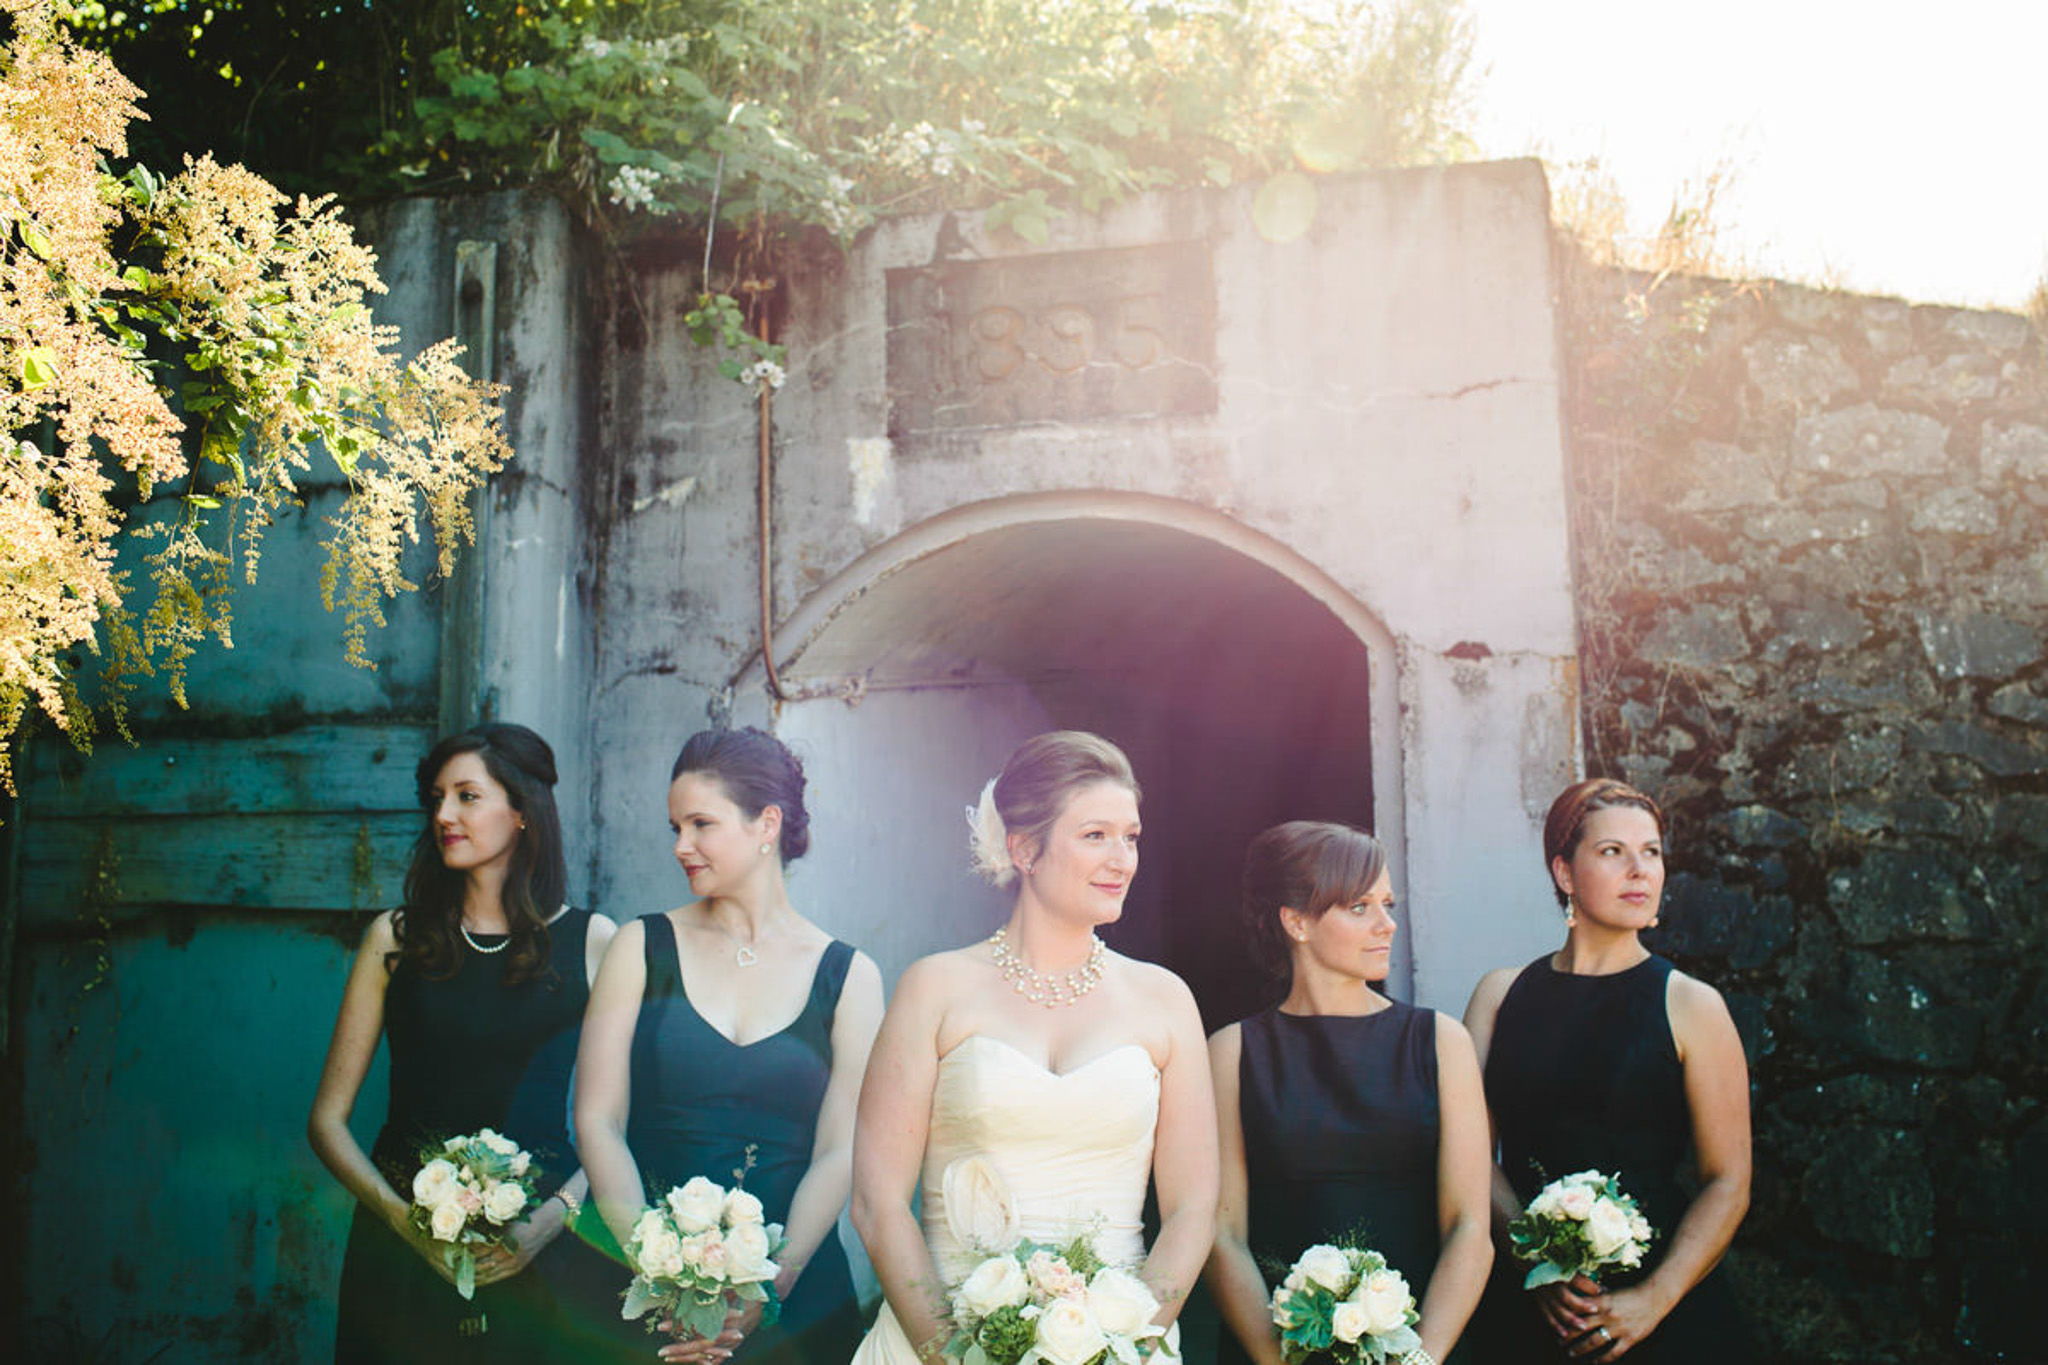
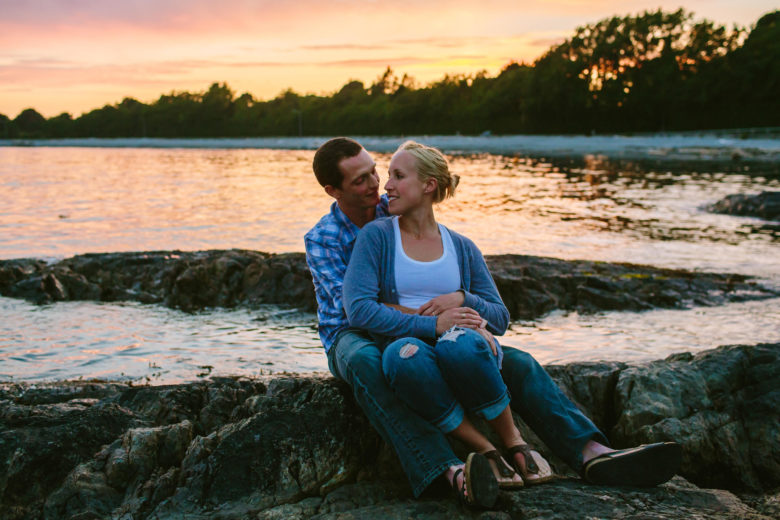
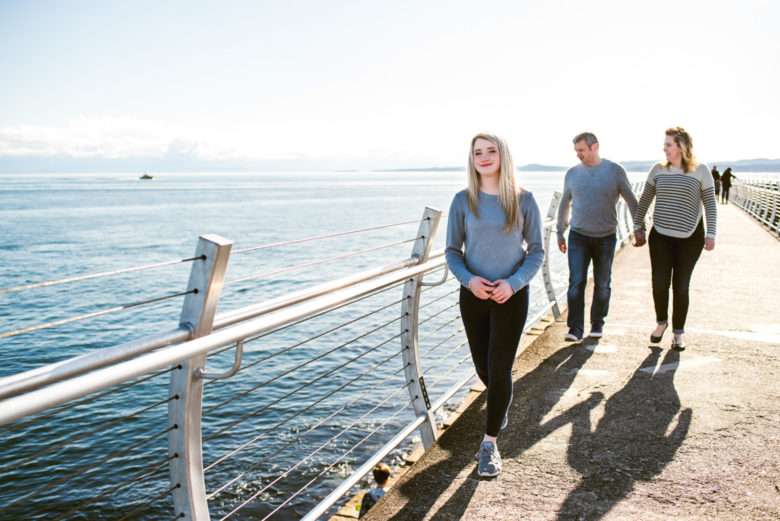
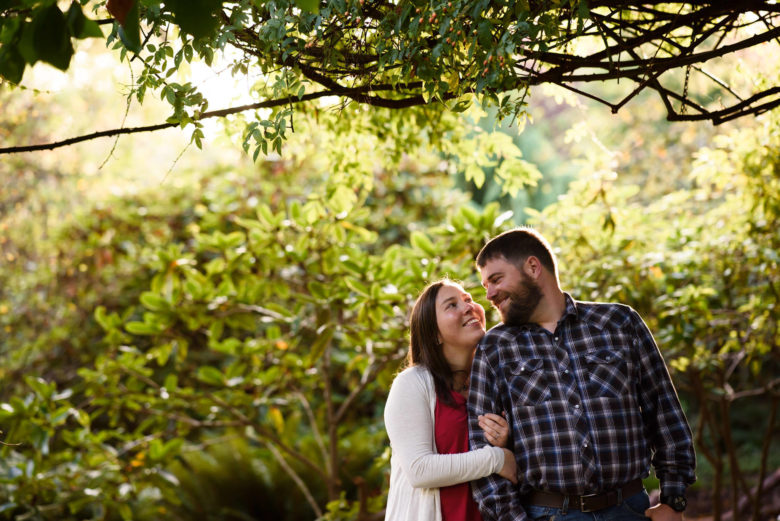
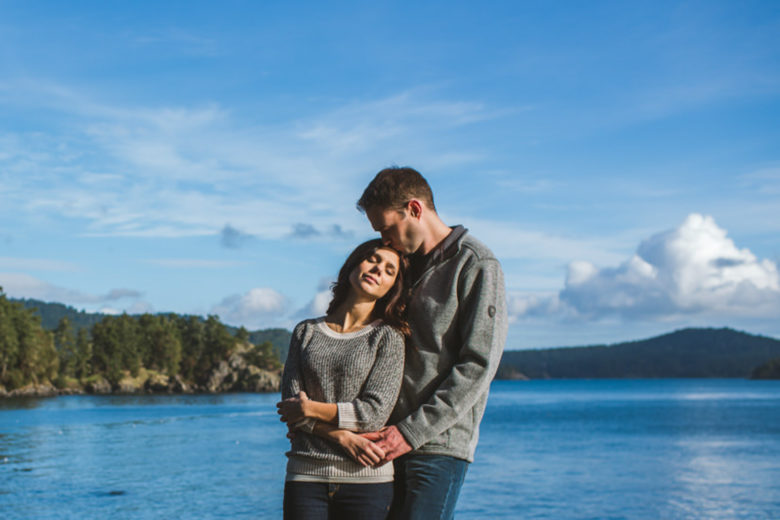
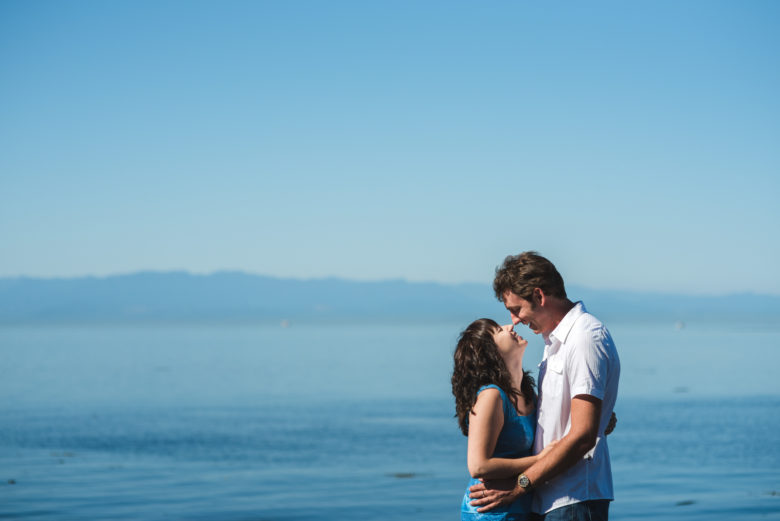
The middle two are backlit with a brighter background and an emphasis on the sky. Since golden hour is near sunset, the sky and your subjects are closer to the same brightness than usual, so you can get both your subjects and the sky well exposed. Sometimes this still requires a bit of editing to make them balance or you can just let the subjects be a bit darker than usual.
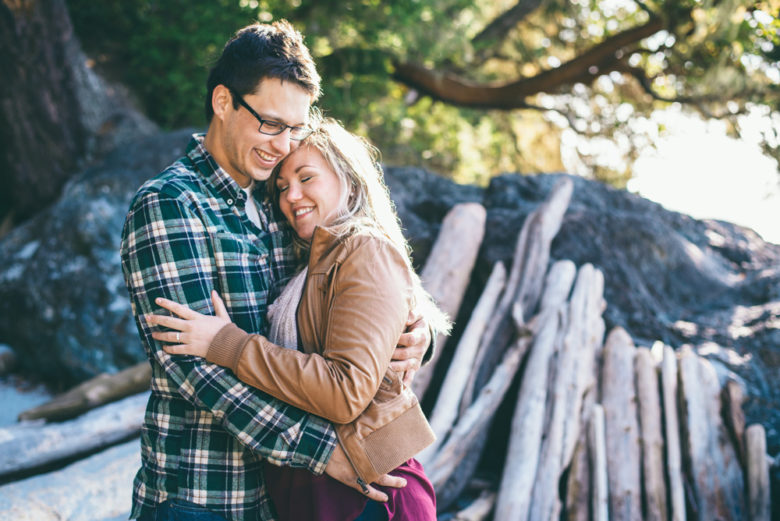
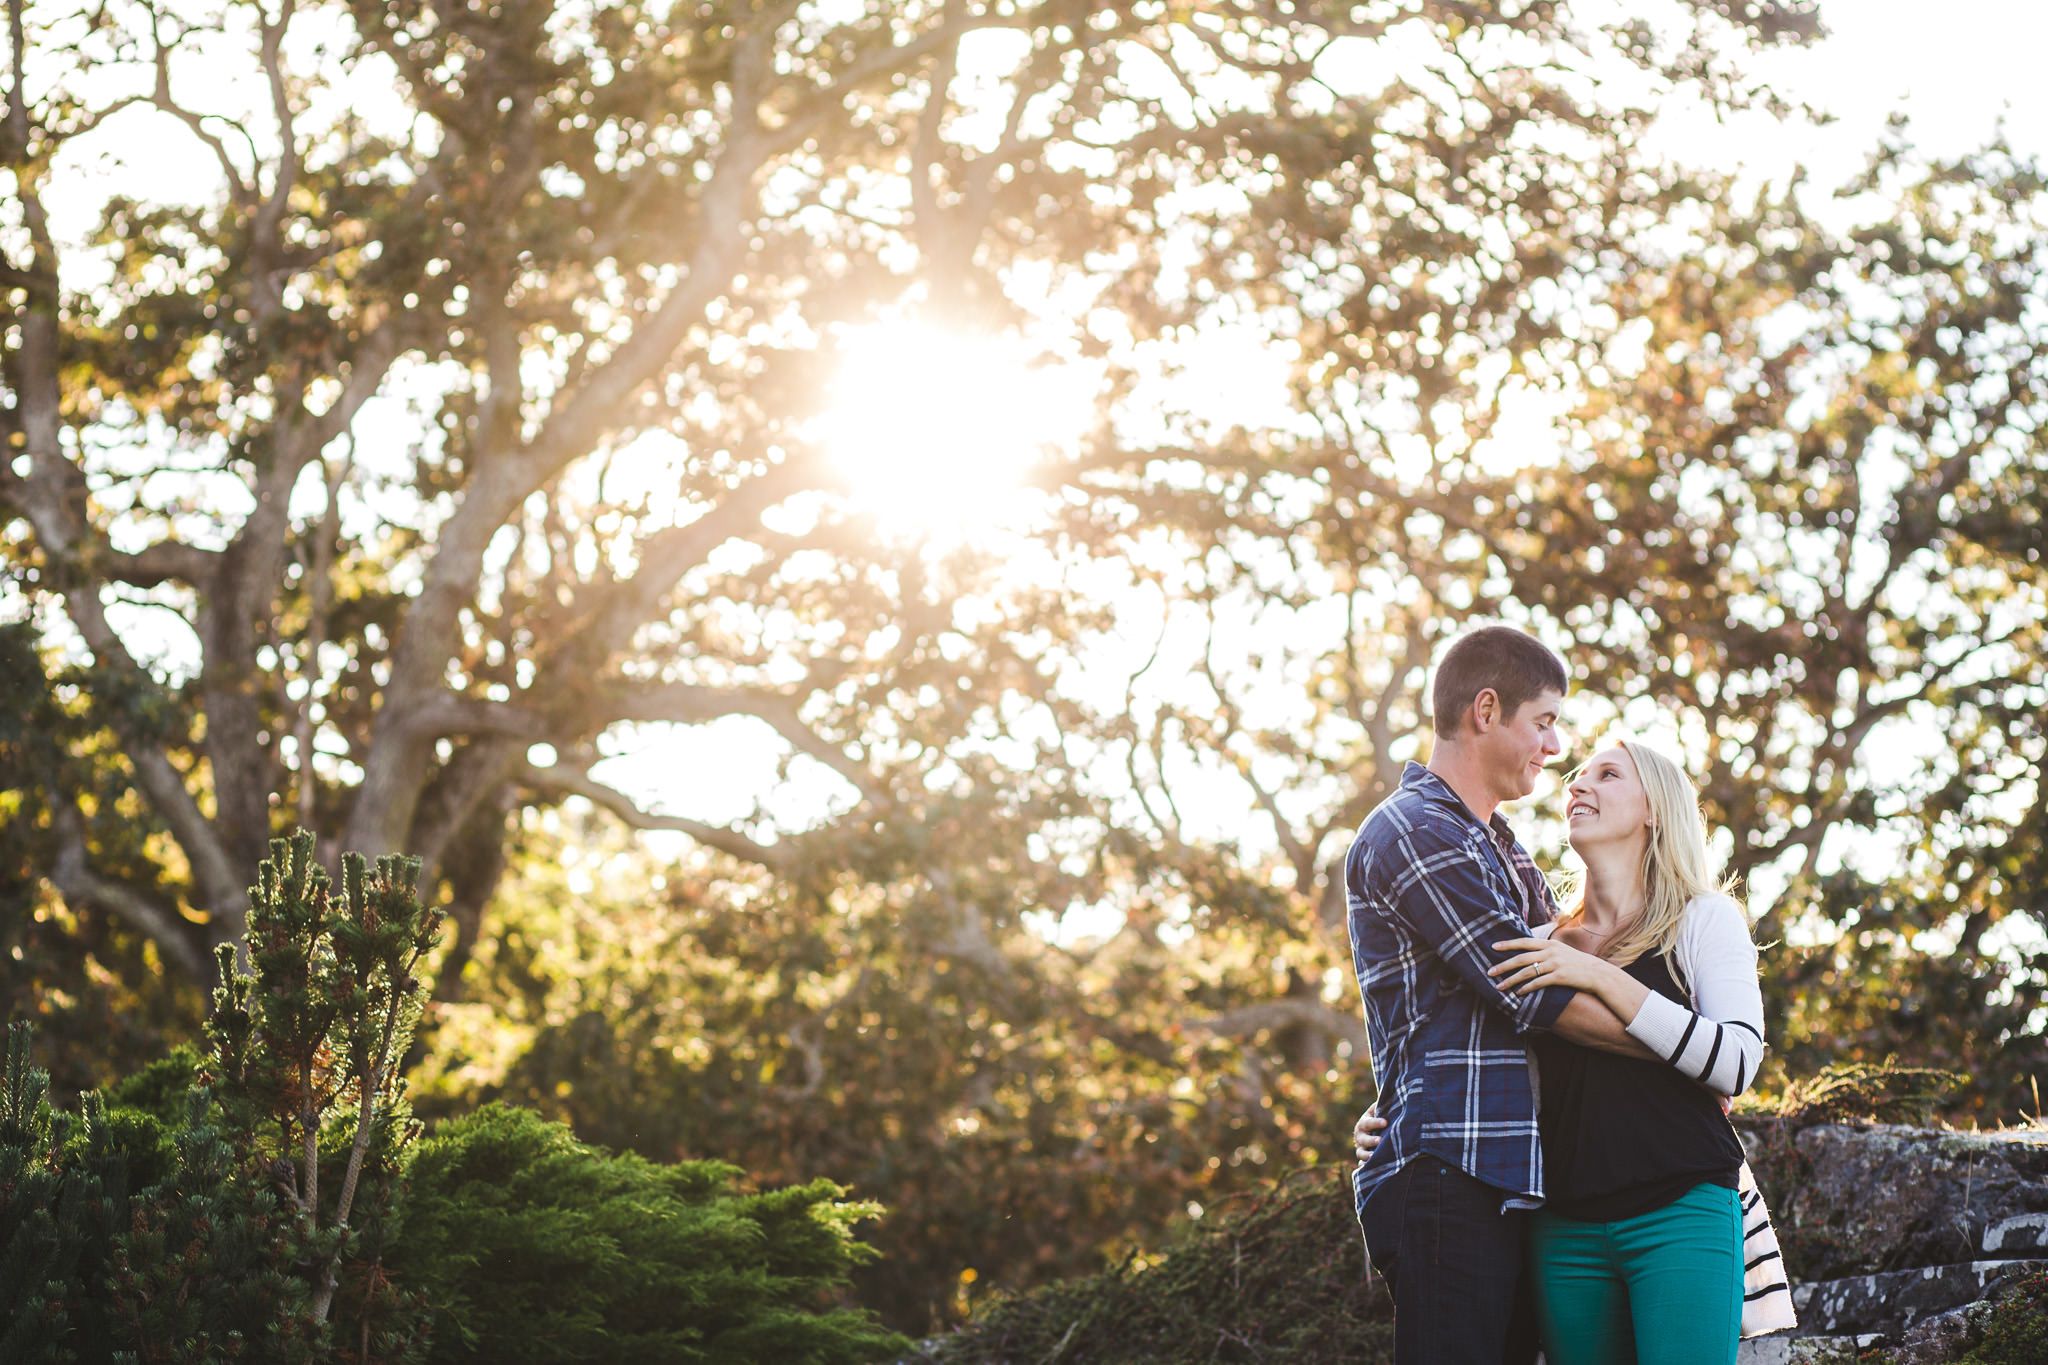
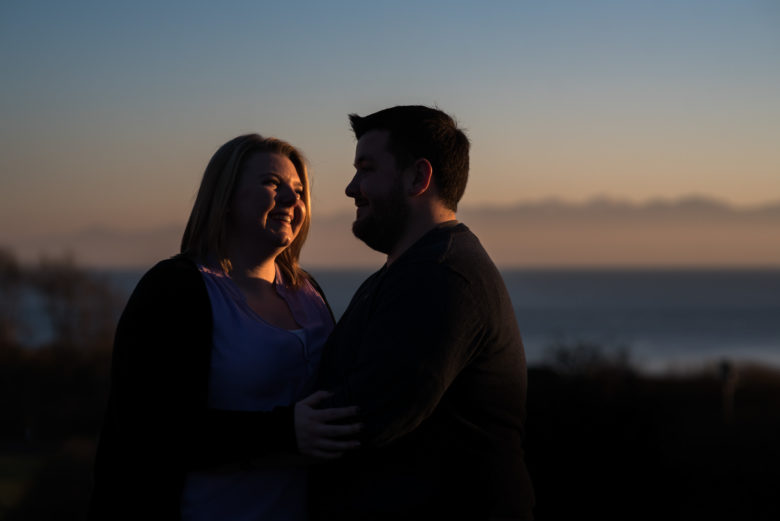
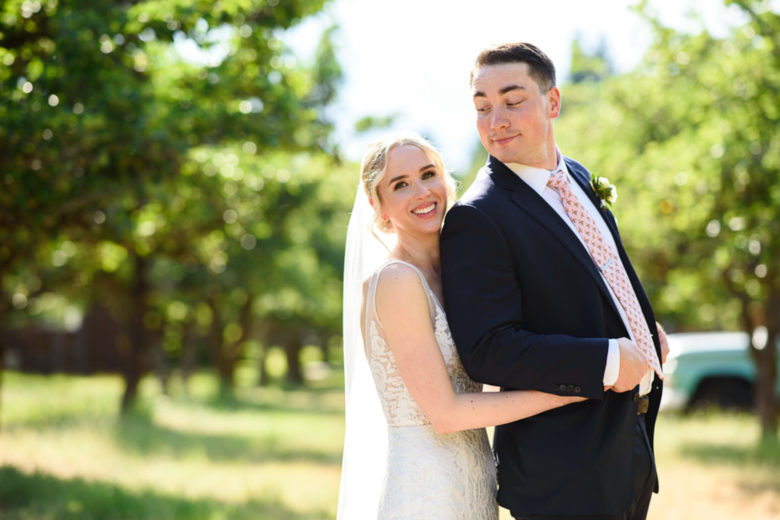
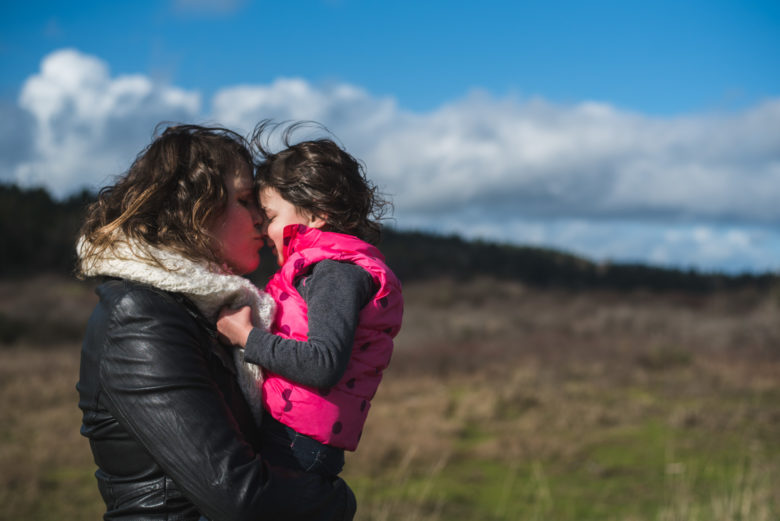
The last two images are front or side lit, casting a warm glow on their skin. This light can still create slightly harsh shadows, but since the sun is lower in the sky, the shadows come more from the side and don’t create shadow mustaches and racoon eyes. Pay attention to the shadows when putting your subject in direct golden hour light.
I don’t have any examples without people in them, but golden hour is certainly lovely for landscape photos as well.
If you have any questions, join us in the community. I’ll be checking in there daily to see your work and help you achieve the best results.
This week’s theme is backlight. Backlight is when the light is behind your subject. You might have gotten advice to put the sun behind you when taking photos. That might be good advice for landscape photography, but when it comes to photos of people, backlight is my go-to.
Backlight provides a nice, even light on people’s faces because they’re in the shade of their own bodies, but it can be brighter and more flattering than shade because there’s more light wrapping around and bouncing off surfaces nearby. You also don’t have to worry about people squinting when facing the camera if the sun is behind them and not you. This is a simple technique to use when you’re photographing a large group. Everyone will be evenly lit and it will be more flattering than lighting that has more contrast.
Here are some tips on using backlight for portraits/candids (but you can apply it to other subjects and scenes as well):
Put the sun behind your subjects and expose for their faces. If you’re using a cell phone, this is really easy as you can just tap on their face on the screen and your exposure and focus should both adjust for the face. I won’t get into how to do this with other cameras since it will be different depending on the camera or what exposure mode you’re using, but if you’re finding the exposure isn’t working out and you’re in an auto mode, try filling the frame more with your subject (i.e. get closer).
You can get that pretty, glowy rim light around their bodies/hair by putting your subjects in front of a darker background. If the background is bright, like a sunny sky, you won’t see that outline.
When you expose for your subjects’ faces, the sky will probably go white or very light. Don’t worry about it. Your subject is more important than the background (usually). If you really want the sky to be blue, you can try using RAW format and underexposing, then adjusting the shadows and highlights when editing to make the subjects brighter and sky darker. But most of the time, I think a white sky looks fine.
If you aim your camera towards the sun, you can get a hazy look or sun flare, which can be an interesting effect sometimes. If you’re getting those effects but don’t like them, use a lens hood or just hold your hand above and in front of your lens (like an umbrella) to block the light from hitting the lens.
If you have any questions, join us in the community. I’ll be checking in there daily to see your work and help you achieve the best results.
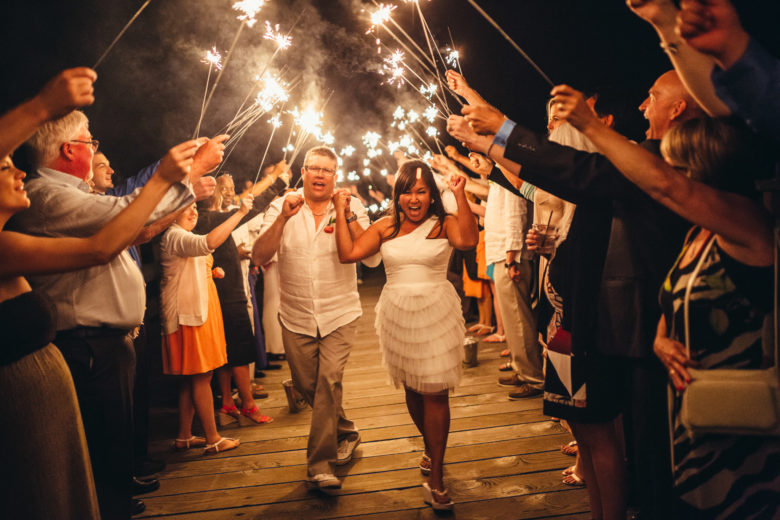
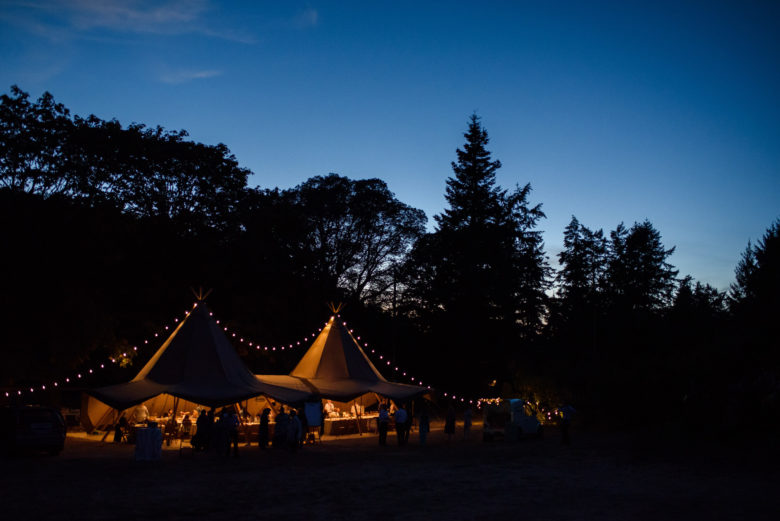
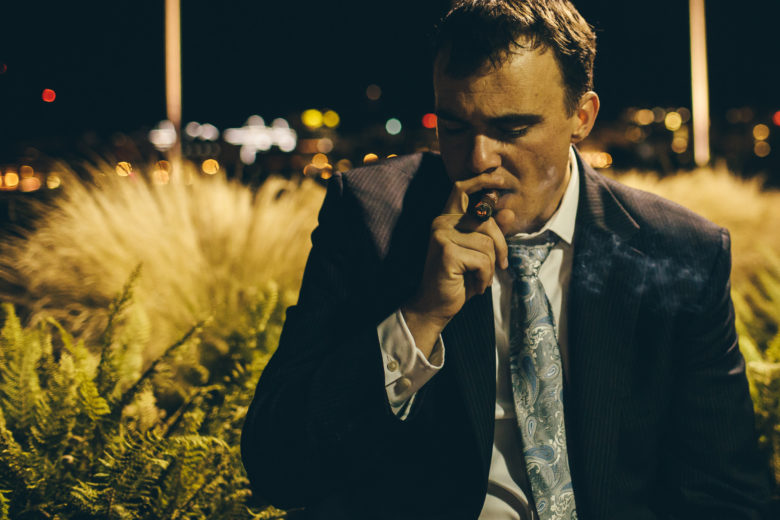
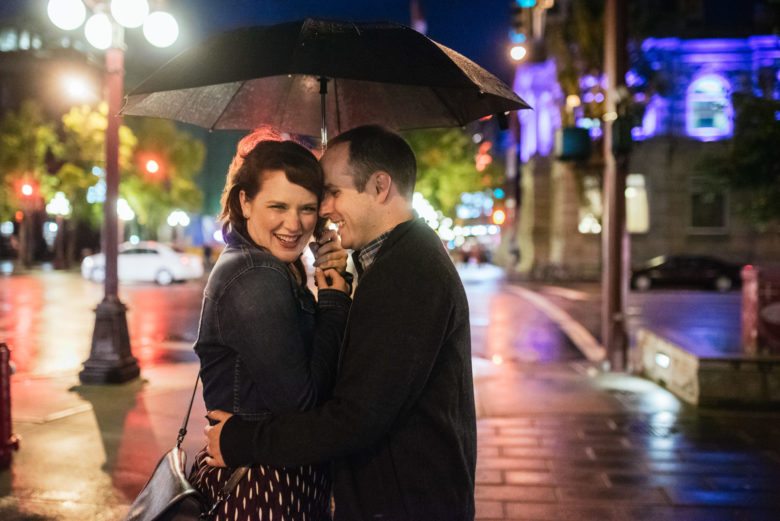
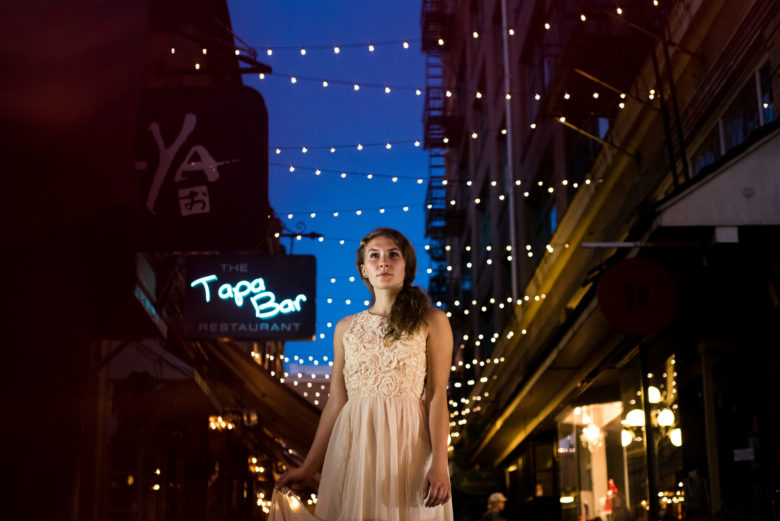
This week’s theme is night photography. You can take photos outdoors or just practice your low light photography inside, like using a streetlight shining through your window, string lights, or a bedside lamp.
Here are some tips on night photography:
Find a light source. For the above photos, from left to right and then down the rows, my light source was: sparklers held by wedding guests, sparklers, lighting in the tent and a bit of recently set sun, a streetlight, general ambient light on the street, a video light held to the left. You can also use a flashlight, portable string lights, your phone’s screen or flashlight, or a camera flash of course.
Don’t be afraid to use high ISO. This will let you have a higher shutter speed. It’s better to have a grainy/noisy photo than a blurry one, unless you like blurry.
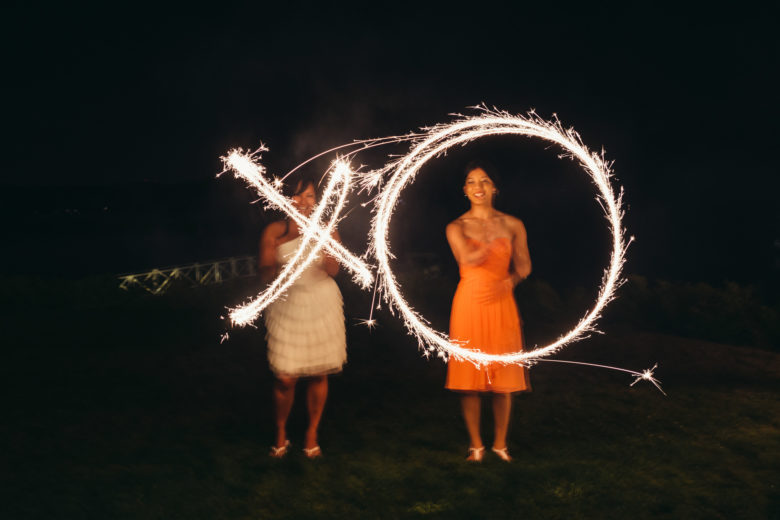
Try playing with light painting. Light painting, like in the top right image of the girls with the sparklers, is done by using a slow shutter speed (experiment starting at 1/2 a second or lower) and a moving light source. You can move sparklers or a flashlight or use something that’s already moving like cars driving by. I highly recommend a tripod or monopod for that slow of a shutter speed. I didn’t use one in the sparkler painting photo, which is why the people are blurry. The light will probably still be sharp, but everything else will be blurry if you don’t use a tripod (or put your camera on a table or something).
If you have any questions, join us in the community. I’ll be checking in there daily to see your work and help you achieve the best results.
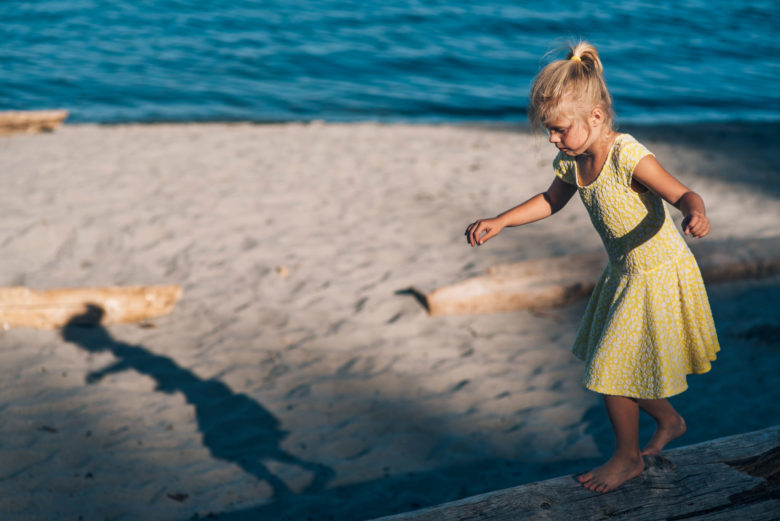
This week’s theme is hard light. Lighting challenges are my favourite because they can be hard, but this is a different kind of hard. Hard light creates sharp, hard-edged shadows and tends to have a lot of contrast. It’s created by a small light source, or relatively small (like the sun, which is big, but far away). You can encounter it outdoors on a bright, sunny day. This kind of light can be hard to work with, but check out some examples below and tips on how to get great photos in hard light.
Here are some tips on working with hard light.
Pay attention to the shadows. Shadows can be really unflattering in a portrait or they can be dramatic and interesting. Pay attention to the way the shadows fall and what they hide and reveal.
For portraits, hard light can be most flattering as a side-light or closer to sunset. At midday, it can create raccoon eyes and a shadow mustache.
When taking portraits at midday, I often try to find backlight rather than deal with hard light, but it can be worked with. You just have to be careful of your posing. Sometimes I have people look to the side, at each other, or close their eyes, still paying attention to the shadows.
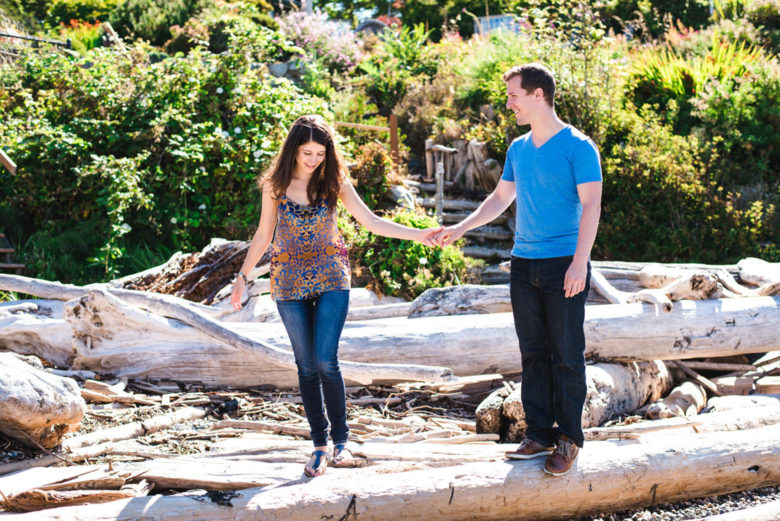
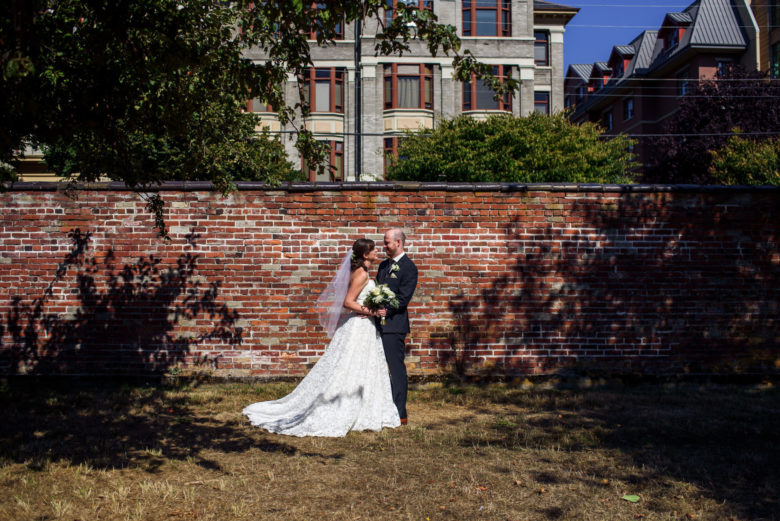
Hard light, or full sun, can be great for capturing a landscape with a lot of contrast. Like the example of the couple with the cloudy blue sky above, putting the light behind you (the photographer) can allow you to capture the full range of colours and tones in a scene and get a beautiful sky, where backlight would tend to wash out the sky (unless you add light to your subjects).
Use the shadows. Like in the photo of the little girl walking on a log above, harsh sun can create great shadows in a scene.
If you have any questions, join us in the community. I’ll be checking in there daily to see your work and help you achieve the best results.
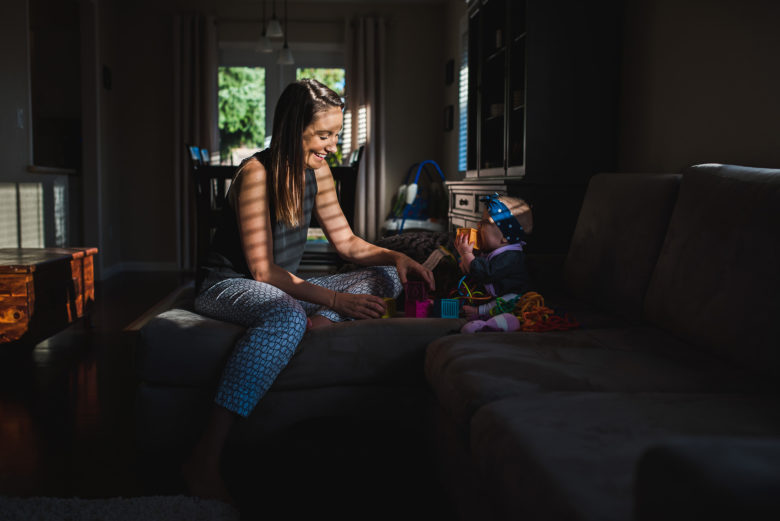
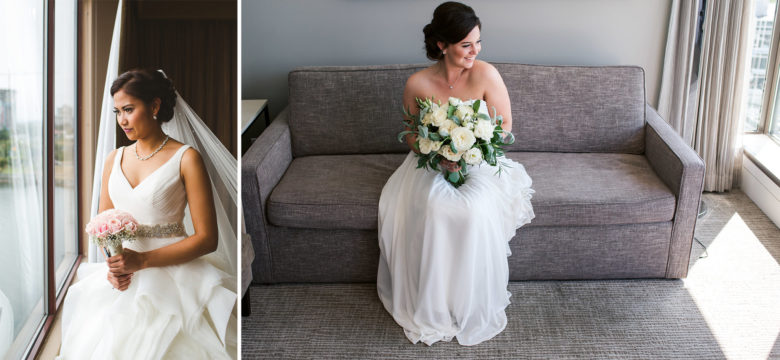
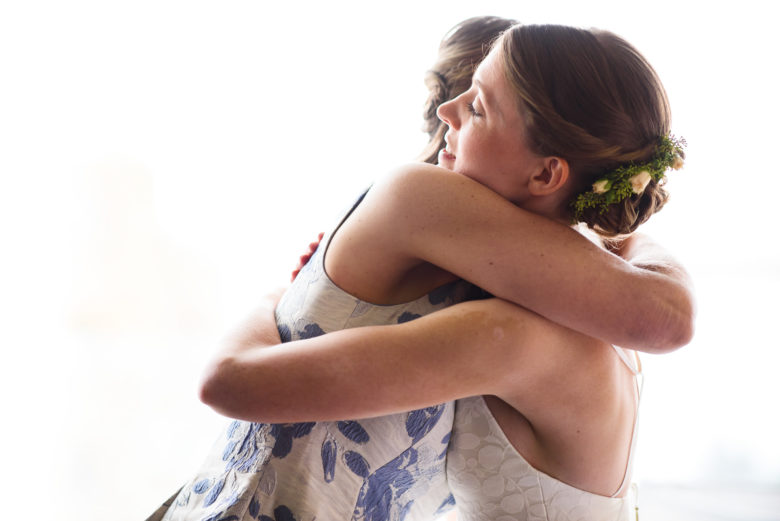
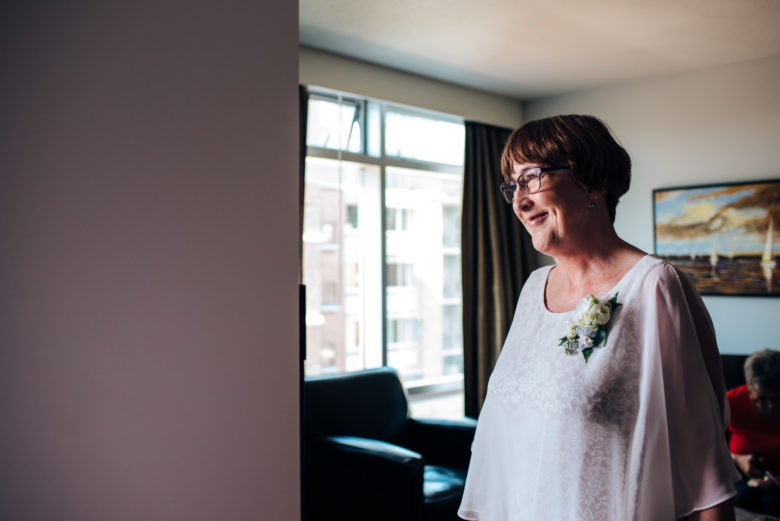
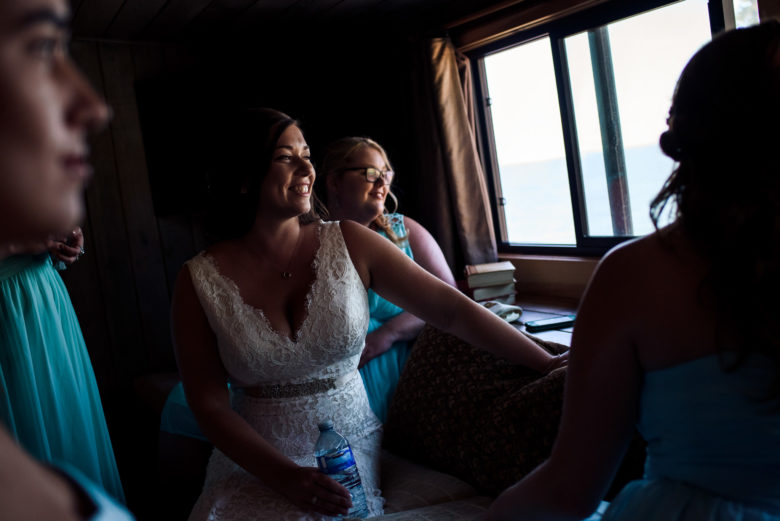
This week’s theme is window light. Window light can actually create various dramatically different looks, but I find it’s mostly flattering or interesting (and sometimes both). Below are some examples of different ways to use it, followed by some tips.
When the sun is low in the sky and coming directly through the window, you can end up with some harsher shadows, like you would if you were shooting outside. If the sun is higher, the window will provide a softer, more even light. I actually couldn’t find an example of this. I guess I favour more dramatic types of light.Having your subject face towards a window when the rest of the room is full of a lot of window light can add a bit of a pretty highlight on the front of their face, but still leave their entire face fairly well lit. This can be very flattering. Both of these images had a window at the front-side of the subject, closer to the camera, as well as directly to the side.For these (taken at a workshop given by Ryan Brenizer back in 2011), we closed the blinds down to a very small gap and the rest of the room was pitch black. This image is backlit by the window, meaning the light is mostly coming from behind them. This might be a bit tricky to expose if you’re using auto mode on a camera, but could be very easy on a cell phone (tap on the subject to expose for them). If you’re finding that aiming towards the window makes your image seem hazy or low contrast, change your angle a bit so the light isn’t hitting your lens directly. This is similar to the two above, but she’s facing into the light and it’s not quite so much brighter than the room, creating a flattering even light on the front of her face and leaving the side/back in shadow.This is similar to the above image, but the rest of the room is very dark compared to the window.If the rest of the room is a little darker or only has windows on one side, you can end up with a very dramatic side light effect.
Here are some tips on using window light:
Watch out for mixed white balance. That basically means light coming from two different kinds of sources, like window light (which is usually kind of blue) plus overhead lighting (which is usually more orange). When you have two different colours of light, they can create some really ugly skin tones and colours in your image. This may not be as crucial if there are no people in your photo.
Using more dramatic, directional window light can emphasize texture and create shadows you may not want in a photo of a person. If someone has very rough skin or a lot of wrinkles, and doesn’t like those things, then I suggest avoiding side light. Having them face towards or away from the window will give you a more even, universally flattering look.
If you’re struggling with getting enough light on your subject without cranking your ISO way up, move your subject closer to the window, which will make them brighter. Also avoid having the window behind your subject, since they’ll be in the shade of their own body. Same thing goes for inanimate objects, of course.
If you have any questions, join us in the community. I’ll be checking in there daily to see your work and help you achieve the best results.
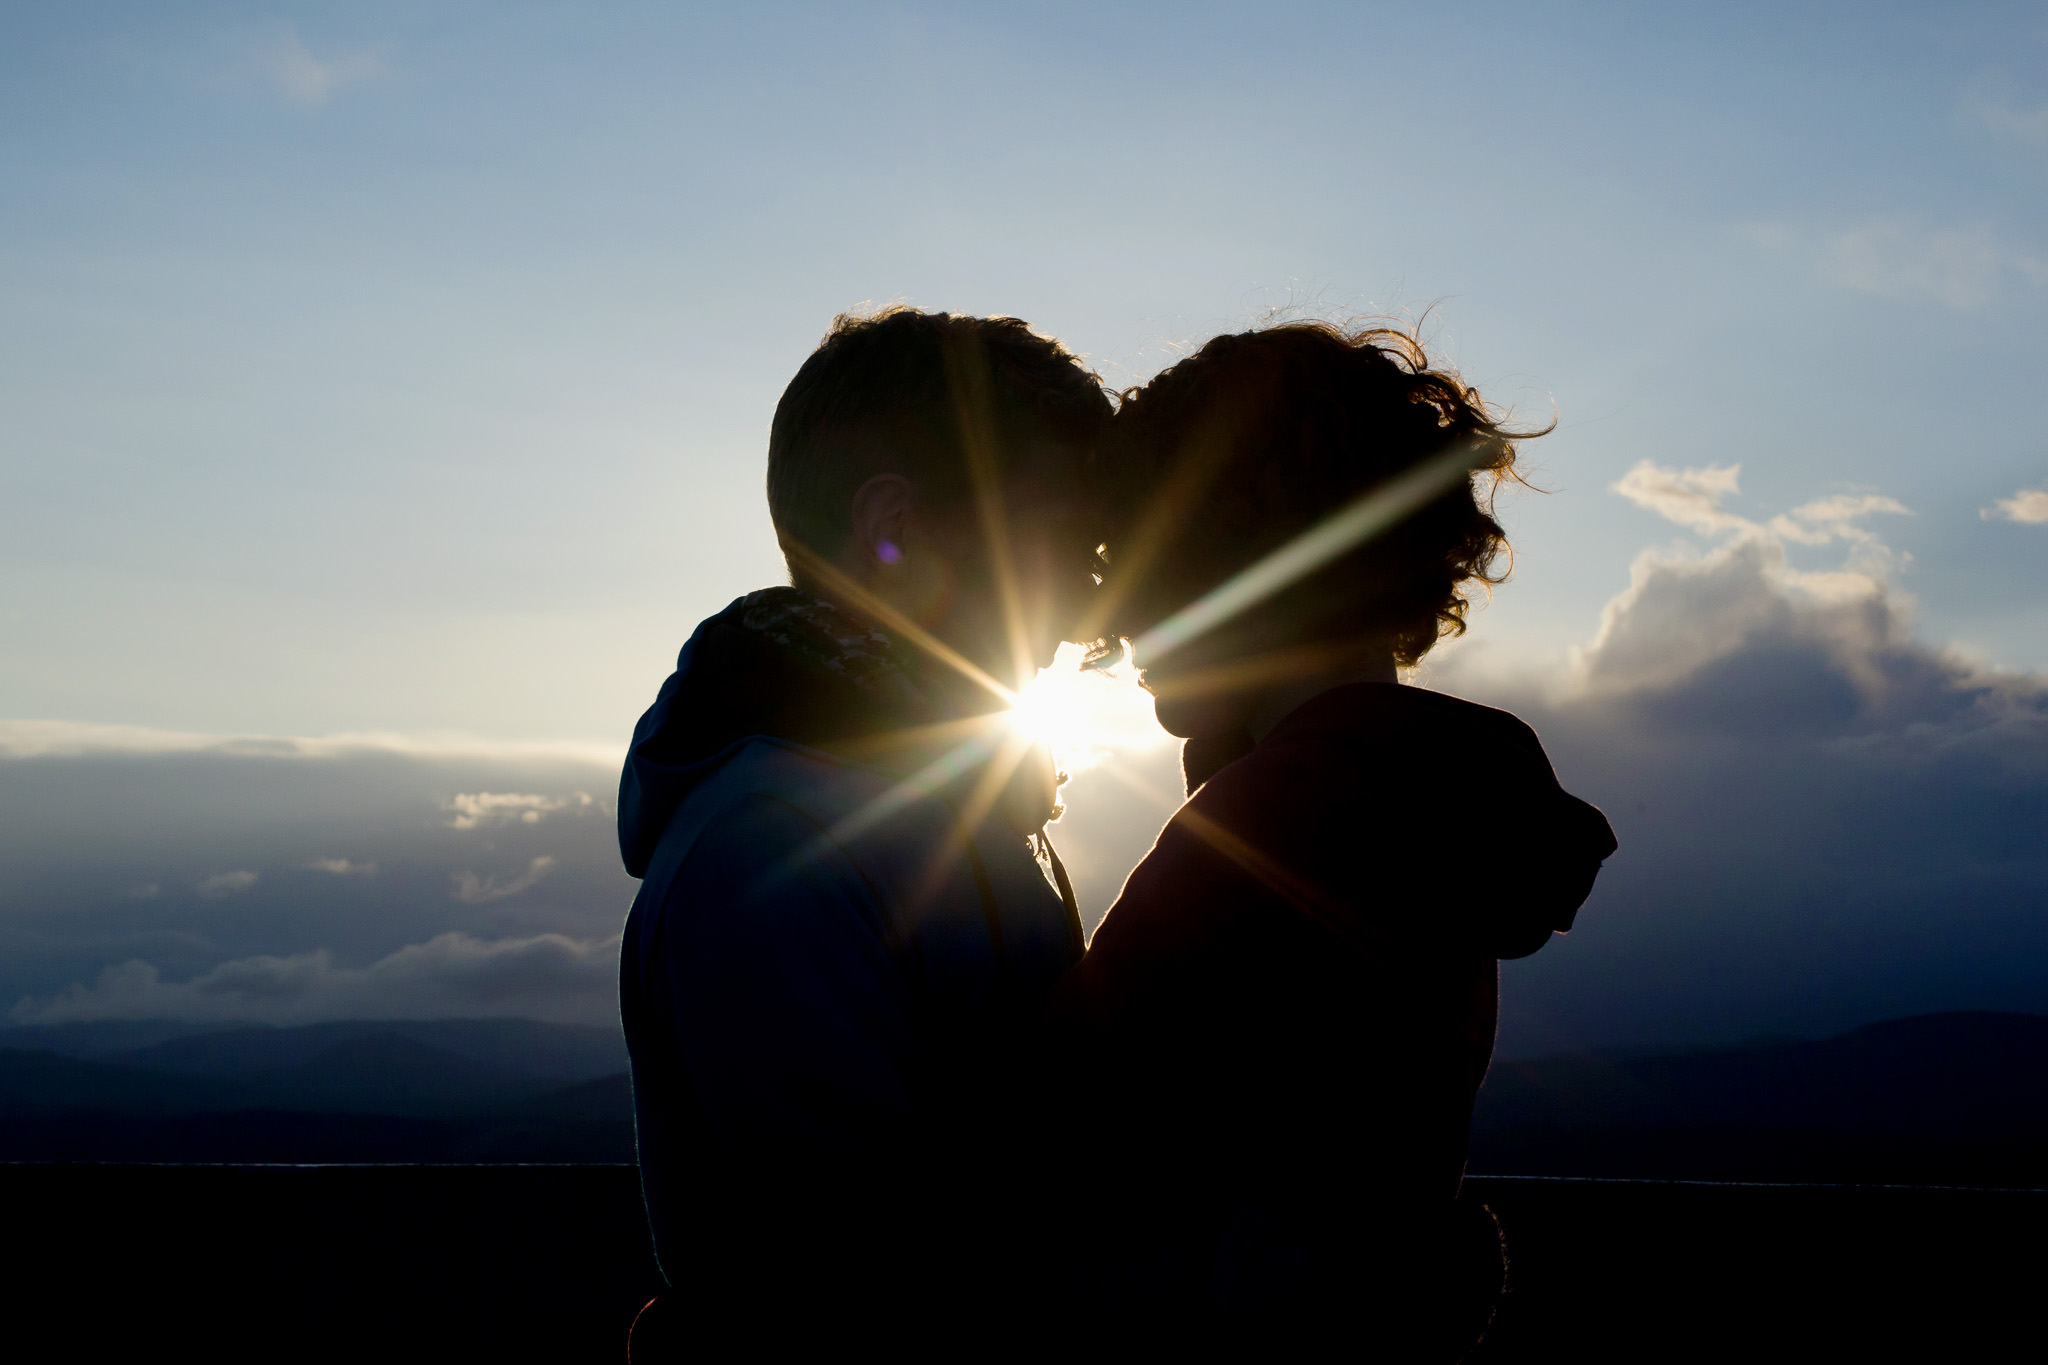
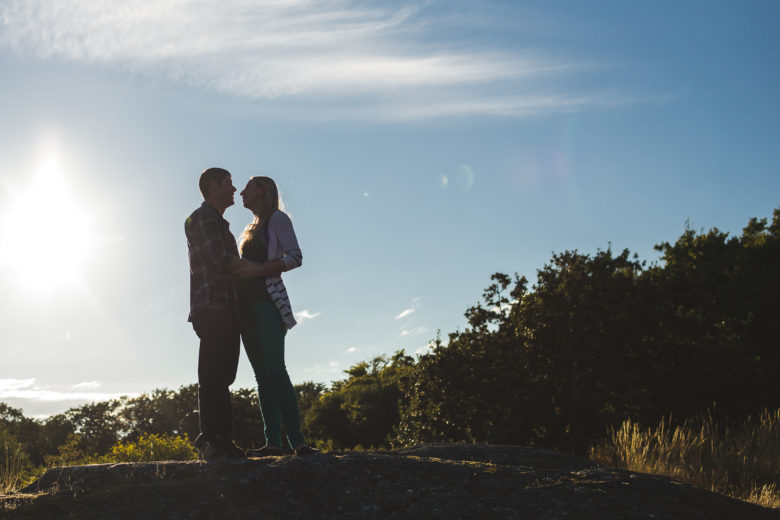
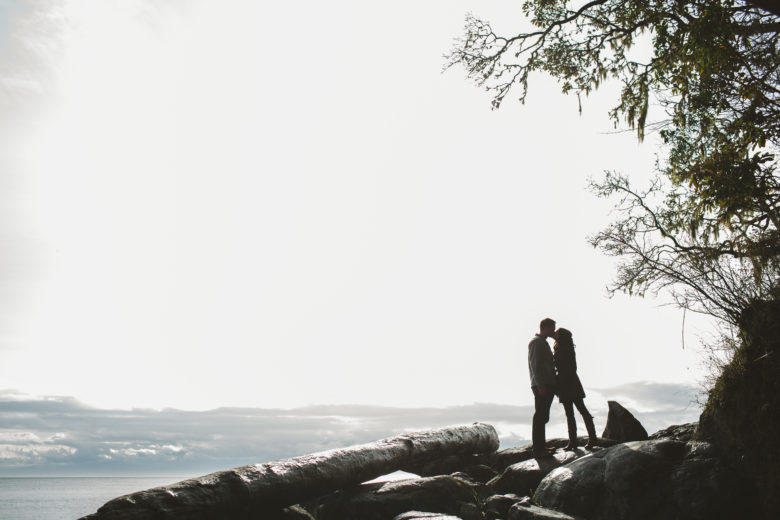
This week’s theme is silhouette. A silhouette is an outline that appears dark and without much detail against a lighter background.
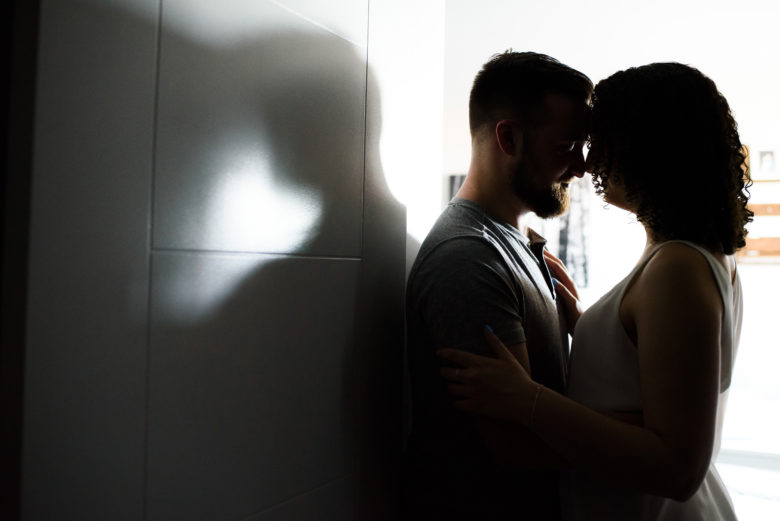
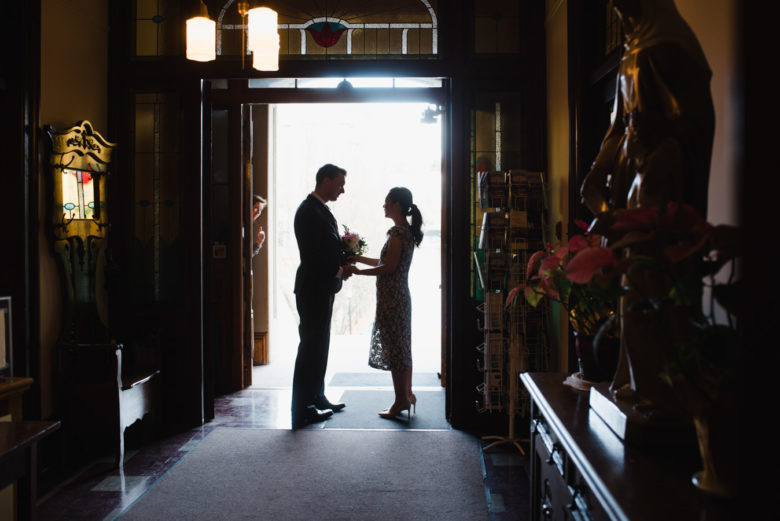
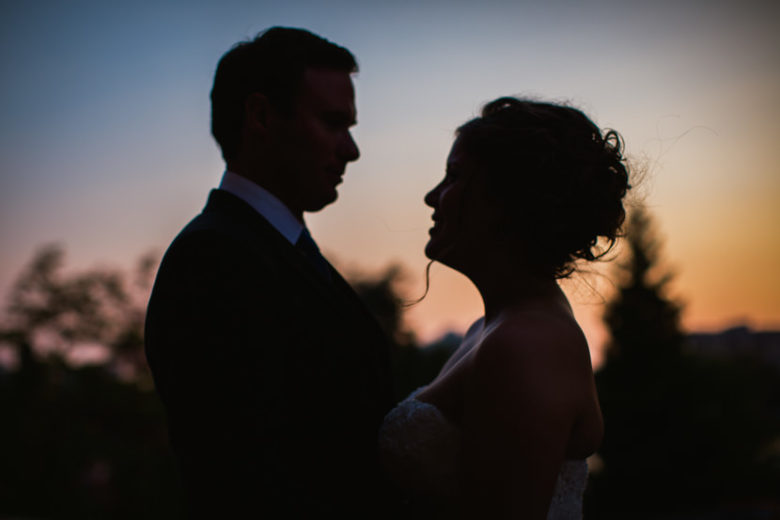
Below are some examples of silhouette photos of people, though you can certainly make a silhouette of other things like trees, buildings, etc. Some of these have a little detail showing with light leaking in at the edges, which can help you see what’s going on a bit better than the traditional totally black silhouette. Find some tips on getting a great silhouette photo below the examples.
Silhouettes rely on backlighting, which means the light is coming from behind the subject. The light from behind puts the subject in the shadow of itself, so it appears dark.
You might have achieved this look accidentally when using automatic mode on your camera. That’s because your camera is exposing for an average brightness in your frame and if the background is larger in area than the subject(s), your camera will think the scene is very bright and expose for the bright areas, making the subjects dark.
How to Expose for a Silhouette
If your camera doesn’t automatically give you a silhouette (and with default settings and the subject not taking up the majority of the frame, you usually will get one), here’s how to get one intentionally. If you’re using a cell phone or similar touch screen device, tap on the light background instead of the subject and it will expose for the background, making the subject dark.
With a DSLR or other more advanced camera, there are two options that can work:
1) Point your camera at an area that’s mostly/only bright background and press the auto-exposure lock button (AE-L or * or check your manual) to lock in your exposure. Then move your camera back to your desired composition, press the shutter button halfway to focus, and you should be able to take a silhouette. This method is the simplest way to expose for the background and get your subject in focus.
2) If the above method doesn’t work or your camera doesn’t have auto-exposure lock, you can try this more complicated method. Set your exposure mode to program/P (manual/aperture-priority/shutter-priority if you know how to use them) and set your metering mode to spot (or center weighted if you don’t have spot). The exposure mode is usually a dial on top of the camera. If you don’t know how to set your metering mode, try searching for “how to change metering mode” and your camera model. Then move your focal point onto the background to expose for the background’s brightness (or for most Canon DSLRs, make sure the center of your frame is over the background because it determines exposure by the center point, not focal point).
Focus. For the cell phone method and second DSLR method above, you may have an issue with your subject being blurry or somewhat out of focus. If you want your subject to be sharp and background blurrier, look up how to separate exposing and focusing for your camera model (or your phone app – I use ProCamera, which lets you tap on different areas for focus and exposure). Alternatively, you can use manual focusing to change the focus after you get your exposure (or before if you switch the lens to M, otherwise pressing the shutter halfway will refocus). Another option is to use a higher aperture to get more of the frame in focus (in aperture-priority, just set the aperture to a higher number).
Other Silhouette Tips
You want your background to be brighter, preferably much brighter, than your subjects. The sky, with the sun behind your subjects, is usually a great background for silhouettes. Sunset or sunrise can make the sky look more interesting.
To get an interesting and clear silhouette of a person or people, try to get them posed in a way where their shapes are distinct and multiple subjects have some space between them. It’s helpful if they’re doing something you can recognize in silhouette so they don’t look like a big blob. Objects with interesting edges make good subjects as well.
Make sure there aren’t other shaded objects intersecting your subject or they won’t stand out. You may be able to get a slight outline of light around two subjects a distance away from each other, which is a little trickier to achieve.
Make sure your flash is turned off if it fires automatically. You want your subjects to be darker than the background, so try to not have any added light on them, including flash or indoor lights.
If you have any questions, join us in the community. I’ll be checking in there daily to see your work and help you achieve the best results.