fbpx

photography tips

Week 20 – Blurry Foreground

This week’s theme is blurry foreground. A blurry foreground is actually even easier to get, technique-wise, than a blurry background. Depth of field (or what’s in focus in your photo) tends to be more behind your subject than in front, meaning that things in the foreground have a bigger tendency to go out of focus than things in the background. You just have to make an effort to put something interesting in the foreground.

Here are some tips on getting a blurry foreground and making it look interesting:

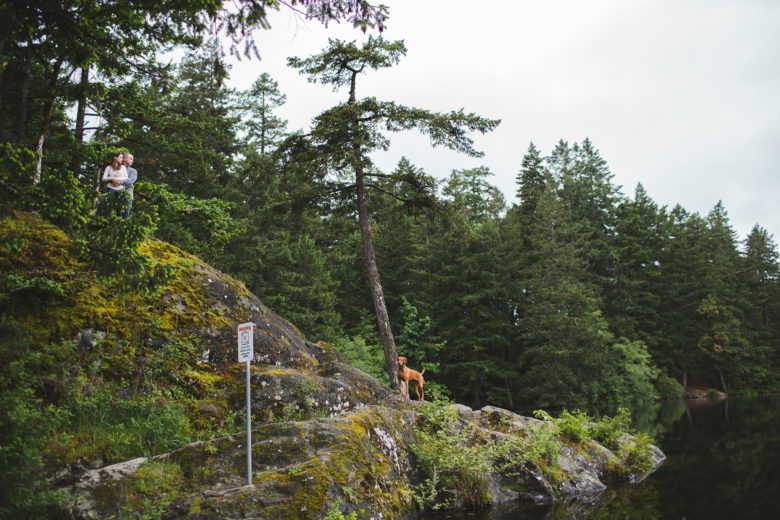
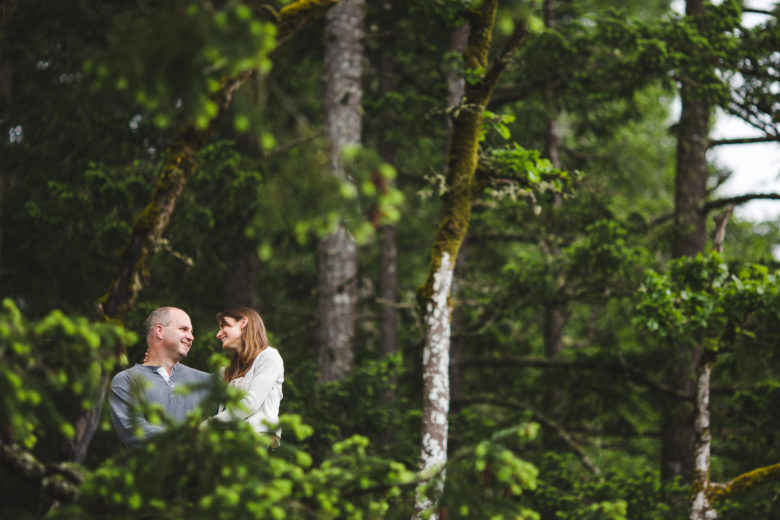
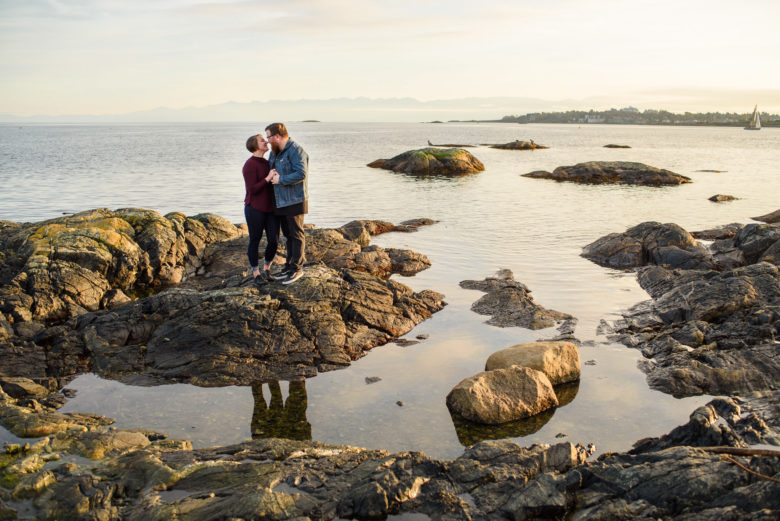
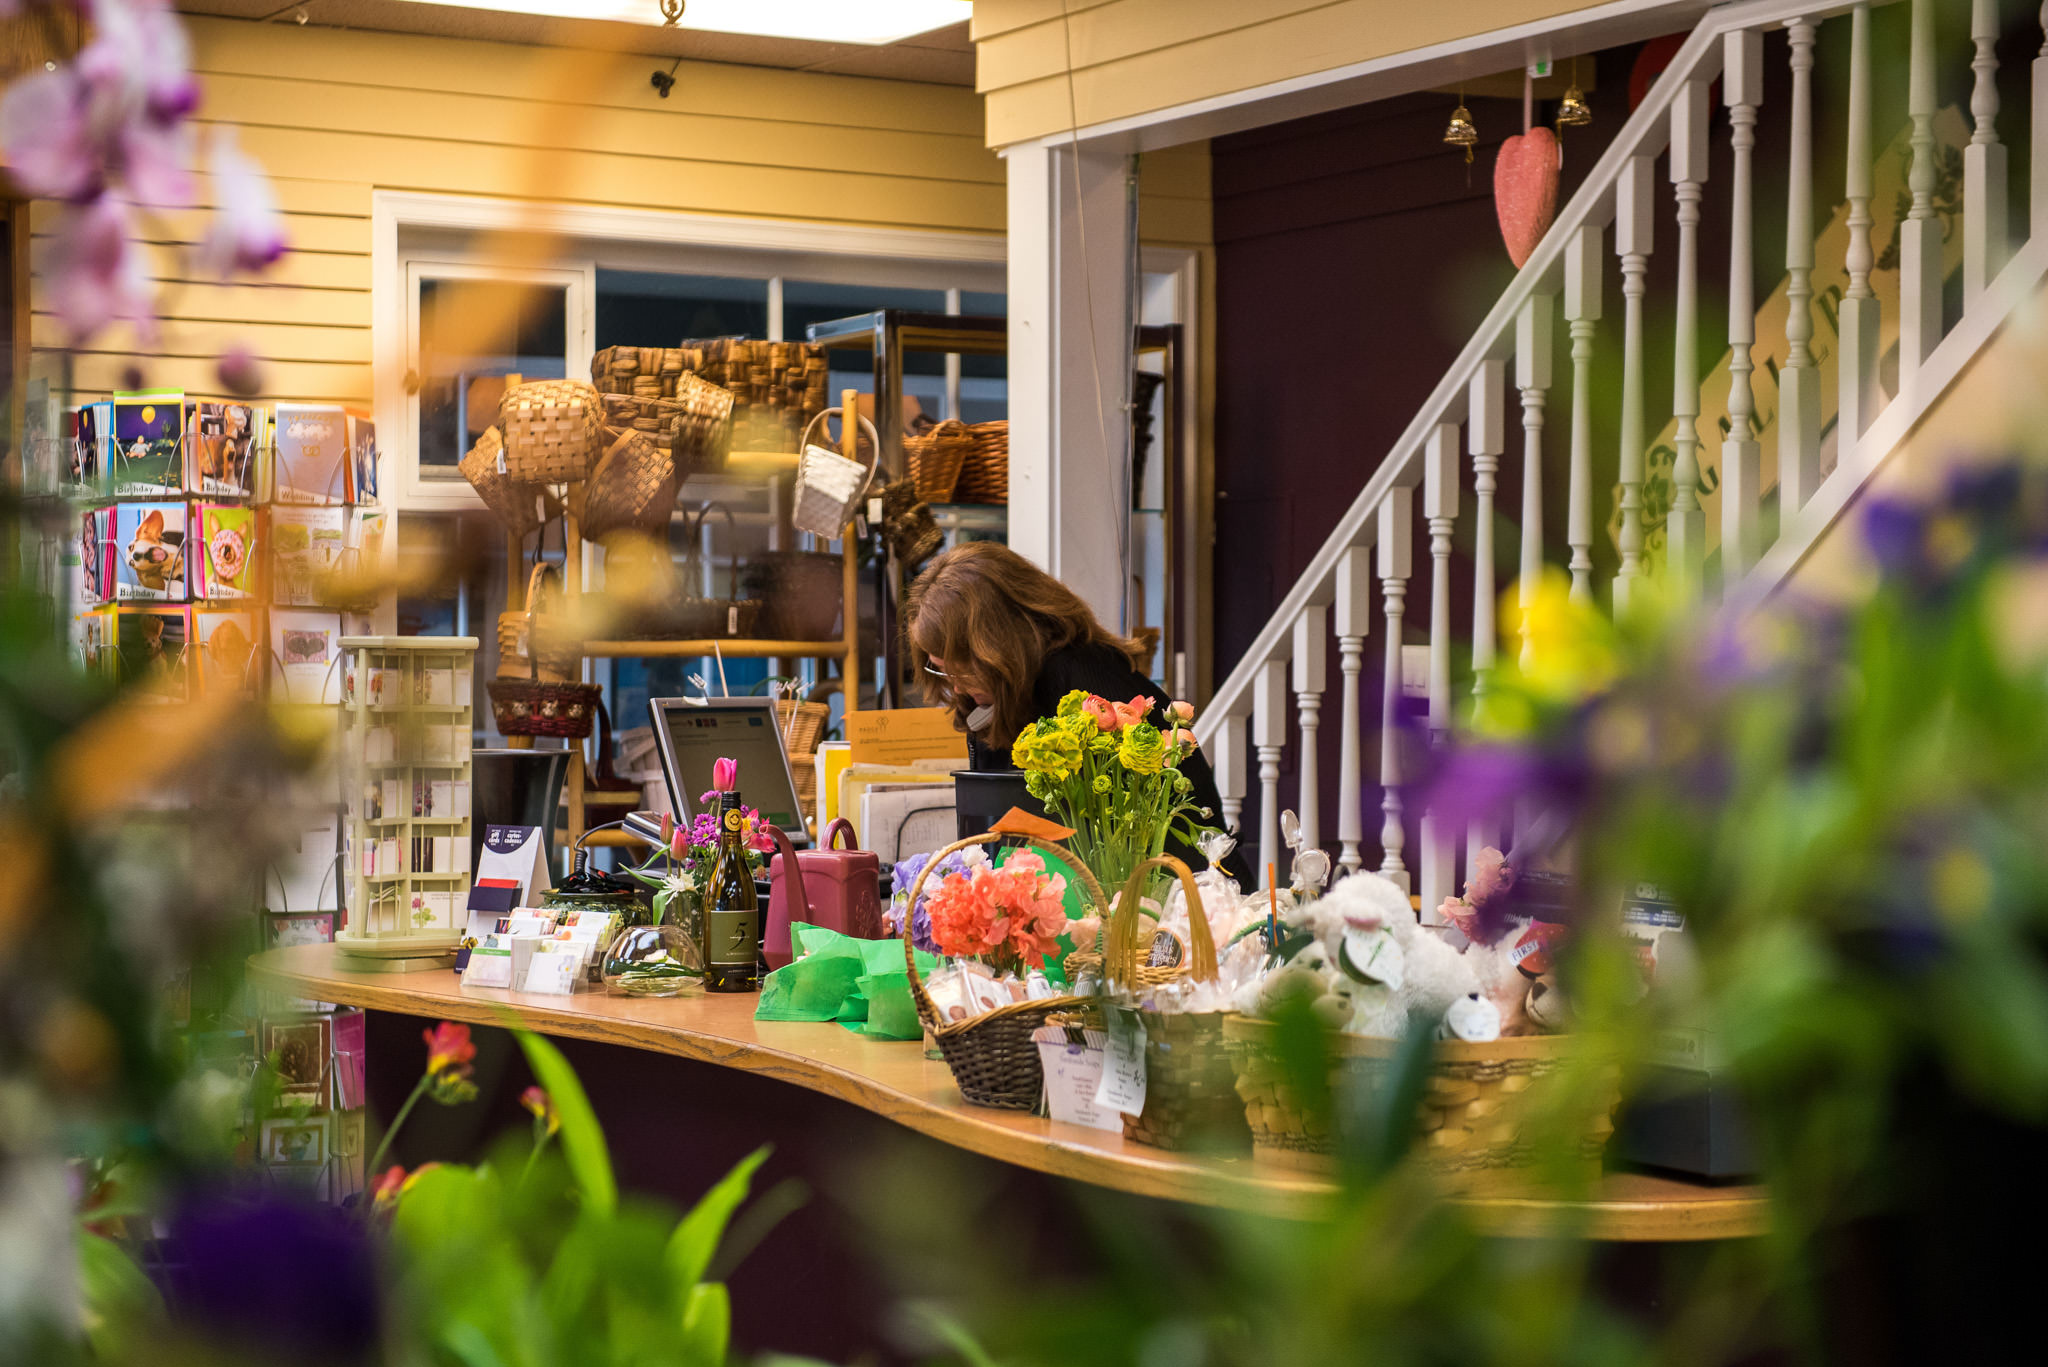
  1. The closer the foreground element is to your lens, the blurrier it’ll be. I’ll often stand behind or right inside a bush to get some leaves or flowers framing my shot. Also, try using a low aperture to get a shallow depth of field.
  2. Make sure you’re focusing on your subject. If you’re really close to the foreground element, the camera probably won’t focus on it anyway because lenses can only focus so close. But if your camera actually tries to focus on the foreground, you’ll want to move your focal point onto your subject. With a cell phone, and some newer cameras, this is as easy as tapping on your subject to get focus. With DSLRs and similar, you may need to change your camera to use a single focal point. The search terms that can help you figure out how might be “changing focus points” or “how to change focal point” along with your camera model.
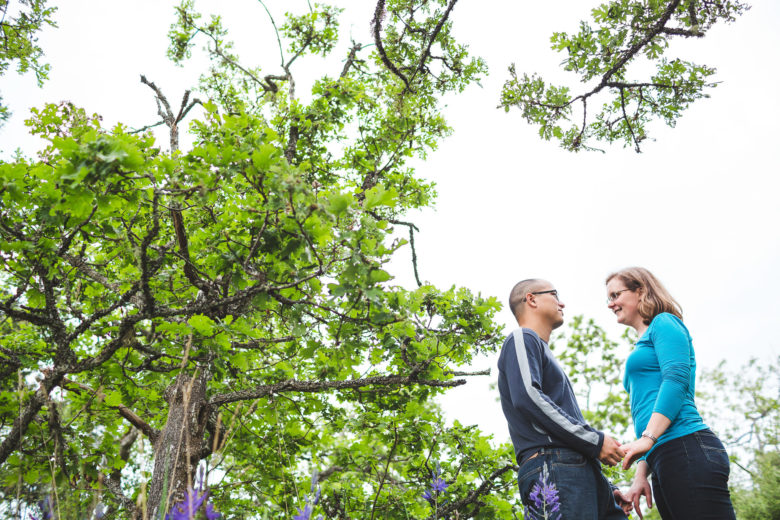
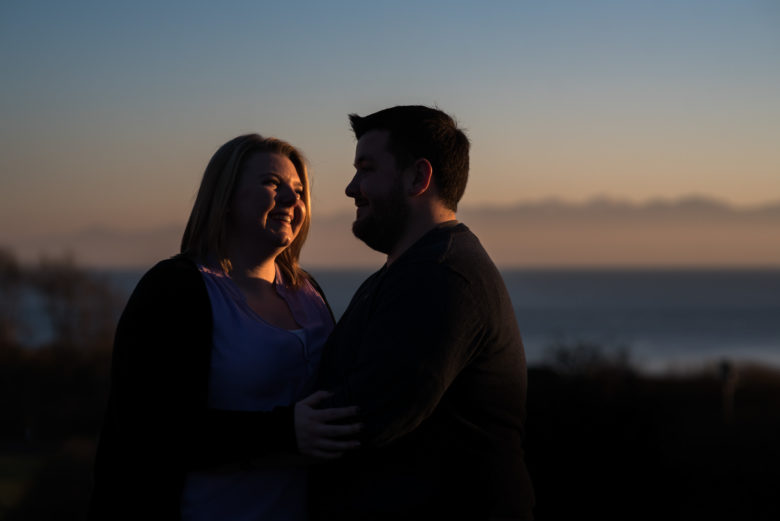
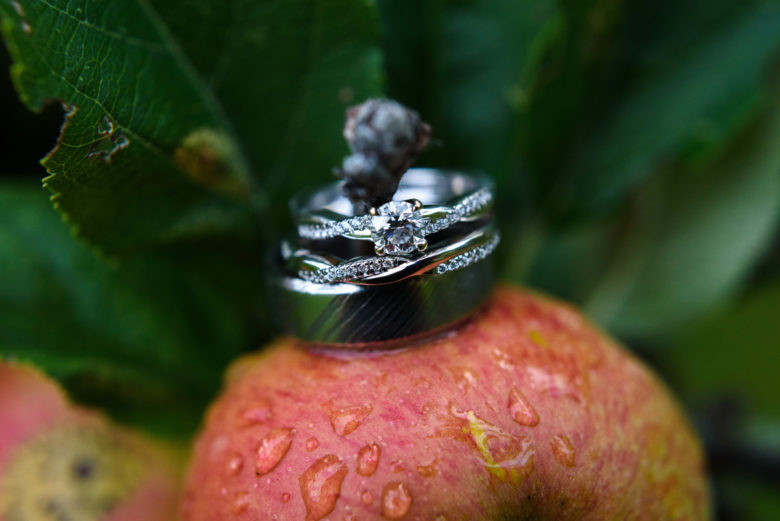
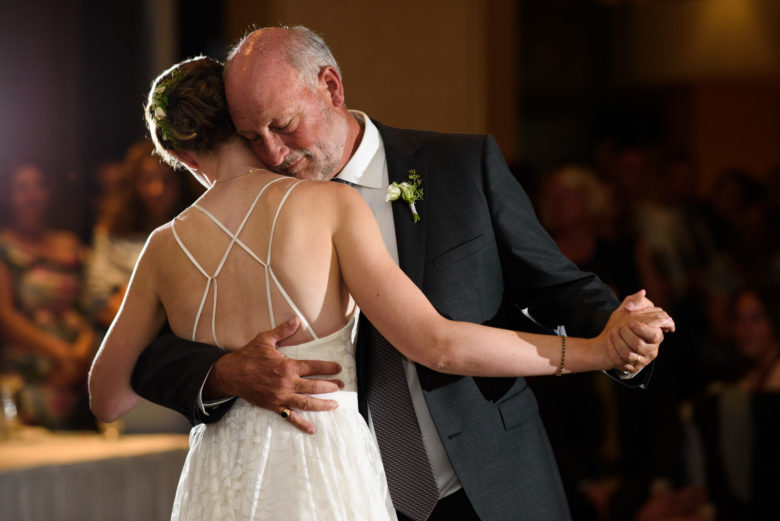
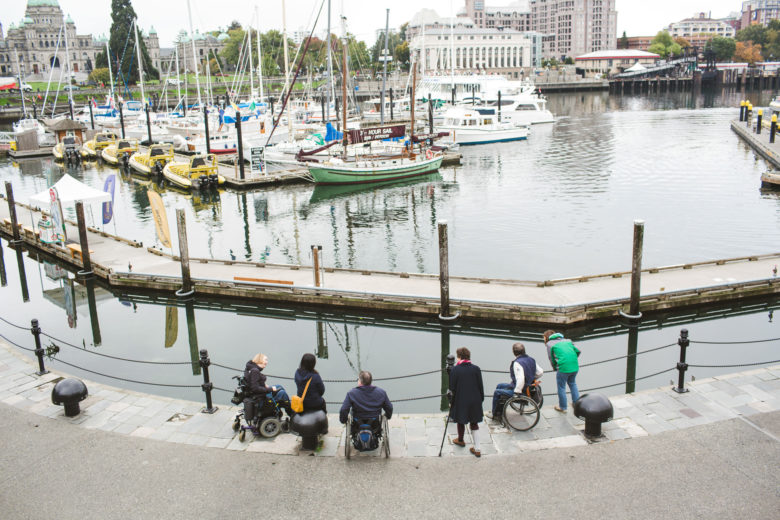
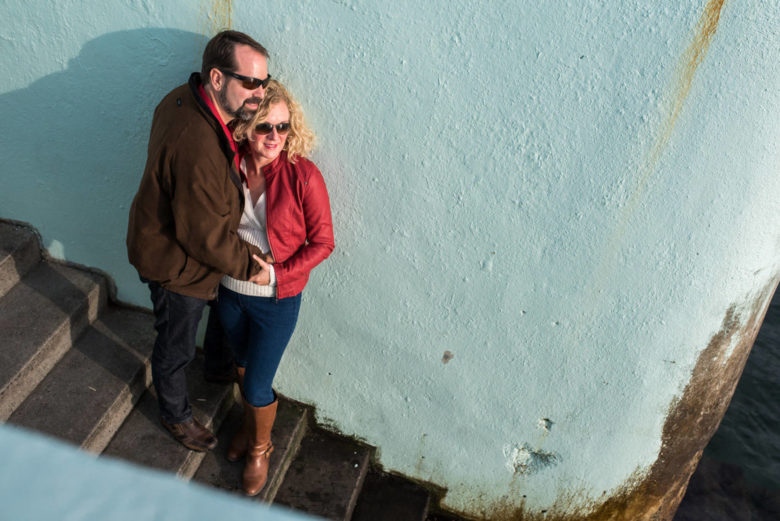
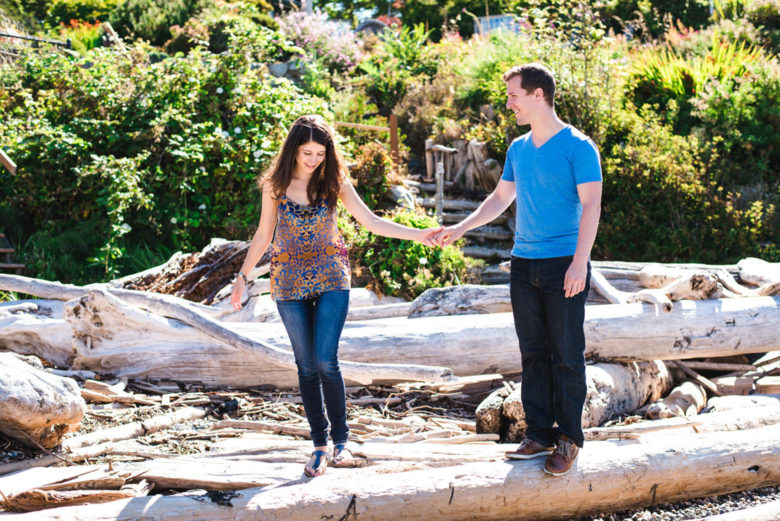
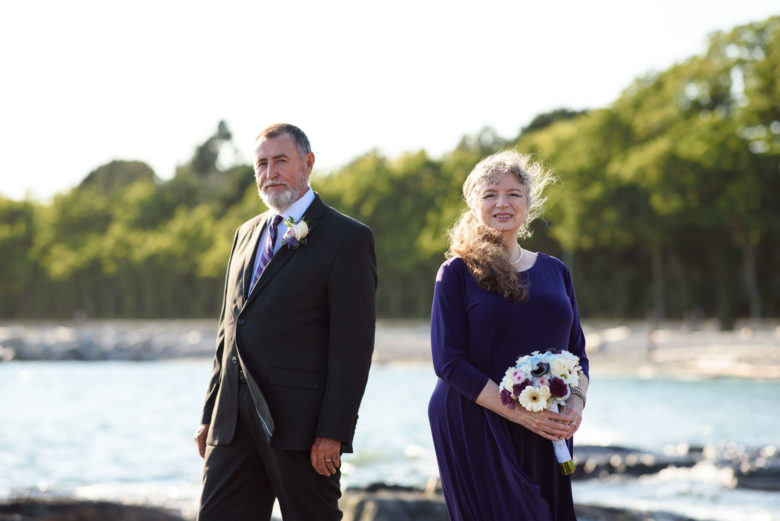
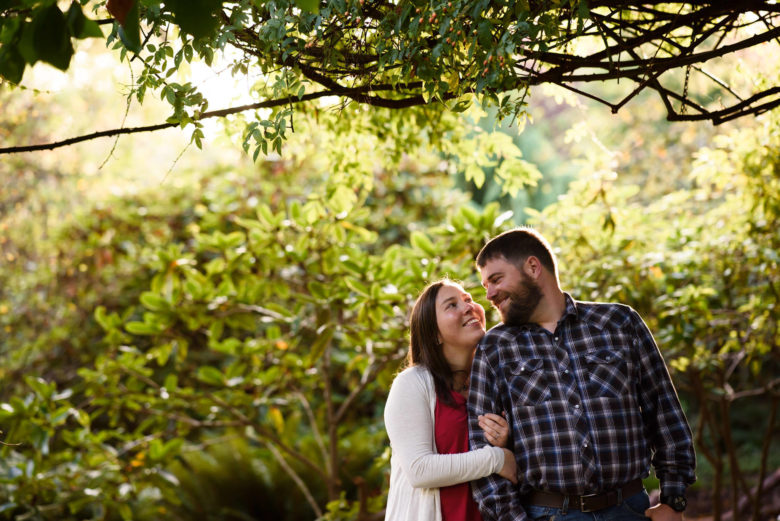
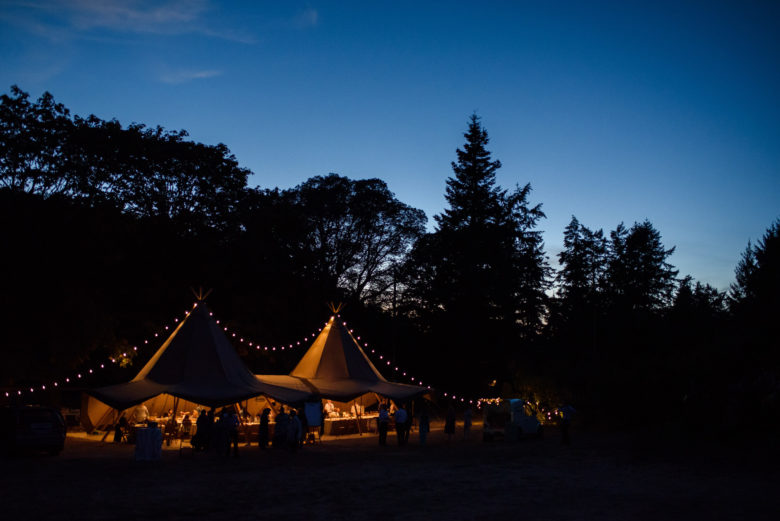
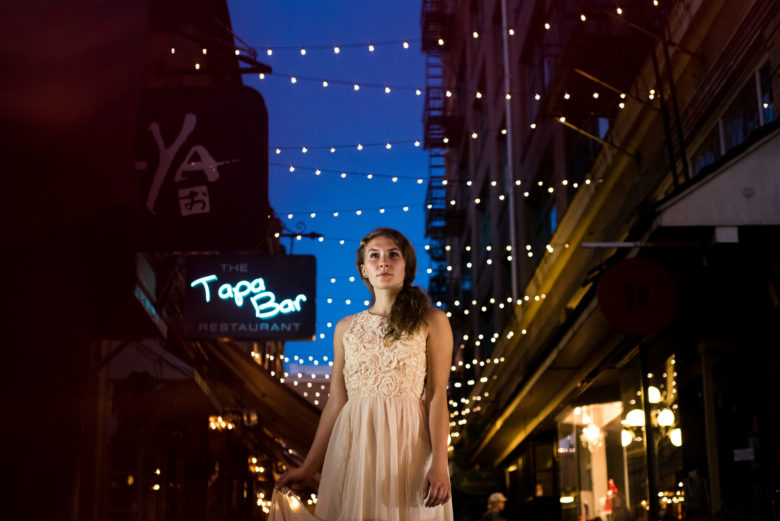
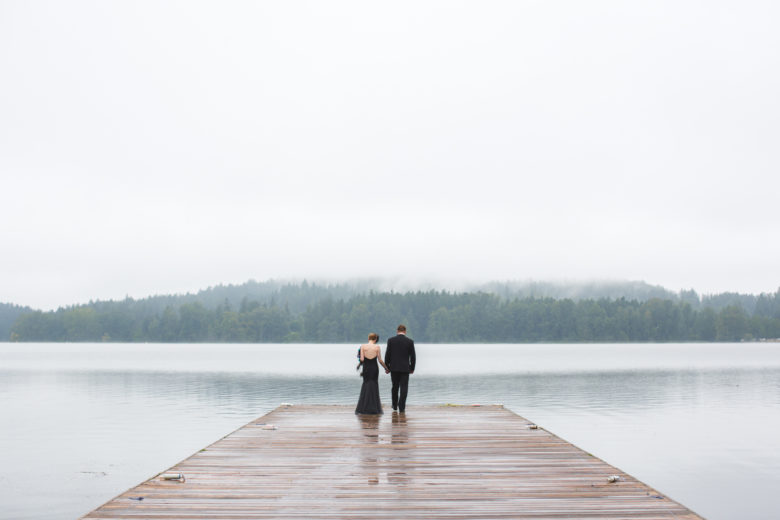
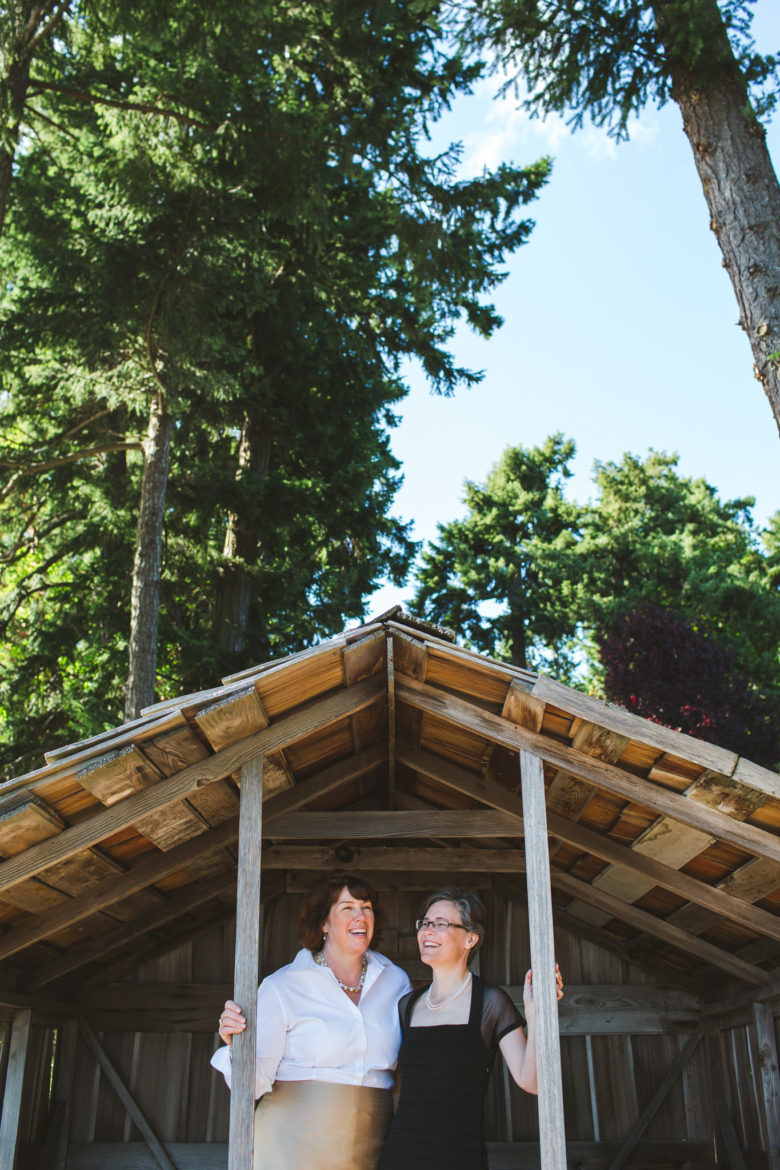
  3. Think about using things with an interesting shape or colour as a way to frame your subject. The first two images show one of my favourite techniques, shooting through a bush to create a pretty blur in the foreground and draw the eye to my in-focus subjects. A string of lights or a sparkler can also make a fun, bright foreground element.
  4. The key here is really to think about where you want the viewer’s eye to go in your photo. Composition is very important as you want the blur to lead the eye to your subject and not cover them or distract the viewer.
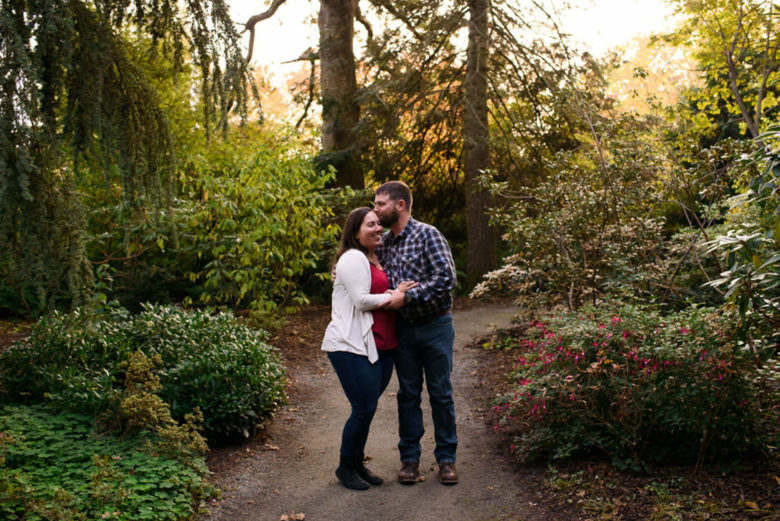
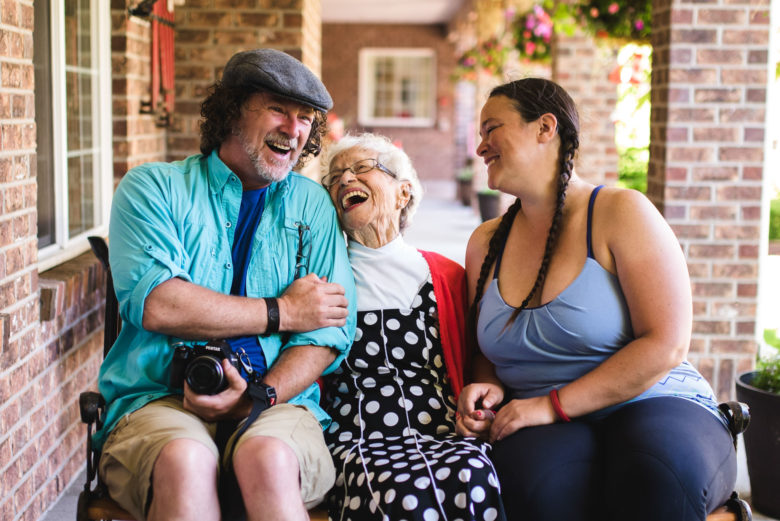
  5. I find using a foreground element can create the feeling of peeking in on a scene or moment, so I prefer to pose my subjects in a more candid way for these.

If you have any questions, join us in the Facebook group. I’ll be checking in there daily to see your work and help you achieve the best results.

If you’re just finding this now, you can check out the full list and more information on the challenge here. You can follow me on Instagram at @documentyourdaytoday and use the hashtag #dtd52weeks so others doing the challenge can see your work.

Week 19 – Low Camera Angle

This week’s theme is low angle. Like shooting from a high angle, being at a low angle can give you a different perspective on a scene.

The above two photos have the couple in the same spot, but I used a longer lens for the second photo (35mm for the first and 105mm for the second). Both of these photos have a similar feel to the high angle photos in that it seems like you’re peeking in on a moment rather than being a part of it. Part of that is that the couple is partially obscured by the trees, but the angle also separates them from where you’d normally focus your attention.

There are a couple of things to note in the above two examples. First is that using a low angle puts the couple in an open space, which draws your eye to them. It can also help you cut out distractions, like a messy room.

The second thing is that the couples are looking at each other, giving them a defined chin line and profile. You’ll want to be careful with low-angle photos of people because it can create a double chin, whether someone actually has one or not. If you’re not convinced, put your phone in selfie mode and hold it at chest level to take a photo of your face. You can avoid this by watching the angle of your subject’s head. Looking at the camera from a higher angle isn’t the most flattering in general. Standing a bit farther away can make the angle less dramatic looking and is more flattering than standing right in front of and below your subject.

The above two photos show how a low angle can create a more unique composition. The first creates a dramatic profile and uses a white sky to make it even more impactful. The second uses a tilted low angle to enhance the appearance of movement and fun atmosphere.


If you have any questions, join us in the Facebook group. I’ll be checking in there daily to see your work and help you achieve the best results.

If you’re just finding this now, you can check out the full list and more information on the challenge here. You can follow me on Instagram at @documentyourdaytoday and use the hashtag #dtd52weeks so others doing the challenge can see your work.

Week 18 – Golden Hour

This week’s theme is golden hour. Golden Hour is the first or last hour of sunlight in the day, which features a soft, warm light and a low sunlight angle. I find it’s not very effective when it’s overcast since it just goes from bright to dark without that nice glow or a colourful sky. So you may need to attempt this more than once depending on the weather. Also, depending on where you live, you might find the sweet spot doesn’t last that long and may occur at a different time during that hour.

The examples above show a few ways to use golden hour light. The first two use backlight with a darker background, creating a warm, glowy rim light around their hair and bodies. More info on using backlight here.

The middle two are backlit with a brighter background and an emphasis on the sky. Since golden hour is near sunset, the sky and your subjects are closer to the same brightness than usual, so you can get both your subjects and the sky well exposed. Sometimes this still requires a bit of editing to make them balance or you can just let the subjects be a bit darker than usual.

The last two images are front or side lit, casting a warm glow on their skin. This light can still create slightly harsh shadows, but since the sun is lower in the sky, the shadows come more from the side and don’t create shadow mustaches and racoon eyes. Pay attention to the shadows when putting your subject in direct golden hour light.

I don’t have any examples without people in them, but golden hour is certainly lovely for landscape photos as well.


If you have any questions, join us in the Facebook group. I’ll be checking in there daily to see your work and help you achieve the best results.

If you’re just finding this now, you can check out the full list and more information on the challenge here. You can follow me on Instagram at @documentyourdaytoday and use the hashtag #dtd52weeks so others doing the challenge can see your work.

Week 17 – Tell a Story with Objects

This week’s challenge is to tell a story with objects. 99% (maybe even 99.9%) of the photos I take are of people, or at least animals, so I don’t have a ton of great examples. I do think objects, locations, and little details are important to storytelling though and I try to take some of these photos at weddings and documentary sessions at people’s homes. Below are some examples and why I find them significant. I hope they’ll spark some ideas for you.

The above photos were all taken at in-home documentary sessions. The top left is something I try to remember to do, which is capture details of people’s homes that are unique to them. This couple has dragons in their cupboards and they’re gamers, which is how they met, so it really adds to the story of their relationship. Top right are some ingredients from a session I did with two young parents and their baby. They make pancakes every Sunday morning. It also includes a coffee mug with a family photo on it. Bottom left is the two kids’ shoes outside their front door, which is a nice lead-in to the family session beyond the door. Bottom right are some scattered ornaments in progress from a Christmas decorating documentary family session.

These are a couple of details from documentary business sessions. The left image is from a video shoot, showing some of the filmmaker’s equipment and her notes. The image on the right was a behind-the-scenes session with some hair and makeup artists for a styled shoot they were doing. I like this one because it includes a coffee cup, shaker bottle, and computer in the background, which both hint at the humans behind the makeup and the business aspect of planning it.

The “ring shot” is a classic of wedding photography. I try to find some meaningful background or location to put the rings so it’s not just about the rings, but tells you something more about the day or at least the venue. I loved the way this turned out because it shows that the wedding was at an apple orchard and also that it rained that day.

You might notice that photos that combine multiple elements tend to tell the story better than just one object or a close-up of something. Think about that when taking your photo this week.


If you have any questions, join us in the Facebook group. I’ll be checking in there daily to see your work and help you achieve the best results.

If you’re just finding this now, you can check out the full list and more information on the challenge here. You can follow me on Instagram at @documentyourdaytoday and use the hashtag #dtd52weeks so others doing the challenge can see your work.

Week 16 – Blurry Background

This week’s theme is blurry background. I wrote a detailed post about this previously, so check it out if you’re not sure how to achieve this effect. It should be possible with nearly any camera, though you may have to get closer than usual. You can also try out portrait mode if you have an iPhone, though the effect is an artificial one. Other newer phones may have something similar.

When might you want to get a blurry background? Here are some good uses of this effect:

  • When the background is messy or distracting. In the fifth and sixth images below, there was a lot going on in the background (guests watching the father-daugther dance and the outdoor hallway of a retirement home, respectively), so I blurred the background to put more focus on the subjects. In the photo of the family in the hallway, I moved the bench so it wasn’t right up against the wall specifically so I could blur the background.
  • If you have lights in the background, blurring the background can make them into circles creating a pretty effect, like in the first two photos below. You can find a lot of examples if you Google the word “bokeh”.
  • In other images where you want to put the focus on your subjects or just make the background look softer. If you can, still pay attention to distractions and align things in a pleasing way. A good composition combined with some background blur can really draw the eye to your subjects.

If you have any questions, join us in the Facebook group. I’ll be checking in there daily to see your work and help you achieve the best results.

If you’re just finding this now, you can check out the full list and more information on the challenge here. You can follow me on Instagram at @documentyourdaytoday and use the hashtag #dtd52weeks so others doing the challenge can see your work.

Week 15 – High Camera Angle

This week’s theme is high angle, meaning that your camera will be higher than your subject. I find this type of composition effective for candid photos or for making a portrait look more candid. It gives the feeling of peeking in on a scene. It can feel more intimate. Or it can just give you a new perspective on something you usually don’t see from above. It can also be very flattering for portraits because it makes the person’s eyes look bigger and reduces the chances of double chins.


If you have any questions, join us in the Facebook group. I’ll be checking in there daily to see your work and help you achieve the best results.

If you’re just finding this now, you can check out the full list and more information on the challenge here. You can follow me on Instagram at @documentyourdaytoday and use the hashtag #dtd52weeks so others doing the challenge can see your work.

Week 14 – Backlight

This week’s theme is backlight. Backlight is when the light is behind your subject. You might have gotten advice to put the sun behind you when taking photos. That might be good advice for landscape photography, but when it comes to photos of people, backlight is my go-to.

Backlight provides a nice, even light on people’s faces because they’re in the shade of their own bodies, but it can be brighter and more flattering than shade because there’s more light wrapping around and bouncing off surfaces nearby. You also don’t have to worry about people squinting when facing the camera if the sun is behind them and not you. This is a simple technique to use when you’re photographing a large group. Everyone will be evenly lit and it will be more flattering than lighting that has more contrast.

Here are some tips on using backlight for portraits/candids (but you can apply it to other subjects and scenes as well):

  1. Put the sun behind your subjects and expose for their faces. If you’re using a cell phone, this is really easy as you can just tap on their face on the screen and your exposure and focus should both adjust for the face. I won’t get into how to do this with other cameras since it will be different depending on the camera or what exposure mode you’re using, but if you’re finding the exposure isn’t working out and you’re in an auto mode, try filling the frame more with your subject (i.e. get closer).
  2. You can get that pretty, glowy rim light around their bodies/hair by putting your subjects in front of a darker background. If the background is bright, like a sunny sky, you won’t see that outline.
  3. When you expose for your subjects’ faces, the sky will probably go white or very light. Don’t worry about it. Your subject is more important than the background (usually). If you really want the sky to be blue, you can try using RAW format and underexposing, then adjusting the shadows and highlights when editing to make the subjects brighter and sky darker. But most of the time, I think a white sky looks fine.
  4. If you aim your camera towards the sun, you can get a hazy look or sun flare, which can be an interesting effect sometimes. If you’re getting those effects but don’t like them, use a lens hood or just hold your hand above and in front of your lens (like an umbrella) to block the light from hitting the lens.

If you have any questions, join us in the Facebook group. I’ll be checking in there daily to see your work and help you achieve the best results.

If you’re just finding this now, you can check out the full list and more information on the challenge here. You can follow me on Instagram at @documentyourdaytoday and use the hashtag #dtd52weeks so others doing the challenge can see your work.

Week 13 – Photograph Hands and Feet

This week’s theme is hands/feet. This is pretty simple and open to interpretation through different styles and techniques, so I won’t give you any tips this week. I included some examples below though.

Hands and feet are a good way to capture emotion without showing faces and, in my opinion, count as a portrait of someone or multiple people. They can also show relationships and personality. And if you don’t have anyone else to photograph, you might even be able to take a self-portrait like this without using a tripod, timer, or trigger.


If you have any questions, join us in the Facebook group. I’ll be checking in there daily to see your work and help you achieve the best results.

If you’re just finding this now, you can check out the full list and more information on the challenge here. You can follow me on Instagram at @documentyourdaytoday and use the hashtag #dtd52weeks so others doing the challenge can see your work.

Week 12 – Night Photography

This week’s theme is night photography. You can take photos outdoors or just practice your low light photography inside, like using a streetlight shining through your window, string lights, or a bedside lamp.

Here are some tips on night photography:

  1. Find a light source. For the above photos, from left to right and then down the rows, my light source was: sparklers held by wedding guests, sparklers, lighting in the tent and a bit of recently set sun, a streetlight, general ambient light on the street, a video light held to the left. You can also use a flashlight, portable string lights, your phone’s screen or flashlight, or a camera flash of course.
  2. Don’t be afraid to use high ISO. This will let you have a higher shutter speed. It’s better to have a grainy/noisy photo than a blurry one, unless you like blurry.
  3. Try playing with light painting. Light painting, like in the top right image of the girls with the sparklers, is done by using a slow shutter speed (experiment starting at 1/2 a second or lower) and a moving light source. You can move sparklers or a flashlight or use something that’s already moving like cars driving by. I highly recommend a tripod or monopod for that slow of a shutter speed. I didn’t use one in the sparkler painting photo, which is why the people are blurry. The light will probably still be sharp, but everything else will be blurry if you don’t use a tripod (or put your camera on a table or something).

If you have any questions, join us in the Facebook group. I’ll be checking in there daily to see your work and help you achieve the best results.

If you’re just finding this now, you can check out the full list and more information on the challenge here. You can follow me on Instagram at @documentyourdaytoday and use the hashtag #dtd52weeks so others doing the challenge can see your work.

Week 11 – Using Symmetry in Photography

This week’s theme is symmetry. Symmetry is one compositional tool you can use to make your images more interesting and pleasing to the eye. Symmetry is when one half of the image is identical to the other, split vertically or horizontally (or both). It doesn’t have to be perfectly symmetrical to have the desired effect, especially if you throw something like a couple or other subject into the image. In that case, you might rely on the overall environment to provide the symmetry.

Here are some tips on using symmetry:

  1. Be careful about angles and cropping to avoid an unsettling slightly crooked look. If you stand slightly off-center to a symmetrical scene, then all of the elements of the scene will be skewed, which can be distracting. I’m definitely guilty of not squaring my frame properly, as you can see in some of my examples with a lot of lines.
  2. Try including other compositional techniques as well to keep visual interest up. Some examples are rule of thirds and leading lines. Pay attention to where your eye goes in the frame. It should still have a focal point or subject.
  3. If a scene is pretty symmetrical, but contains a distraction off to one side, try cropping in closer to remove it.
  4. You can create symmetry by using a reflection, such as with a body of water or using a mirror/phone.
  5. Look for symmetry in your environment. Buildings are a great source of this, especially places like churches or commercial buildings.

If you have any questions, join us in the Facebook group. I’ll be checking in there daily to see your work and help you achieve the best results.

If you’re just finding this now, you can check out the full list and more information on the challenge here. You can follow me on Instagram at @documentyourdaytoday and use the hashtag #dtd52weeks so others doing the challenge can see your work.