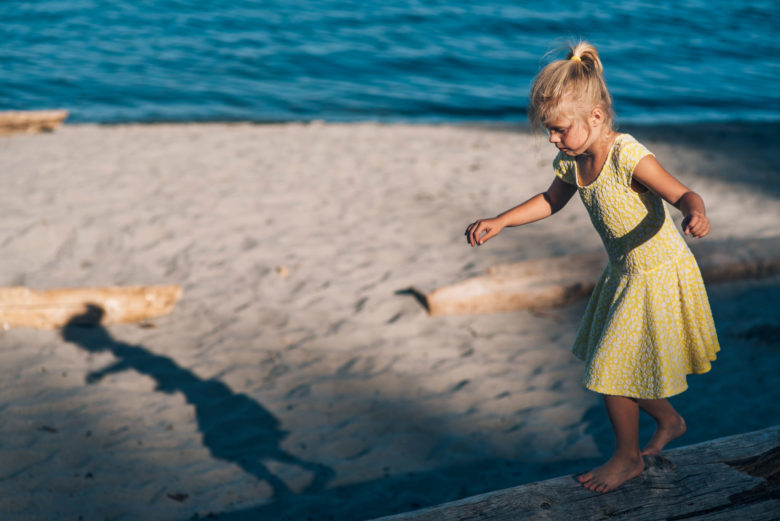
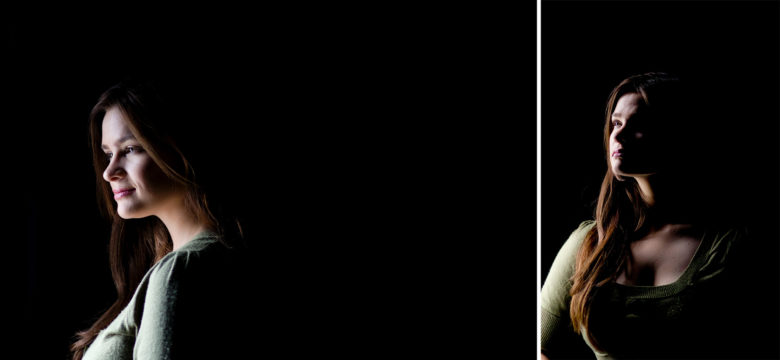
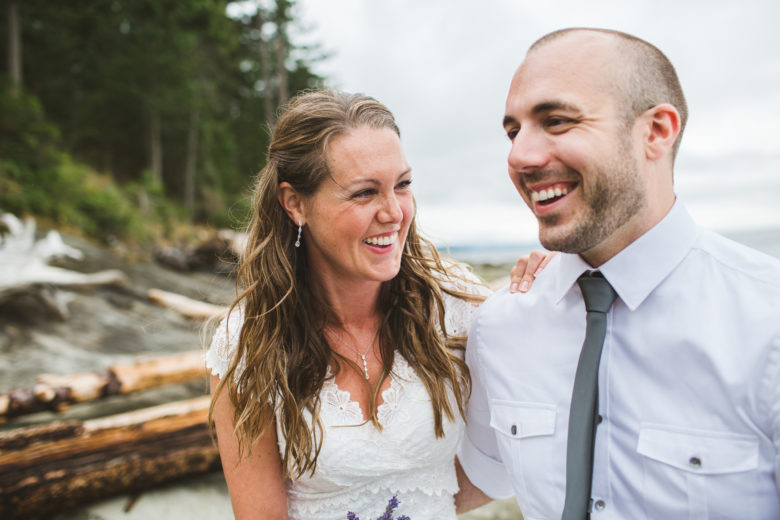
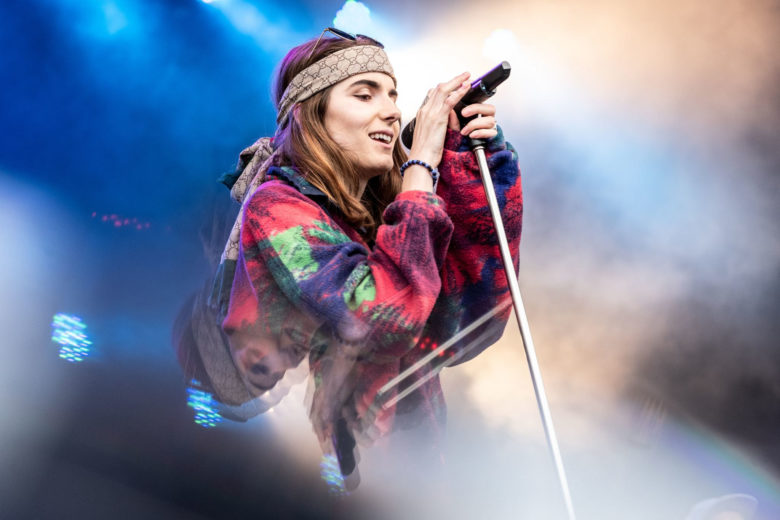
This week’s theme is hard light. Lighting challenges are my favourite because they can be hard, but this is a different kind of hard. Hard light creates sharp, hard-edged shadows and tends to have a lot of contrast. It’s created by a small light source, or relatively small (like the sun, which is big, but far away). You can encounter it outdoors on a bright, sunny day. This kind of light can be hard to work with, but check out some examples below and tips on how to get great photos in hard light.
Here are some tips on working with hard light.
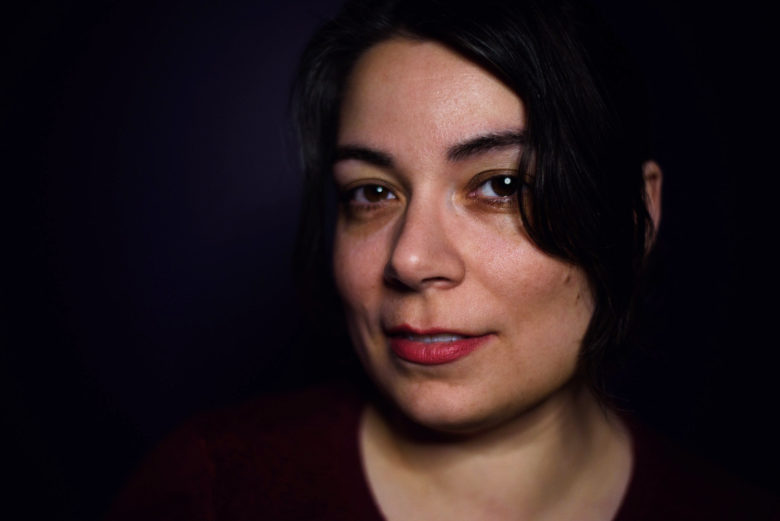
Pay attention to the shadows. Shadows can be really unflattering in a portrait or they can be dramatic and interesting. Pay attention to the way the shadows fall and what they hide and reveal.
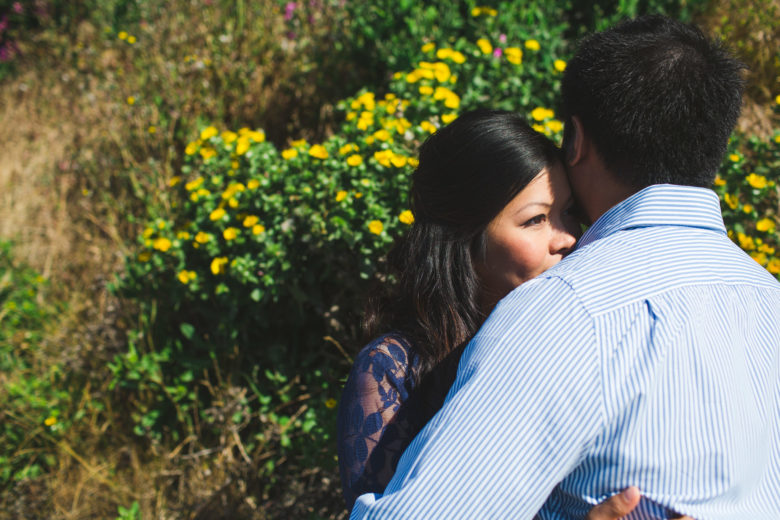
For portraits, hard light can be most flattering as a side-light or closer to sunset. At midday, it can create raccoon eyes and a shadow mustache.
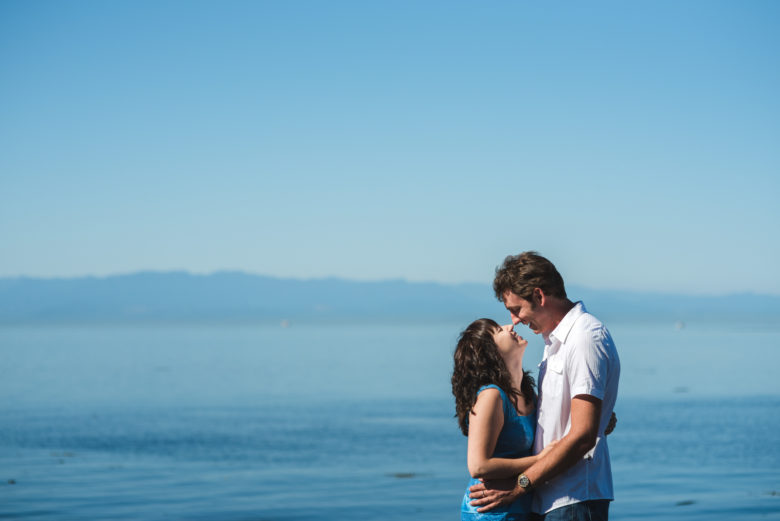
When taking portraits at midday, I often try to find backlight rather than deal with hard light, but it can be worked with. You just have to be careful of your posing. Sometimes I have people look to the side, at each other, or close their eyes, still paying attention to the shadows.
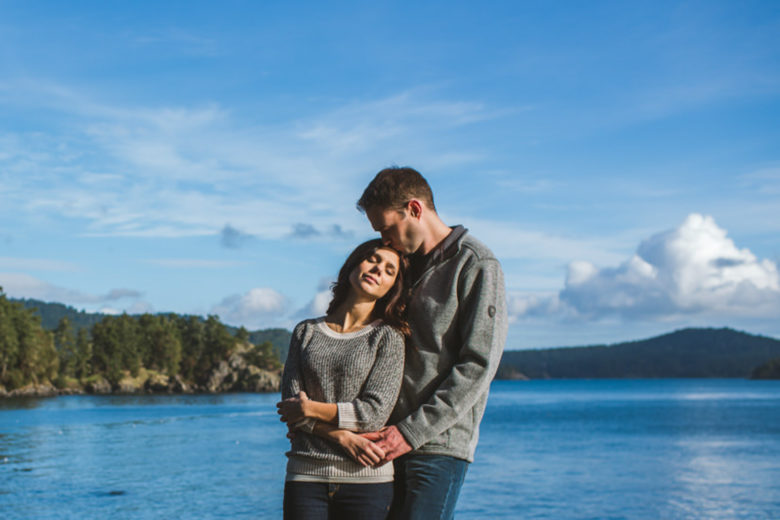
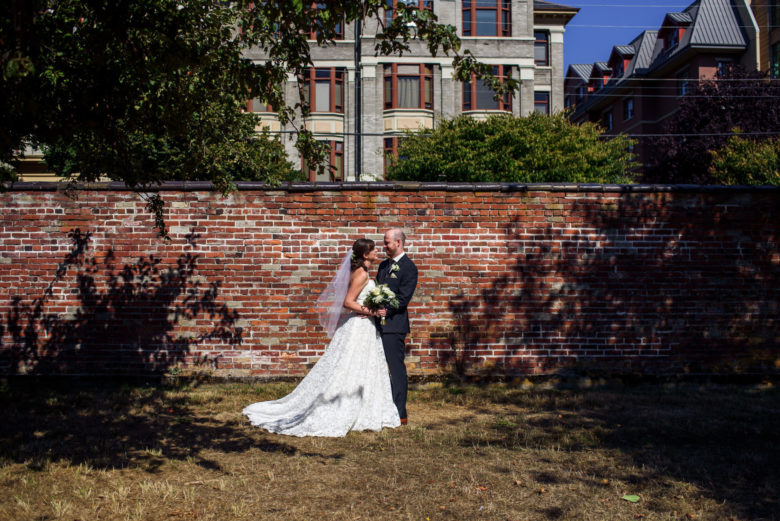
Hard light, or full sun, can be great for capturing a landscape with a lot of contrast. Like the example of the couple with the cloudy blue sky above, putting the light behind you (the photographer) can allow you to capture the full range of colours and tones in a scene and get a beautiful sky, where backlight would tend to wash out the sky (unless you add light to your subjects).
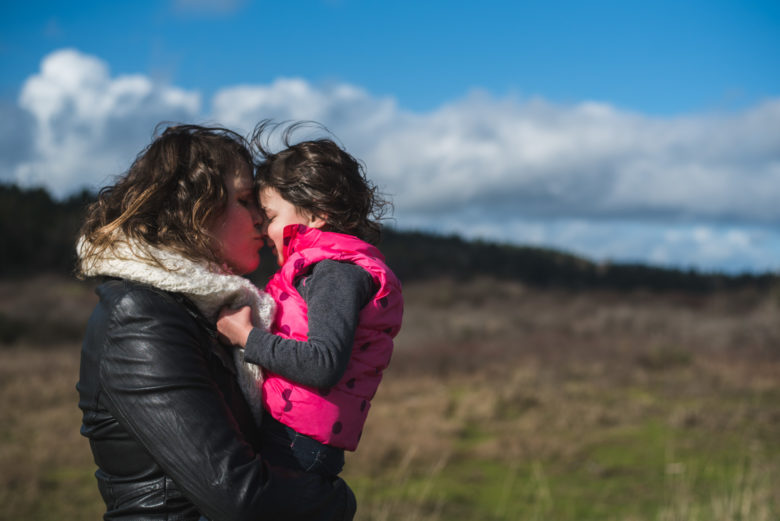
Use the shadows. Like in the photo of the little girl walking on a log above, harsh sun can create great shadows in a scene.
If you have any questions, join us in the community. I’ll be checking in there daily to see your work and help you achieve the best results.
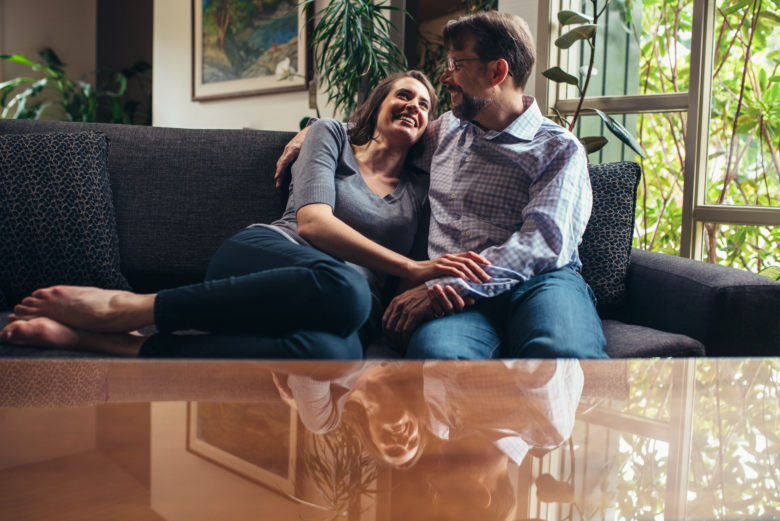
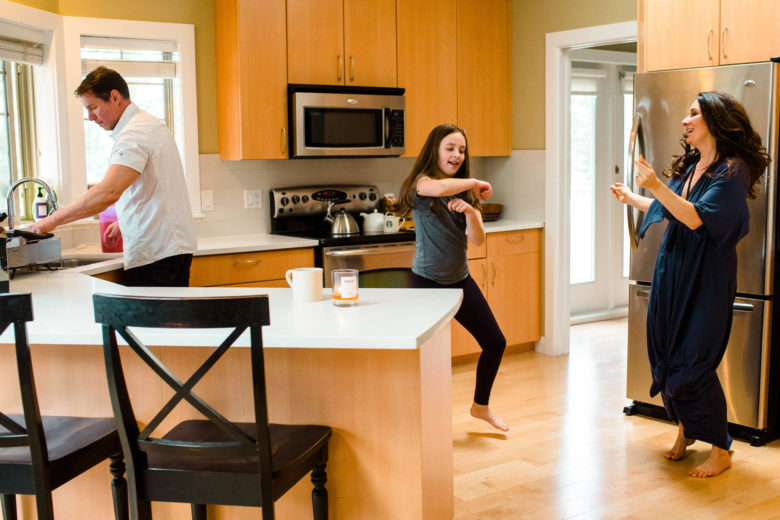
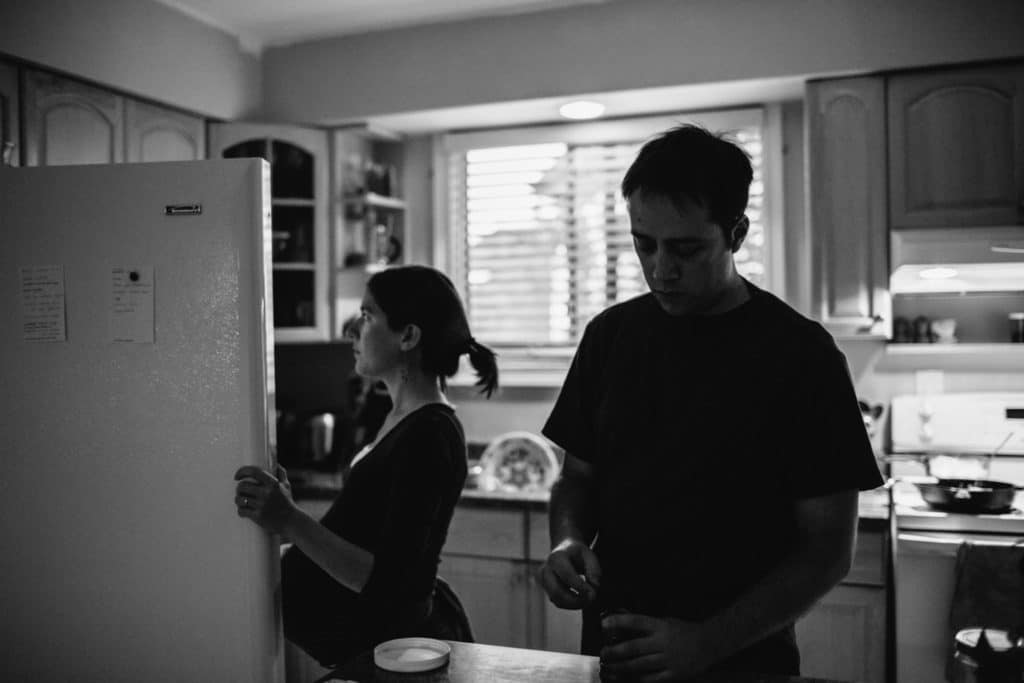
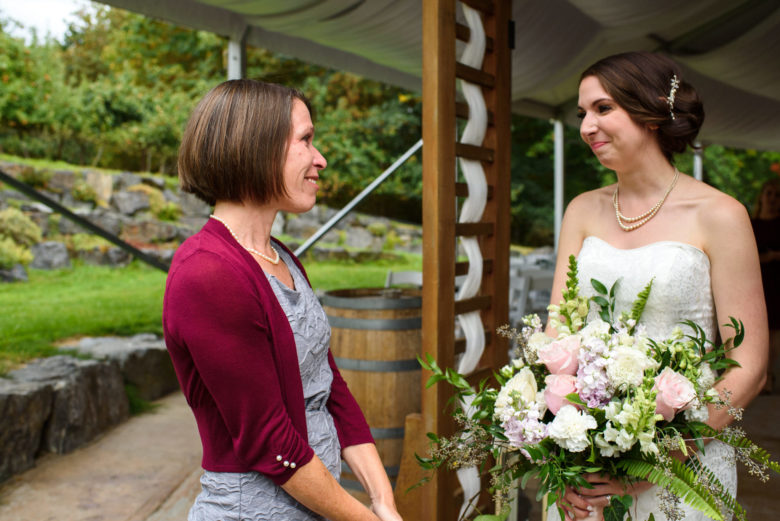
If you photograph people, this is something to think about. Lots of people want to go to a pretty location, or even a studio, for portraits because they think it will look nice. But location can also play a role in documenting your subject by capturing an important part of their memories and adding personality.
You should also consider location when you’re just documenting your own life. 10-20 years from now, maybe you’ll be living in a different place or your favourite bar or store will have closed down. Why not document them and the impact they have on your life while they’re here?
Below are some photos I took of clients in places that have meaning for them: their homes, favourite stores, bars/restaurants, and places they engage in their hobbies. I’m not going to give you any tips this week. Just go out (or stay in) and capture a place that’s important to you.
If you have any questions, join us in the community. I’ll be checking in there daily to see your work and help you achieve the best results.
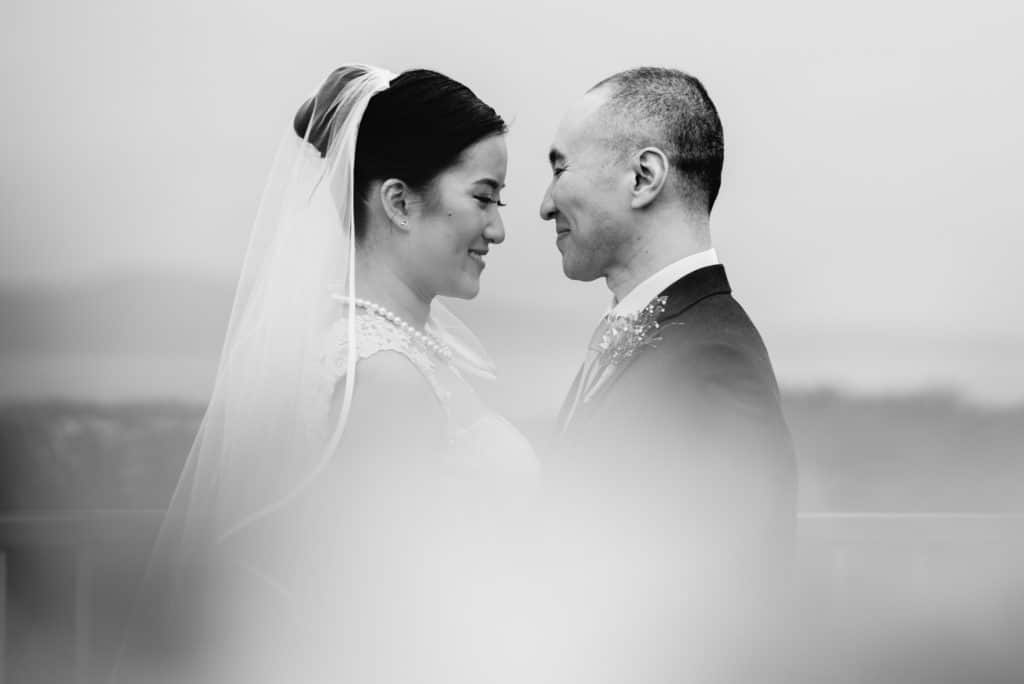
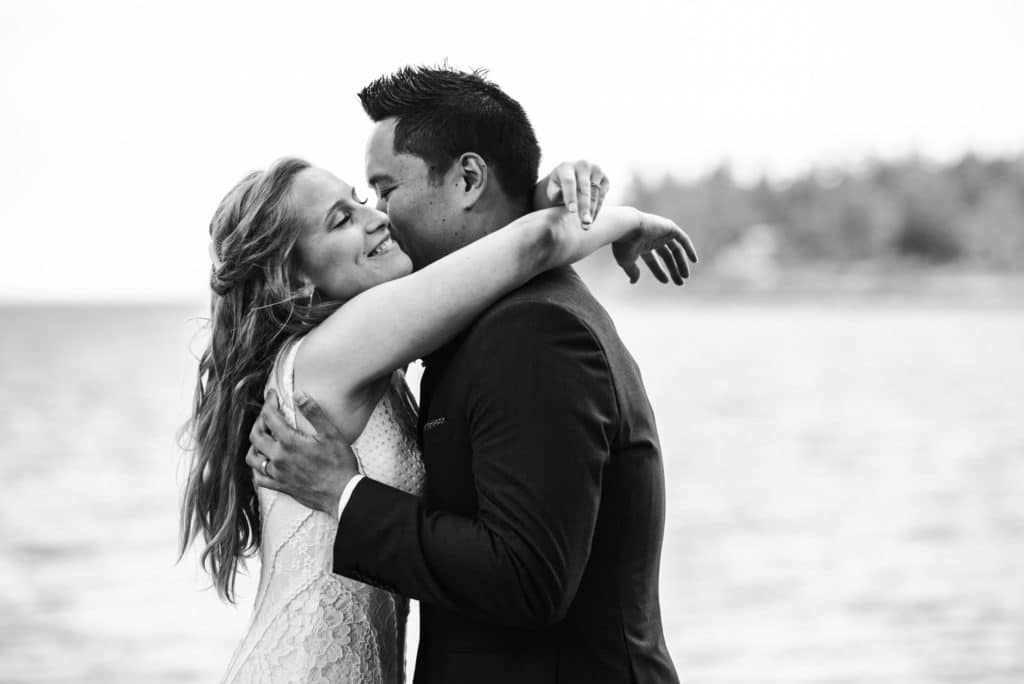
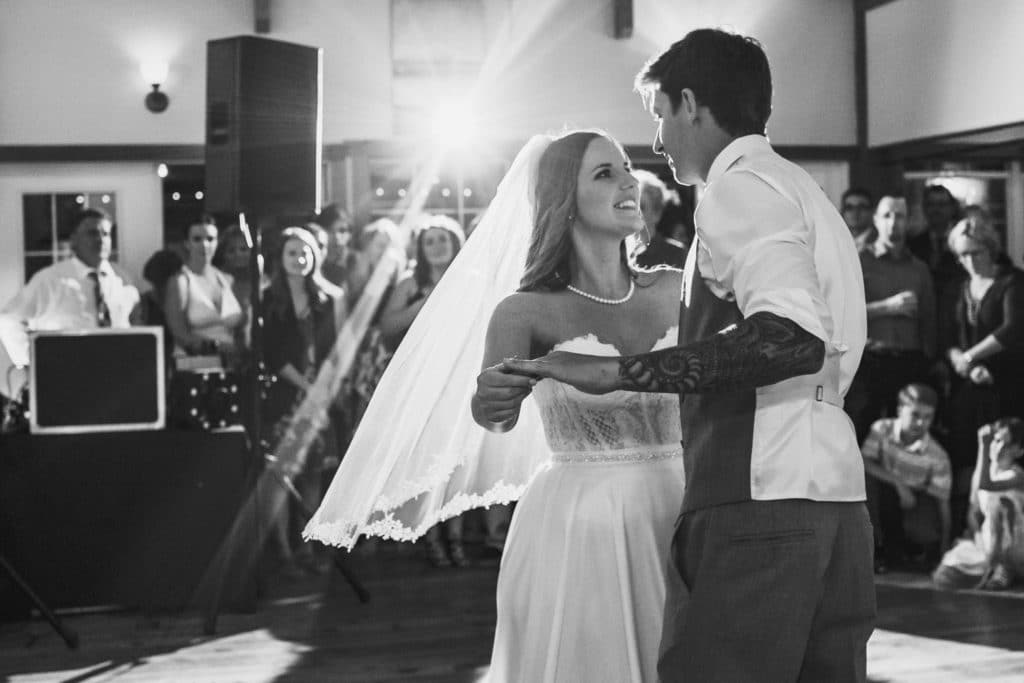
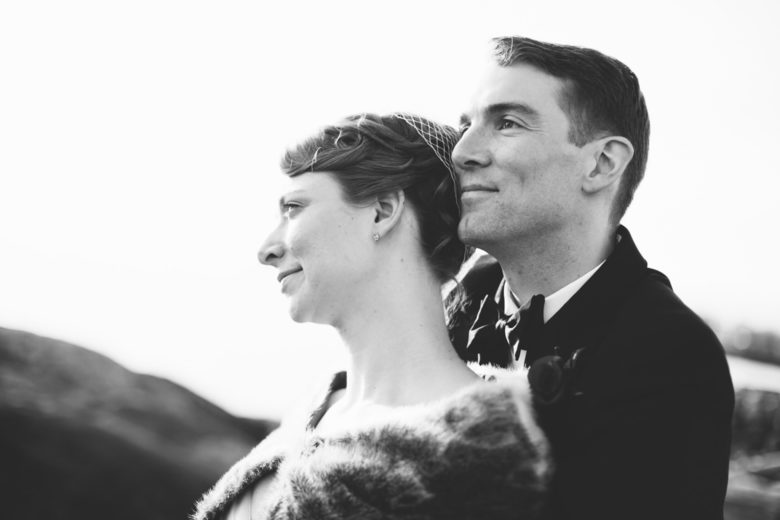
This week’s theme is black and white. This is pretty simple since you can take a photo of pretty much anything and edit it in black and white, or make it black and white in camera. I tend to deliver my clients’ photos all in colour and just use black and white when it really calls for it. Below are some of my fave black and white images from my work.
Black and white can be used to “fix” a technically imperfect photo that has too much noise/grain, weird colour (often due to mixed lighting), or even a lack of sharpness, but it can also be used to put the focus on the moment or composition. Some people say if colour doesn’t add anything to an image, then make it black and white. I tend to approach my work from the opposite perspective (if the colour doesn’t take anything away from the image, keep the colour), but they do have a point.
Here are some tips on getting better black and white photos:
If you set your camera to shoot in black and white, you can get a better idea of what the finished image will look like. Some photographers even set their camera to black and white so they can focus on light and composition without the distraction of colour, then edit the RAW file (which can be edited in colour or black and white, no matter what the camera is set to). You can set most digital cameras to monochrome in the picture styles menu.
Look for contrast. Whether it’s differences in colour or dramatic lighting, contrast can have a big impact in black and white.
Pay attention to composition. Removing the element of colour leaves you primarily with composition, lighting, and focus to control where the eye goes in your image. Look for strong lines, shapes, and shadows/highlights when composing.
If there’s a busy background in your image, it’ll be harder to differentiate it from the subject in black and white. Try to hide or crop out distractions. You can also use backlighting to separate the subject from the background (see the dancing photo with flash behind them).
Play with some different editing methods, even if you have little experience with editing. For example, in Adobe Lightroom (which I use to edit), you can try adjusting the clarity to add more definition, adjusting the curve to add contrast to specific tones, or use the HSL/grayscale tools to make certain colours brighter or darker.
If you have any questions, join us in the community. I’ll be checking in there daily to see your work and help you achieve the best results.
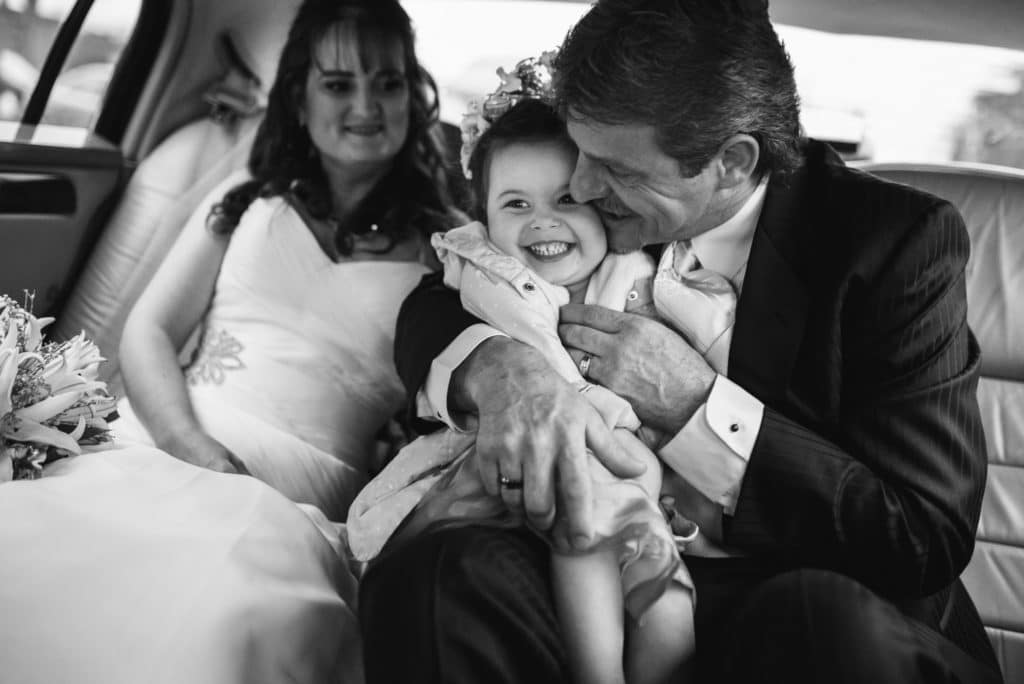
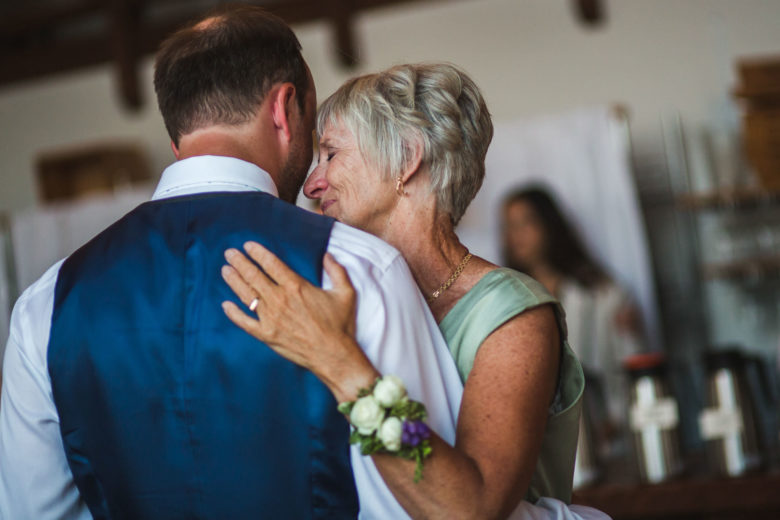
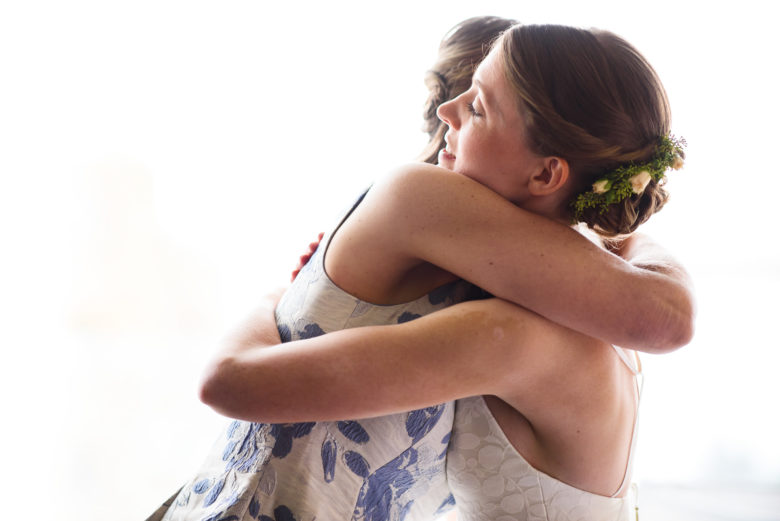
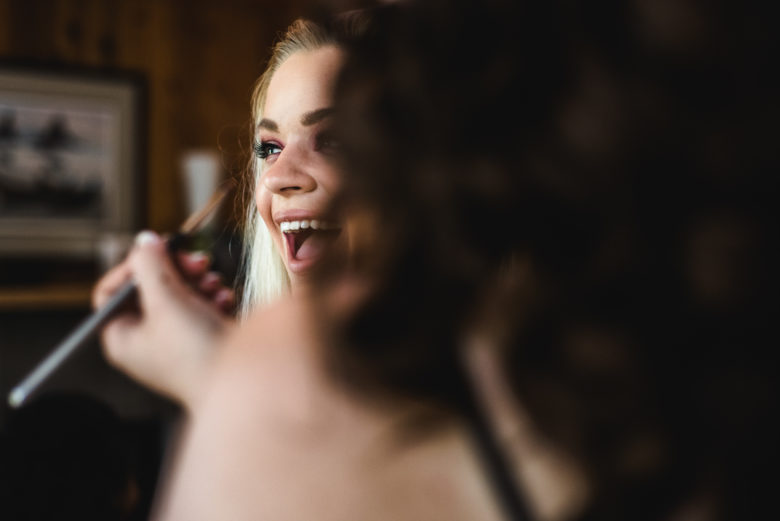
This week’s challenge is to get close. Getting close allows you to focus on emotion when people are involved and get a different perspective on things. I’m going to focus on photos of people here, but you can certainly apply it to other things. Don’t worry about getting super close with a macro lens or otherwise, since we’ll cover macro photography later in the year.
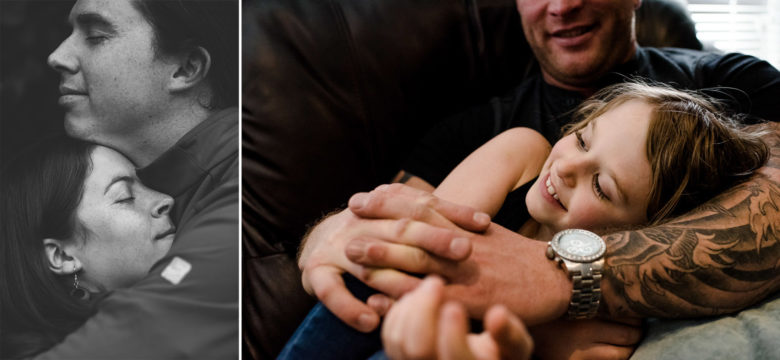
Below are some examples of photos where I got close to the subjects to capture their expressions and emotion. Some of these were taken with a 35mm lens, so I was literally very close to them. Others were taken with a 50mm to 85mm, which allowed me to stand a bit farther away. The first three are portraits, the fourth is a candid but obviously very camera-aware, and the last two are candids.
Here are some tips on getting closer:
To get a good close-up candid, you can either use a longer lens or work on being less noticeable. Usually people will notice me less and less as the day goes on when photographing a wedding or a documentary session. I start out chatting with them and getting them comfortable with me and eventually they just continue their day without paying me much attention. This does take some practice though, so you may find a longer lens the better choice to start. As for photographing your own family, the less you ask them to smile for the camera, the easier you’ll find it to take candids.
Be careful getting close with a really wide lens (shorter than 35mm) because the edges can get distorted, along with people’s facial features. Think about how you look in a phone selfie versus in a photo taken from farther away. Cell phones tend to have wide lenses.
Pay attention to expression. Getting close puts the focus on expression and emotion. For more tips on expression, check out the post from week 5.
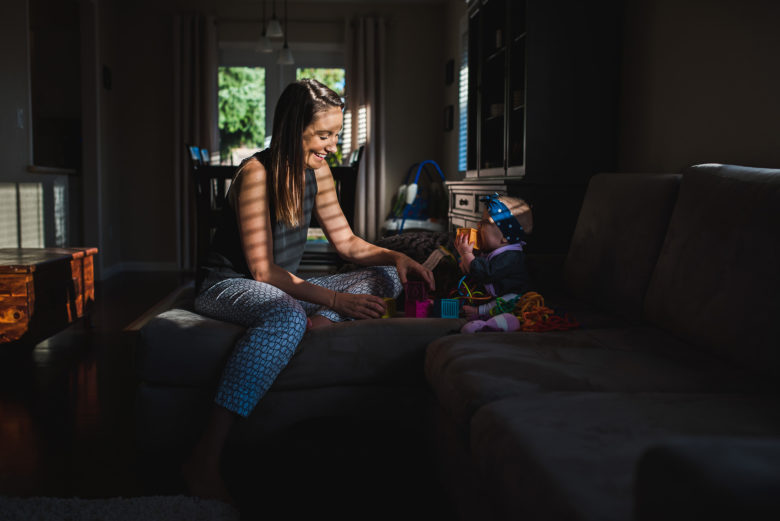
Getting close to your subject or using a longer lens and being relatively close will both create a shallower depth of field (and blurrier background), so if your aperture is fairly low, your subject will be more isolated and stand out more. This is great for putting the focus on your subject, literally and figuratively, and can help take attention away from messy backgrounds. For example, the bottom left photo in the set above shows a mother dancing with her son and a blurry bartender in the background. The focus and depth of field make the bartender and other background elements barely noticeable.
Don’t be afraid to cut off parts of people’s heads/faces and get super close up, as below. You don’t even have to include more than just a mouth or eyes, or even hands/arms, to convey emotion.
If you have any questions, join us in the community. I’ll be checking in there daily to see your work and help you achieve the best results.
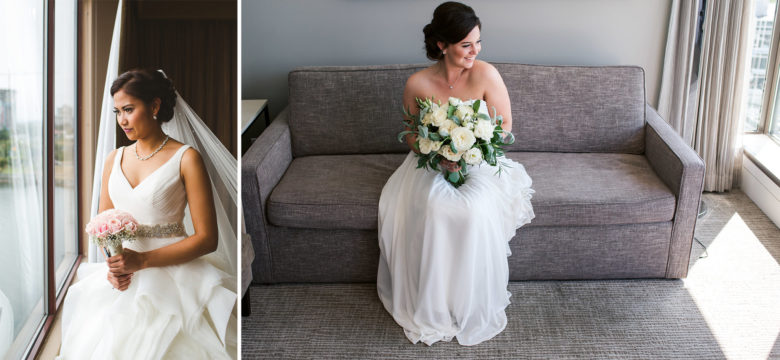
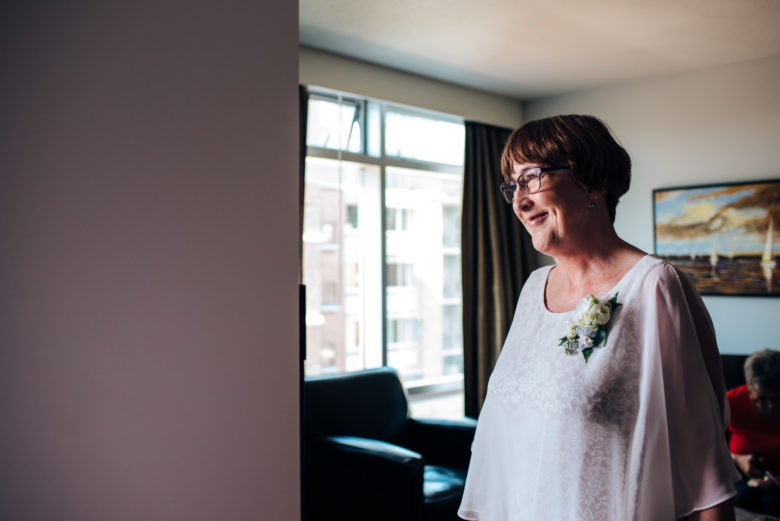
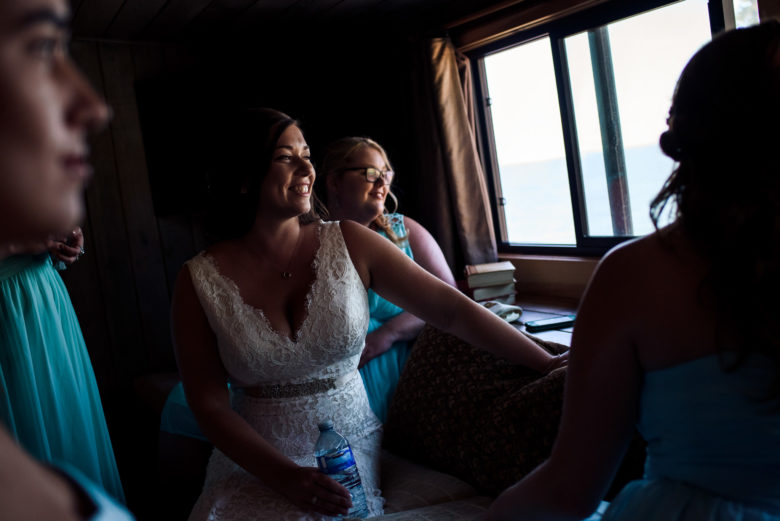
This week’s theme is window light. Window light can actually create various dramatically different looks, but I find it’s mostly flattering or interesting (and sometimes both). Below are some examples of different ways to use it, followed by some tips.
When the sun is low in the sky and coming directly through the window, you can end up with some harsher shadows, like you would if you were shooting outside. If the sun is higher, the window will provide a softer, more even light. I actually couldn’t find an example of this. I guess I favour more dramatic types of light.Having your subject face towards a window when the rest of the room is full of a lot of window light can add a bit of a pretty highlight on the front of their face, but still leave their entire face fairly well lit. This can be very flattering. Both of these images had a window at the front-side of the subject, closer to the camera, as well as directly to the side.For these (taken at a workshop given by Ryan Brenizer back in 2011), we closed the blinds down to a very small gap and the rest of the room was pitch black. This image is backlit by the window, meaning the light is mostly coming from behind them. This might be a bit tricky to expose if you’re using auto mode on a camera, but could be very easy on a cell phone (tap on the subject to expose for them). If you’re finding that aiming towards the window makes your image seem hazy or low contrast, change your angle a bit so the light isn’t hitting your lens directly. This is similar to the two above, but she’s facing into the light and it’s not quite so much brighter than the room, creating a flattering even light on the front of her face and leaving the side/back in shadow.This is similar to the above image, but the rest of the room is very dark compared to the window.If the rest of the room is a little darker or only has windows on one side, you can end up with a very dramatic side light effect.
Here are some tips on using window light:
Watch out for mixed white balance. That basically means light coming from two different kinds of sources, like window light (which is usually kind of blue) plus overhead lighting (which is usually more orange). When you have two different colours of light, they can create some really ugly skin tones and colours in your image. This may not be as crucial if there are no people in your photo.
Using more dramatic, directional window light can emphasize texture and create shadows you may not want in a photo of a person. If someone has very rough skin or a lot of wrinkles, and doesn’t like those things, then I suggest avoiding side light. Having them face towards or away from the window will give you a more even, universally flattering look.
If you’re struggling with getting enough light on your subject without cranking your ISO way up, move your subject closer to the window, which will make them brighter. Also avoid having the window behind your subject, since they’ll be in the shade of their own body. Same thing goes for inanimate objects, of course.
If you have any questions, join us in the community. I’ll be checking in there daily to see your work and help you achieve the best results.
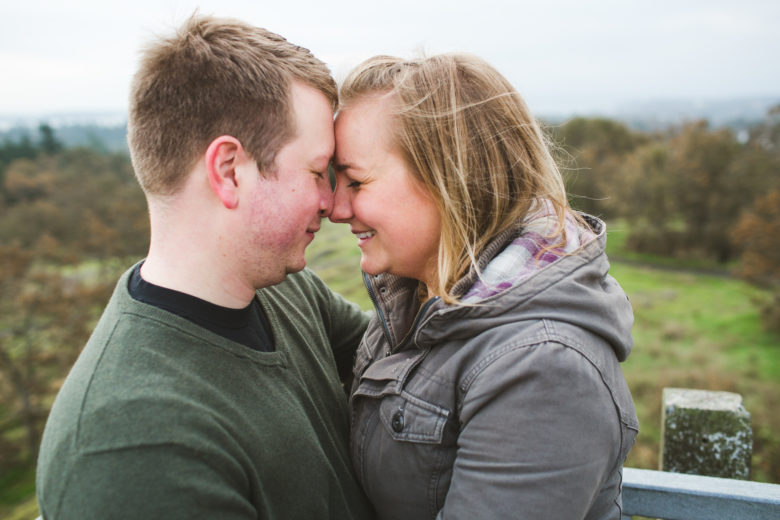
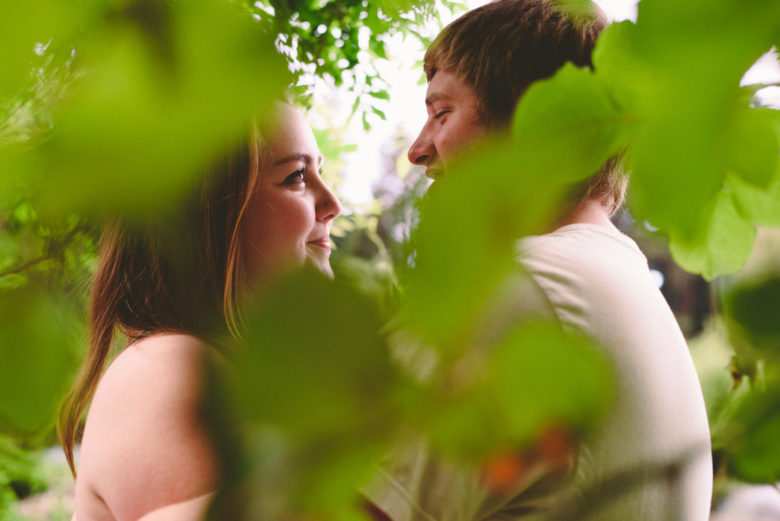
This week’s theme is expression, as in facial expression (though you can also use body language here). If you don’t normally photograph people, you can challenge yourself this week to try. You can take a self-portrait if you don’t have anyone to photograph. Or get clever and find an expression in an animal or inanimate object.
Expression is very important in portrait and documentary photography that involves people. It can tell a story and make the viewer feel something.
Last year, I took the below self-portrait for this challenge. It can be tough to get a natural looking expression in a self-portrait, so you may want to use a timer and move around a bit until the timer goes off. You can also use a remote and take multiple photos while changing your expression. Just trying to hold a pose while waiting for the timer off is likely to get a fake-looking expression.
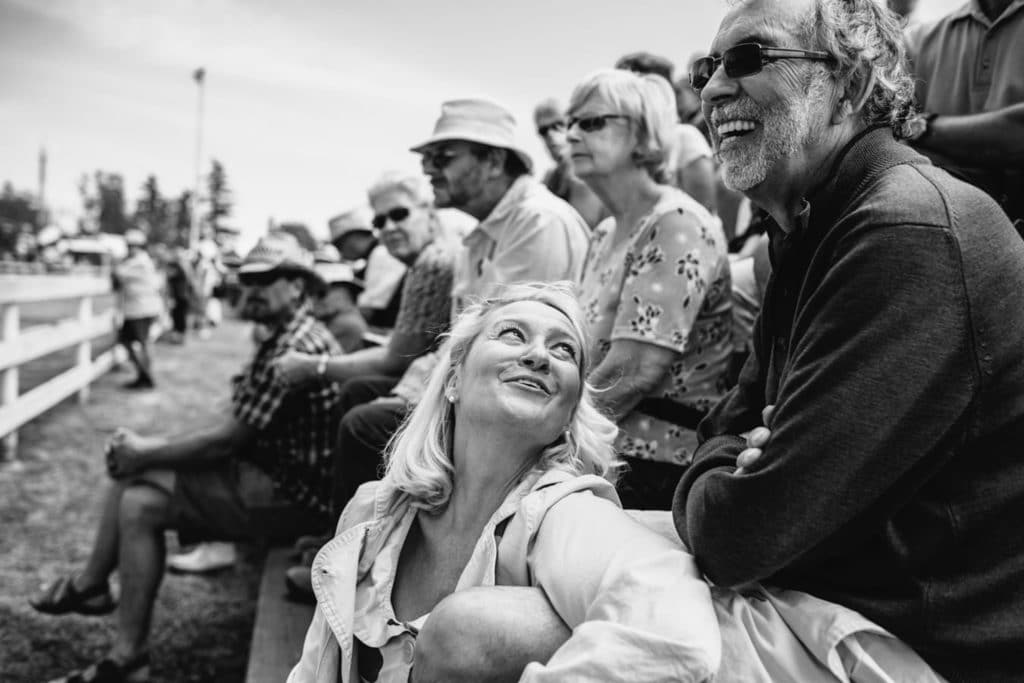
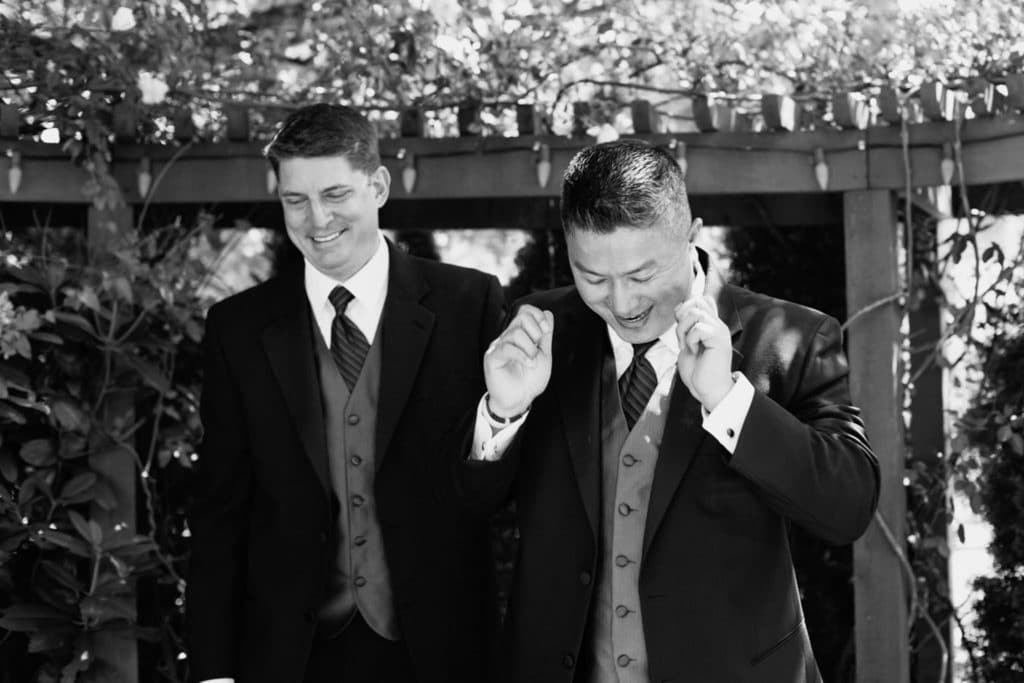
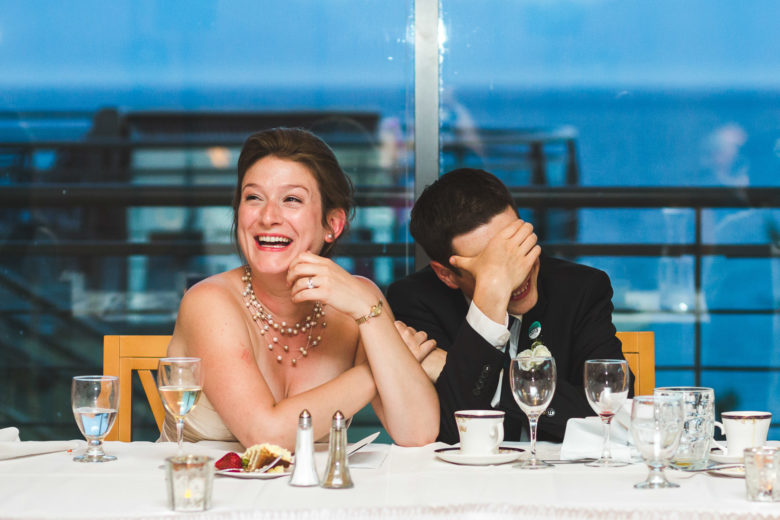
Below are some expressive photos I love from my work, from laughter to tears and everything in between.
Here are some tips on capturing expression through photography:
For a portrait, I find I get the best expression by having a fairly continuous dialogue with the subject, at least at the start. Unless they’re a professional model, most people feel awkward in front of the camera. Chat with them to help them feel comfortable. Tell jokes or be silly to get them to laugh. Try giving them prompts to get a certain reaction. If there are multiple people, get them to interact with each other (ex: with a couple, tell one to whisper a joke or something romantic in the other’s ear).
For candids, interact with your subjects if they’re not engaged in what they’re doing and feel awkward with the camera. If you’re documenting your own life, there’s no need to approach it like strict photojournalism. You’re a part of your story, so feel free to act like it. You can get some great expressions by playing with your kids or talking to your spouse, for example. Sometimes I’ll start a documentary session by chatting with my subjects so they get comfortable with me and then slowly fade into the background as they go about their day.
Get close to your subject to put an emphasis on their expression. This can also be done by having a clean background without distracting elements. Even if the background is a bit messy, you can use a shallow depth of field (i.e. a small area of focus) to draw the eye to your subject’s face.
Think about using other elements of the photo to reinforce the emotion being expressed. This could be lighting, composition, or colour scheme. For example, you could reinforce a sad expression with cool colour tones and dim or dramatic lighting. We’ll cover this more in future weeks.
If you have any questions, join us in the community. I’ll be checking in there daily to see your work and help you achieve the best results.
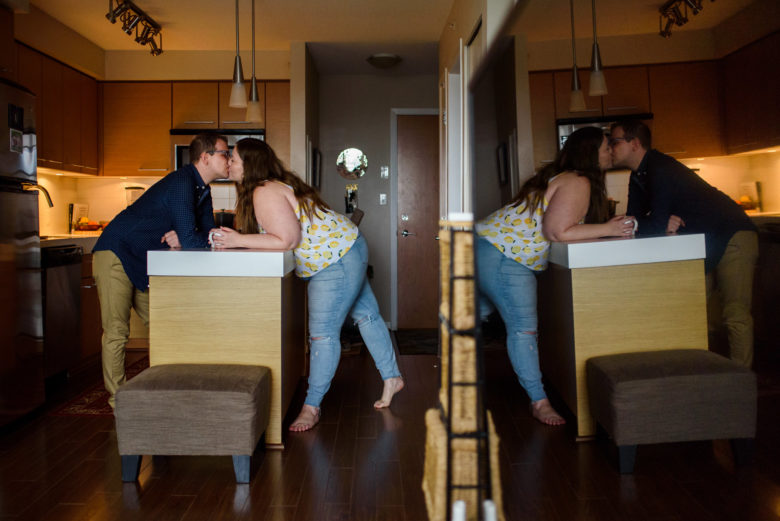
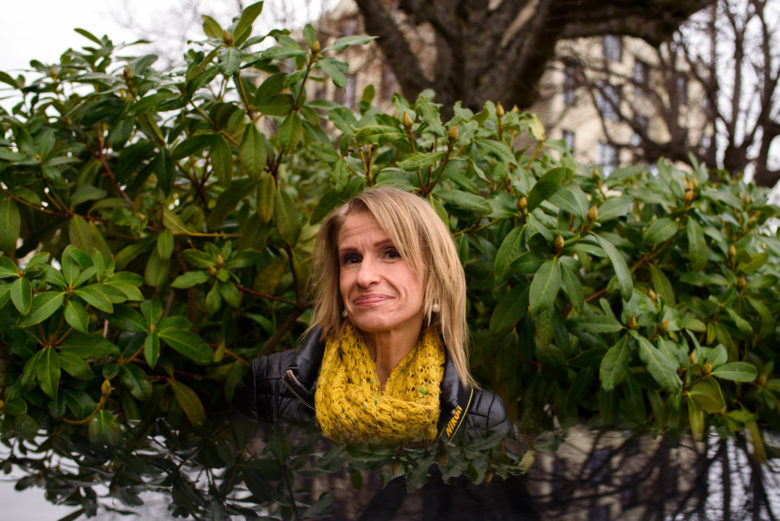
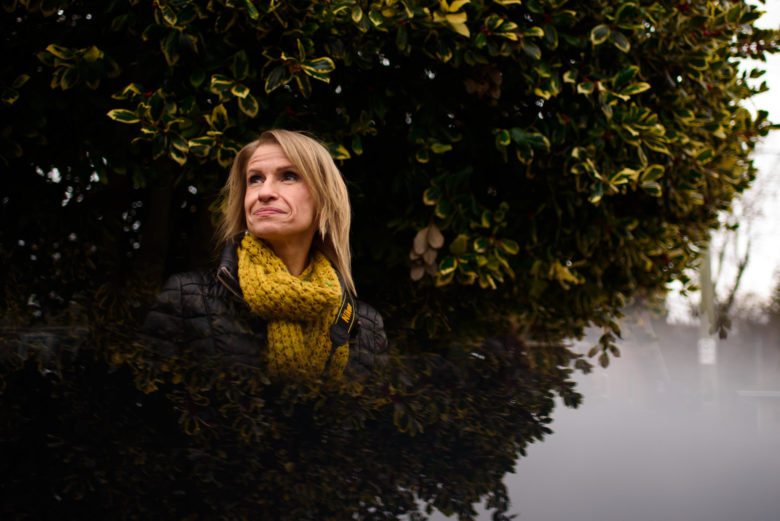
This week’s theme is mirrors/prisms/phones. These are a few similar tricks you can use to create a surreal, double-exposure like effect in camera.
The basic idea is to hold your phone face up, without a case and with no lens hood on your camera, with the edge right up against the lower part of your lens to create a reflection of what’s above. You can tilt it up and down a bit to change what’s reflected. Just experiment until you see something interesting through your viewfinder or on your LCD.
You can, of course, also use an actual mirror. Your phone is handy because you usually have it with you. If you’re using your phone to take the photos, you might want to try a mirror, or check out the prism idea below.
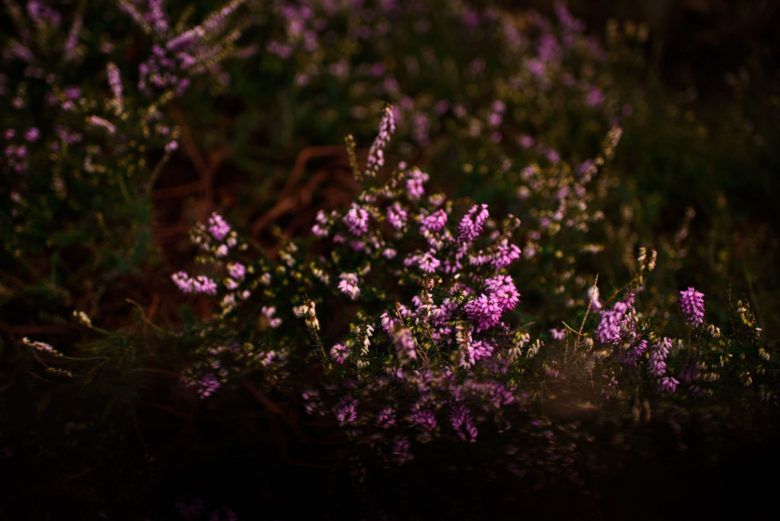
Here are a few of my attempts. It can be really cool if you have an interesting sky, but it was pretty grey out, so I just went for reflecting some trees. I also tried it out on some flowers, which created an interesting gradient effect on the bottom instead of the brighter soil that was there.
Another option is to use a prism. A prism is a clear object with flat surfaces that refracts light. You can search for photo prism to find lots of examples of things to use. Below is an example by my friend Bud, who is awesome at this kind of experimental photography, using a triangular prism. You can use them in a similar way to a mirror and just play around with it until it looks the way you want.
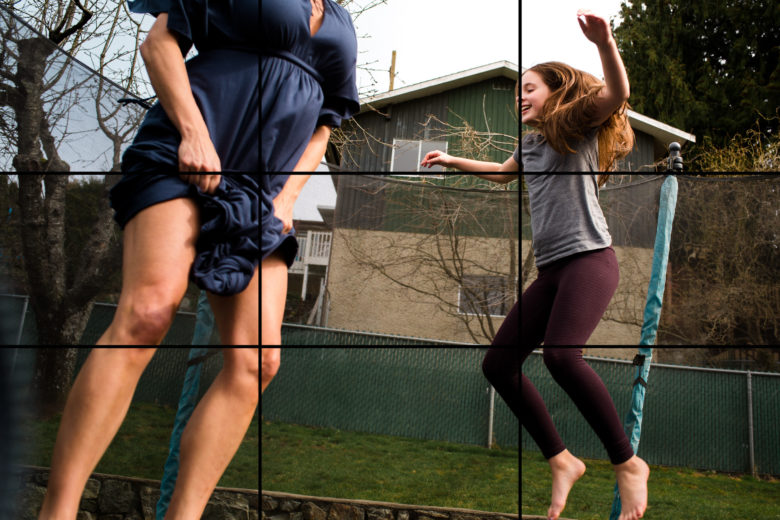
This week’s theme is rule of thirds. The rule of thirds is probably the most well-known composition rule in photography.
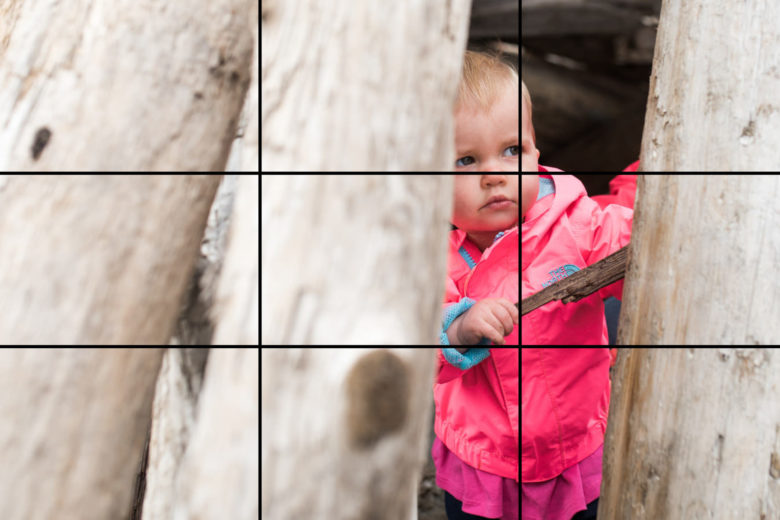
The basic principle behind the rule of thirds is to break an image down into thirds horizontally and vertically, like the diagram below.
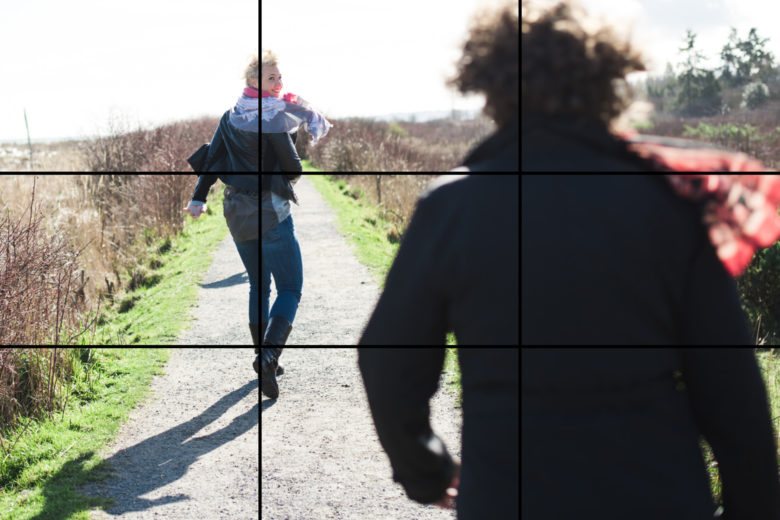
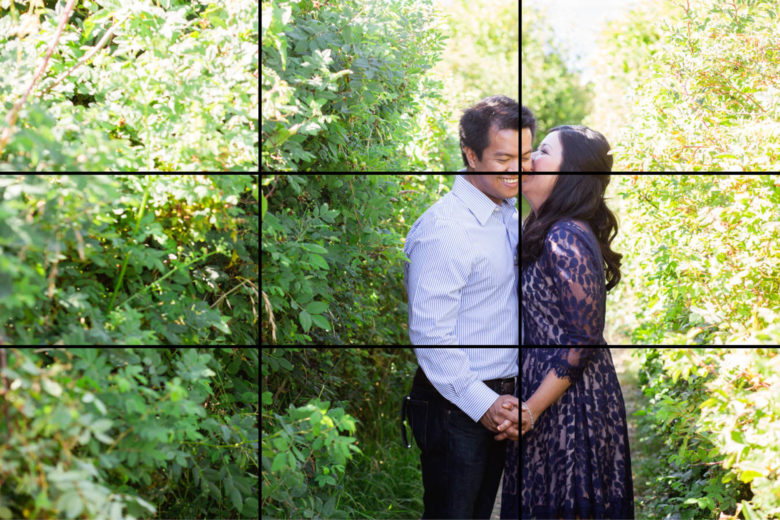
Placing the most important elements of your frame on one of the lines or at one of the intersections helps create an aesthetically pleasing and interesting image. See below for some examples.
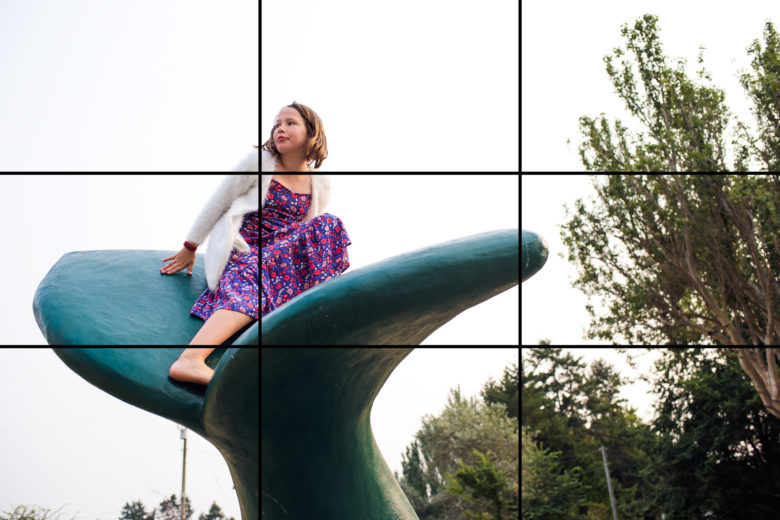
I typically use this rule horizontally, but it can also be used vertically. It even works in an otherwise centered image, like the last example above. Playing with the rule of thirds is a good way to break out of a tendency to center everything all the time.
Rule of Thirds Tips
How to apply the rule using guidelines: you can imagine these lines while composing, but some cameras have the ability to turn on a grid in the viewfinder/LCD. Many editing programs also show this grid when cropping, which is a feature I use a lot when the in-camera crop doesn’t look quite right.
Try placing something on multiple points or lines across the frame creating balance in your composition. See the trampoline image and the one with the two women running above.
With landscape photos, try placing the horizon line on one of the horizontal lines on the grid.
As with any rules or guidelines in photography, feel free to break it if you want. It’s good to learn the rules first and then you can break them intentionally and know why you’re doing it. This also isn’t something you have to think about for every photo. There are many composition techniques out there that can result in interesting photos. We’ll get to some more of them later in this challenge.
If you have any questions, join us in the community. I’ll be checking in there daily to see your work and help you achieve the best results.
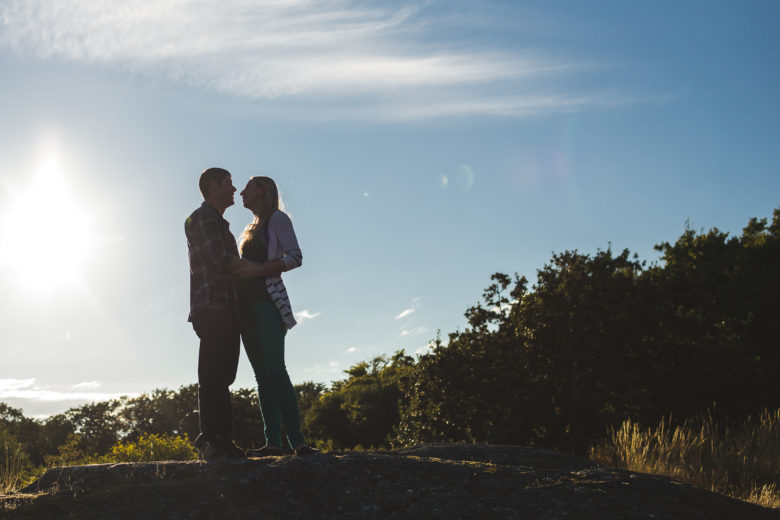
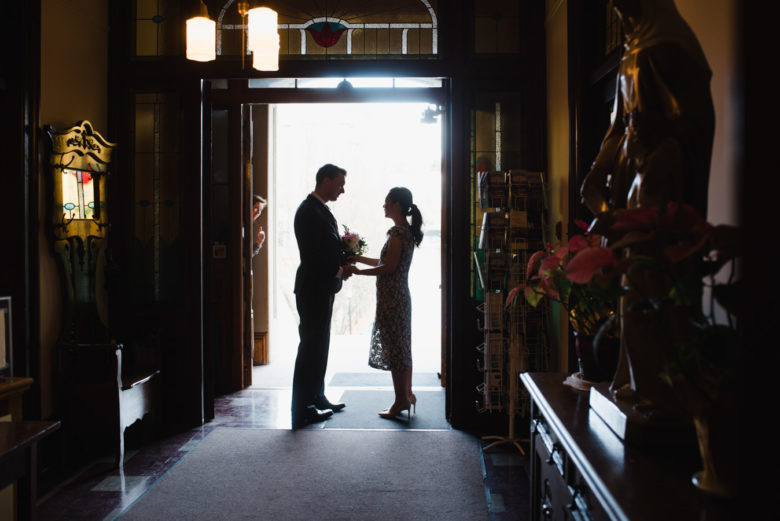
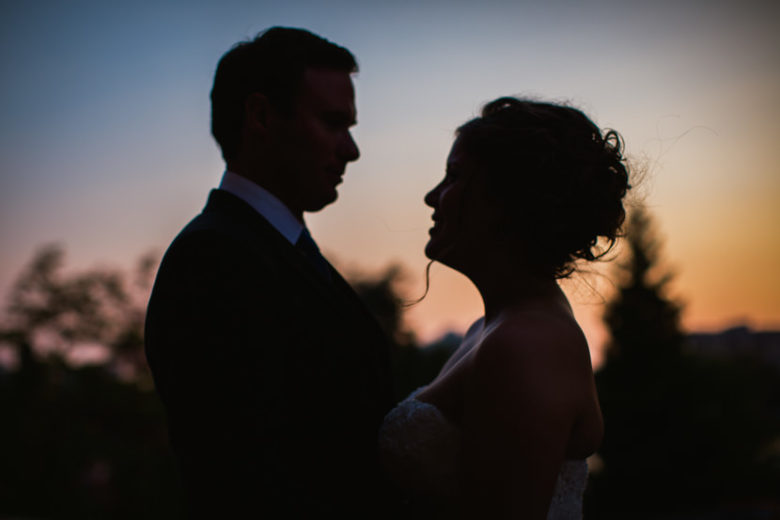
This week’s theme is silhouette. A silhouette is an outline that appears dark and without much detail against a lighter background.
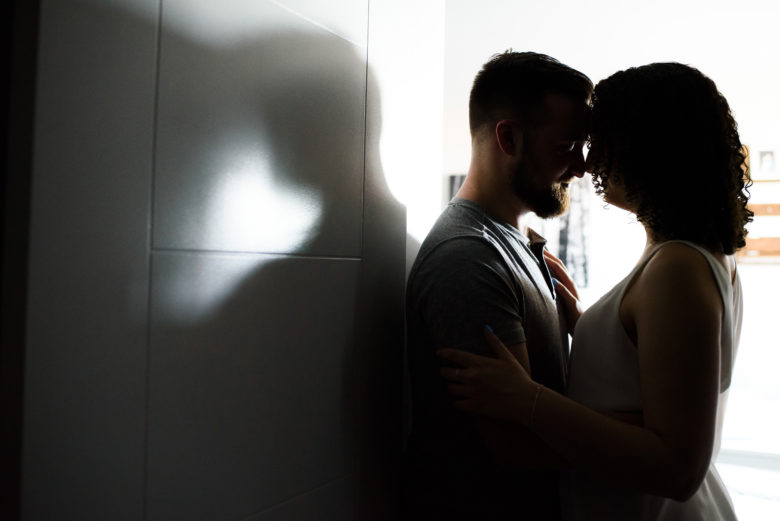
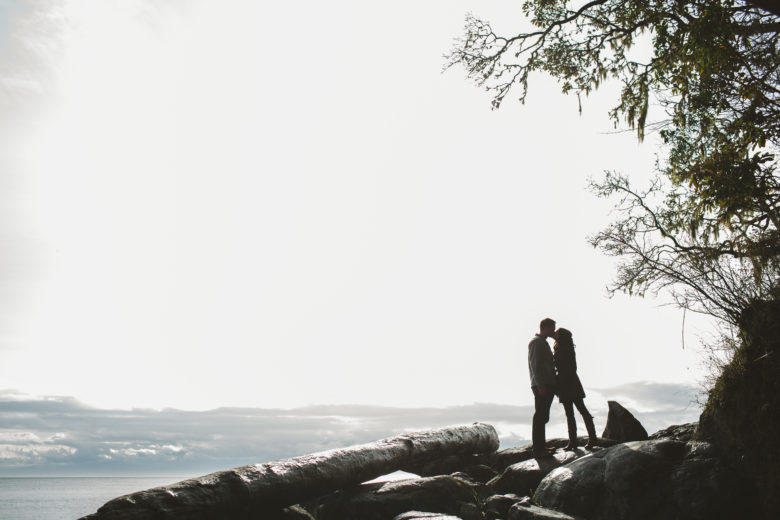
Below are some examples of silhouette photos of people, though you can certainly make a silhouette of other things like trees, buildings, etc. Some of these have a little detail showing with light leaking in at the edges, which can help you see what’s going on a bit better than the traditional totally black silhouette. Find some tips on getting a great silhouette photo below the examples.
Silhouettes rely on backlighting, which means the light is coming from behind the subject. The light from behind puts the subject in the shadow of itself, so it appears dark.
You might have achieved this look accidentally when using automatic mode on your camera. That’s because your camera is exposing for an average brightness in your frame and if the background is larger in area than the subject(s), your camera will think the scene is very bright and expose for the bright areas, making the subjects dark.
How to Expose for a Silhouette
If your camera doesn’t automatically give you a silhouette (and with default settings and the subject not taking up the majority of the frame, you usually will get one), here’s how to get one intentionally. If you’re using a cell phone or similar touch screen device, tap on the light background instead of the subject and it will expose for the background, making the subject dark.
With a DSLR or other more advanced camera, there are two options that can work:
1) Point your camera at an area that’s mostly/only bright background and press the auto-exposure lock button (AE-L or * or check your manual) to lock in your exposure. Then move your camera back to your desired composition, press the shutter button halfway to focus, and you should be able to take a silhouette. This method is the simplest way to expose for the background and get your subject in focus.
2) If the above method doesn’t work or your camera doesn’t have auto-exposure lock, you can try this more complicated method. Set your exposure mode to program/P (manual/aperture-priority/shutter-priority if you know how to use them) and set your metering mode to spot (or center weighted if you don’t have spot). The exposure mode is usually a dial on top of the camera. If you don’t know how to set your metering mode, try searching for “how to change metering mode” and your camera model. Then move your focal point onto the background to expose for the background’s brightness (or for most Canon DSLRs, make sure the center of your frame is over the background because it determines exposure by the center point, not focal point).
Focus. For the cell phone method and second DSLR method above, you may have an issue with your subject being blurry or somewhat out of focus. If you want your subject to be sharp and background blurrier, look up how to separate exposing and focusing for your camera model (or your phone app – I use ProCamera, which lets you tap on different areas for focus and exposure). Alternatively, you can use manual focusing to change the focus after you get your exposure (or before if you switch the lens to M, otherwise pressing the shutter halfway will refocus). Another option is to use a higher aperture to get more of the frame in focus (in aperture-priority, just set the aperture to a higher number).
Other Silhouette Tips
You want your background to be brighter, preferably much brighter, than your subjects. The sky, with the sun behind your subjects, is usually a great background for silhouettes. Sunset or sunrise can make the sky look more interesting.
To get an interesting and clear silhouette of a person or people, try to get them posed in a way where their shapes are distinct and multiple subjects have some space between them. It’s helpful if they’re doing something you can recognize in silhouette so they don’t look like a big blob. Objects with interesting edges make good subjects as well.
Make sure there aren’t other shaded objects intersecting your subject or they won’t stand out. You may be able to get a slight outline of light around two subjects a distance away from each other, which is a little trickier to achieve.
Make sure your flash is turned off if it fires automatically. You want your subjects to be darker than the background, so try to not have any added light on them, including flash or indoor lights.
If you have any questions, join us in the community. I’ll be checking in there daily to see your work and help you achieve the best results.
Comments Off on Week 1 – Photograph Someone You Love
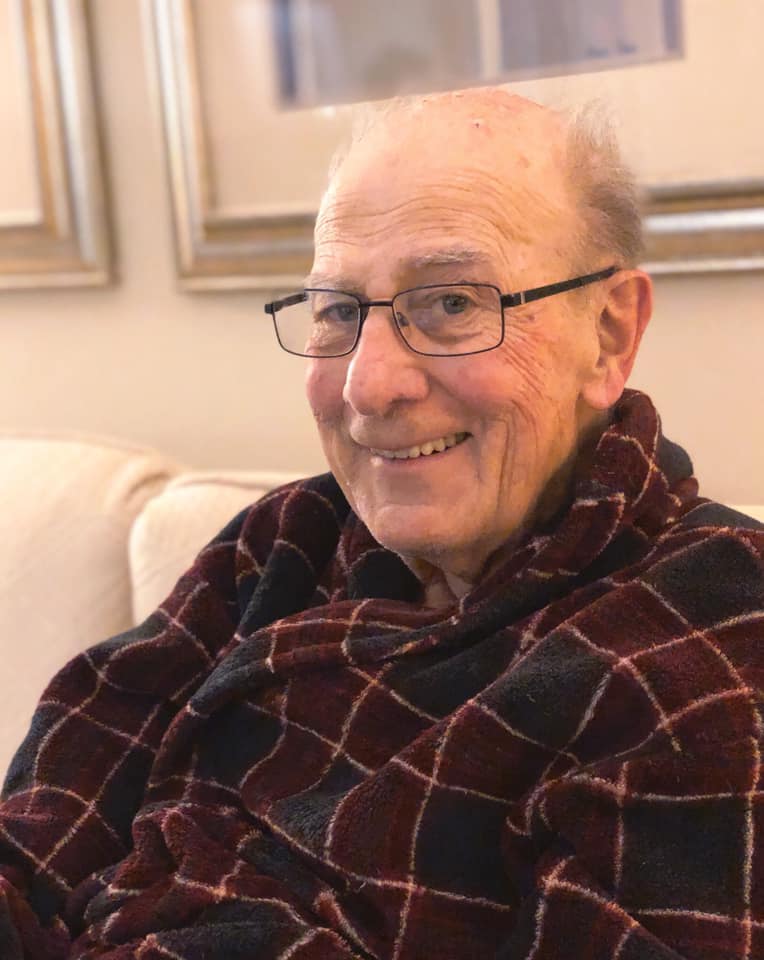
I’ve been a professional photographer for over a decade and over the years, I’ve learned how important it is to document the people in our lives. People change so quickly, even if it’s not apparent when you see them every day.
This week’s challenge is to photograph someone you love. If you don’t have anyone handy, you could choose a pet or do a self portrait instead. This image can be posed or candid, your choice.
Below is the photo I took for this theme in 2020. I was visiting my parents across the country and just had my cell phone, so it’s not up to my usual technical standards, but I still think it’s a great photo of him.
Below are some examples of candid photos of individuals. If you regularly photograph people, try taking a different type of portrait/candid than usual.
If you have any questions, join us in the community. I’ll be checking in there daily to see your work and help you achieve the best results.