This week’s theme is macro photography. Macro photography is very close up photography, usually of small subjects and often produced at greater than or equal to 1:1 scale. You may have noticed your lenses can only focus at a certain distance from your subject, so you can’t get really close up photos with a normal lens. To get closer for macro photography, you can buy a macro lens or a lens with macro capability. The 18-55 kit lens that comes with Canon and Nikon DSLRs says it has macro capability, but it can’t get as close as a true macro lens.
There are alternatives to using a macro lens though and they can be a lot more affordable.
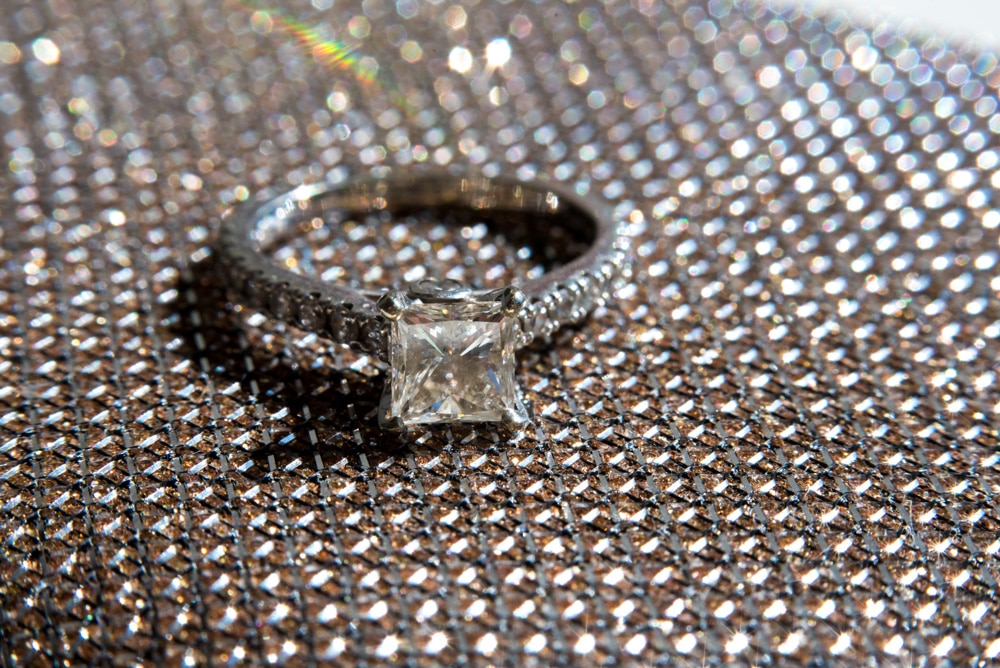
First, you can just turn your lens backwards and hold it in front of the camera opening. That’s what I did in the photo below. It can be a bit tricky to get focus while also trying to hold the lens in place and hold the aperture open (if needed). You can buy a reversing ring for pretty cheap to mount the lens on the body backwards instead.
Second, you can buy extension tubes, which can be fairly affordable. They go between the lens and the camera and get your front element closer to your subject. I had a cheap set years ago, which didn’t maintain the connection between the lens and body and so the aperture couldn’t be changed unless the lens had an aperture ring. There are more expensive ones that work like a normal lens though.
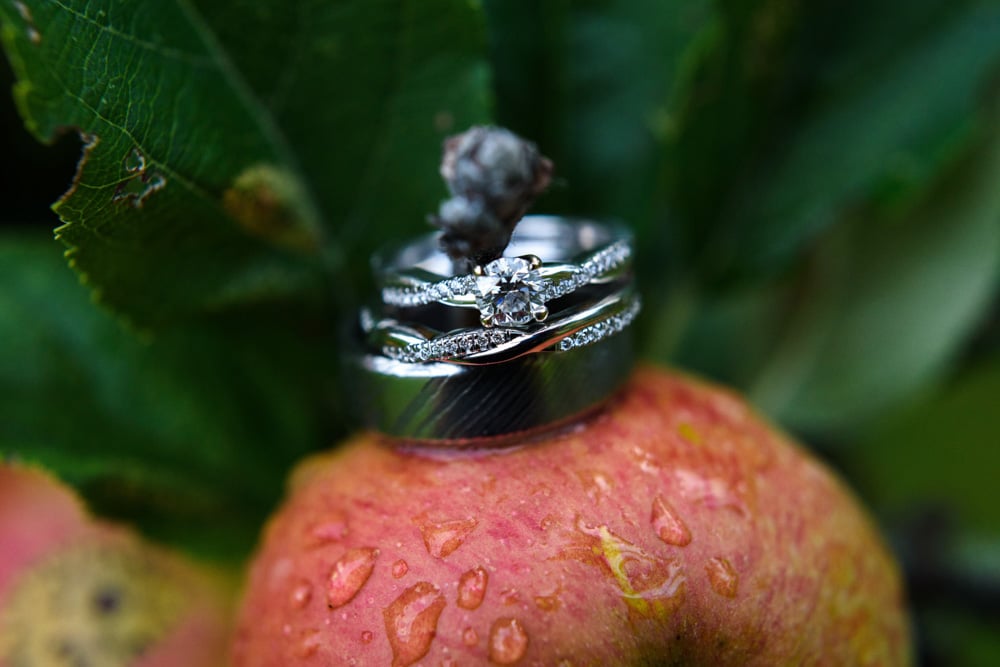
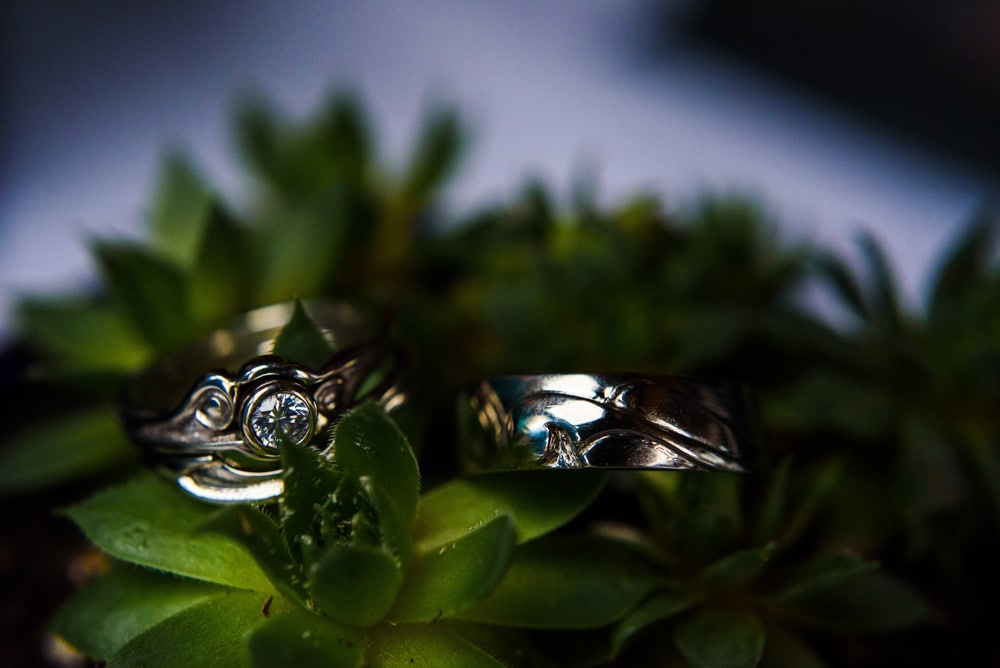
Third, and my current favourite, are close-up filters. I have a set from Polaroid that are pretty cheap and work great. They come in different magnifications and you can stack them. Make sure to buy the right size for your lens. You’ll want to look up the filter size or diameter for the lens you want to use them on. Below are a couple of examples I took with the close-up filters.
Here are some tips for capturing great macro photos:
- Since you’re so close to your subject, the depth of field (area in focus) will be very small. You’ll probably want to use a higher aperture to ensure you get focus.
- You can use autofocus if you want, though I find autofocusing once and then locking focus or using manual focus works best. Then I rock slightly back and forth and take several photos in order to get at least one in focus. I often do this in live view so I can see focus more clearly. The focusing difficulty comes from any slight hand shaking changing the distance from your lens to your subject, moving the plane of focus. You could also use a tripod to carefully obtain focus once and lock it.
- Think about your composition and context. In the above two ring photos, I included elements of the weddings they were taken at. I especially love the first one that shows it was a rainy day at an apple orchard wedding. Composition of the background is important when your subject takes up a lot of the frame.
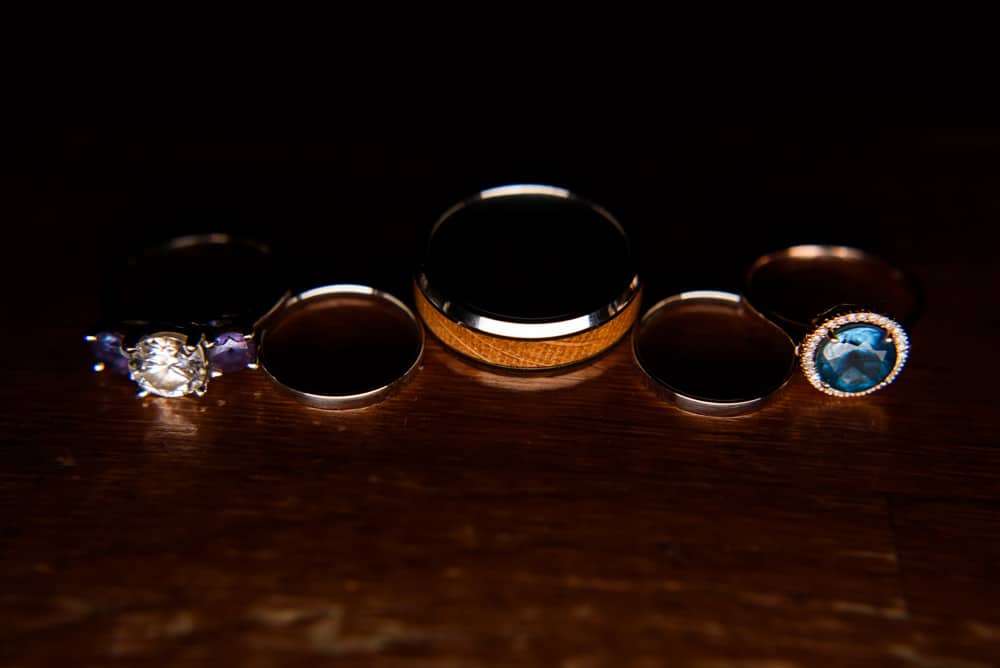
- Make sure you have enough light. If you have low light, then you’ll either need to raise your ISO and get more noise or use a low aperture, which can make your depth of field too narrow and hard to get focus. You can use a tripod and a low shutter speed if possible or add some light. In the image below, I used a Polaroid BrightSaber video light to create a narrow beam of light across the rings. It was a pretty dark reception, so this helped me get more reasonable settings than I would have otherwise.
If you have any questions, join us in the Facebook group. I’ll be checking in there daily to see your work and help you achieve the best results.
If you’re just finding this now, you can check out the full list and more information on the challenge here. You can follow me on Instagram at @documentyourdaytoday and use the hashtag #dtd52weeks so others doing the challenge can see your work.