This week’s theme is silhouette. A silhouette is an outline that appears dark and without much detail against a lighter background.
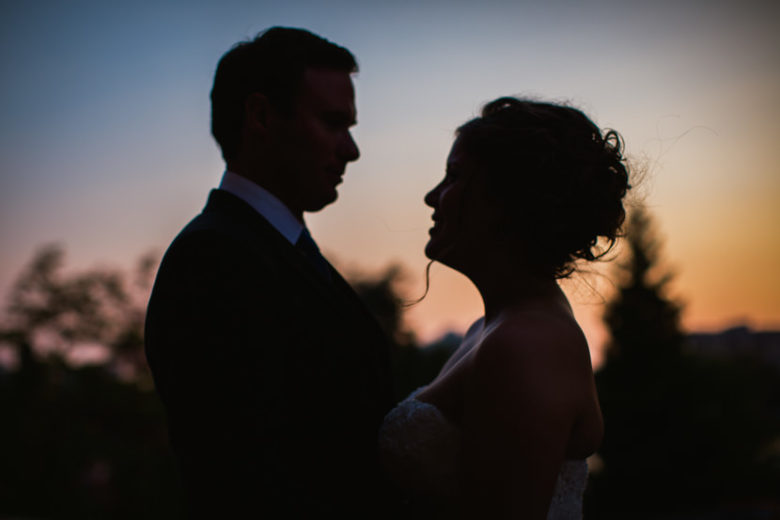
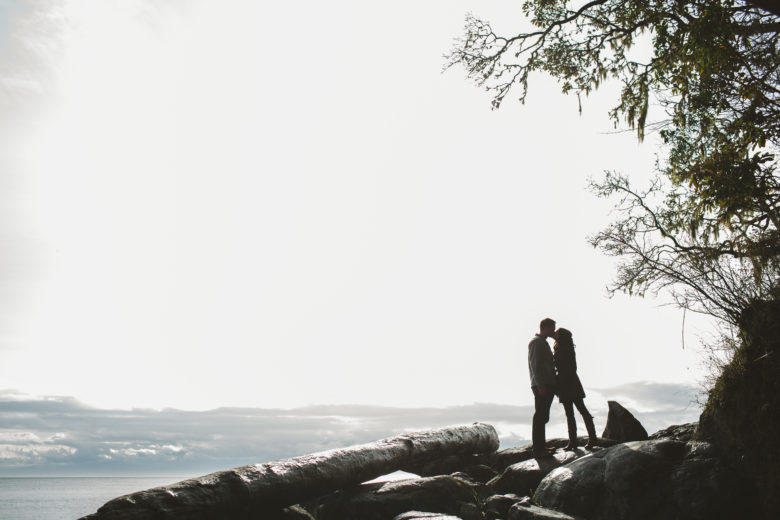
Below are some examples of silhouette photos of people, though you can certainly make a silhouette of other things like trees, buildings, etc. Some of these have a little detail showing with light leaking in at the edges, which can help you see what’s going on a bit better than the traditional totally black silhouette. Find some tips on getting a great silhouette photo below the examples.
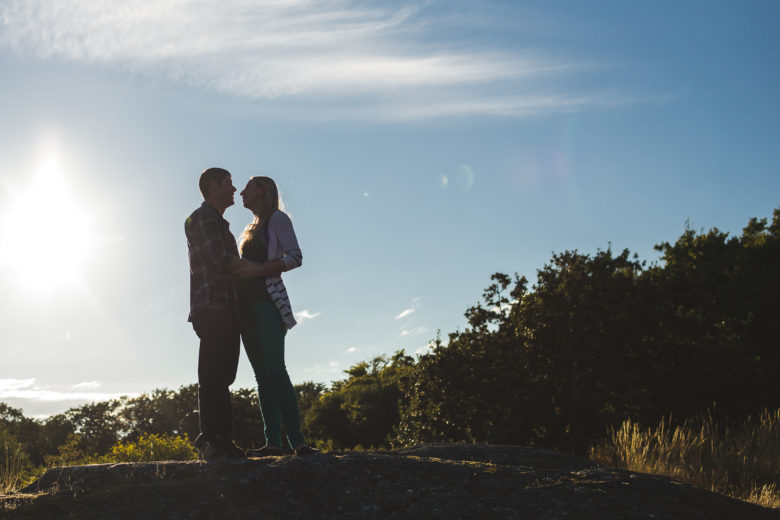


Silhouettes rely on backlighting, which means the light is coming from behind the subject. The light from behind puts the subject in the shadow of itself, so it appears dark.
You might have achieved this look accidentally when using automatic mode on your camera. That’s because your camera is exposing for an average brightness in your frame and if the background is larger in area than the subject(s), your camera will think the scene is very bright and expose for the bright areas, making the subjects dark.
How to Expose for a Silhouette
If your camera doesn’t automatically give you a silhouette (and with default settings and the subject not taking up the majority of the frame, you usually will get one), here’s how to get one intentionally. If you’re using a cell phone or similar touch screen device, tap on the light background instead of the subject and it will expose for the background, making the subject dark.
With a DSLR or other more advanced camera, there are two options that can work:
1) Point your camera at an area that’s mostly/only bright background and press the auto-exposure lock button (AE-L or * or check your manual) to lock in your exposure. Then move your camera back to your desired composition, press the shutter button halfway to focus, and you should be able to take a silhouette. This method is the simplest way to expose for the background and get your subject in focus.
2) If the above method doesn’t work or your camera doesn’t have auto-exposure lock, you can try this more complicated method. Set your exposure mode to program/P (manual/aperture-priority/shutter-priority if you know how to use them) and set your metering mode to spot (or center weighted if you don’t have spot). The exposure mode is usually a dial on top of the camera. If you don’t know how to set your metering mode, try searching for “how to change metering mode” and your camera model. Then move your focal point onto the background to expose for the background’s brightness (or for most Canon DSLRs, make sure the center of your frame is over the background because it determines exposure by the center point, not focal point).
Focus. For the cell phone method and second DSLR method above, you may have an issue with your subject being blurry or somewhat out of focus. If you want your subject to be sharp and background blurrier, look up how to separate exposing and focusing for your camera model (or your phone app – I use ProCamera, which lets you tap on different areas for focus and exposure). Alternatively, you can use manual focusing to change the focus after you get your exposure (or before if you switch the lens to M, otherwise pressing the shutter halfway will refocus). Another option is to use a higher aperture to get more of the frame in focus (in aperture-priority, just set the aperture to a higher number).
Other Silhouette Tips
- You want your background to be brighter, preferably much brighter, than your subjects. The sky, with the sun behind your subjects, is usually a great background for silhouettes. Sunset or sunrise can make the sky look more interesting.
- To get an interesting and clear silhouette of a person or people, try to get them posed in a way where their shapes are distinct and multiple subjects have some space between them. It’s helpful if they’re doing something you can recognize in silhouette so they don’t look like a big blob. Objects with interesting edges make good subjects as well.
- Make sure there aren’t other shaded objects intersecting your subject or they won’t stand out. You may be able to get a slight outline of light around two subjects a distance away from each other, which is a little trickier to achieve.
- Make sure your flash is turned off if it fires automatically. You want your subjects to be darker than the background, so try to not have any added light on them, including flash or indoor lights.
If you have any questions, join us in the community. I’ll be checking in there daily to see your work and help you achieve the best results.
If you’re just finding this now, you can check out the full list and more information on the challenge here. You can follow me on Instagram at @documentyourdaytoday and use the hashtag #dtd52weeks so others doing the challenge can see your work.