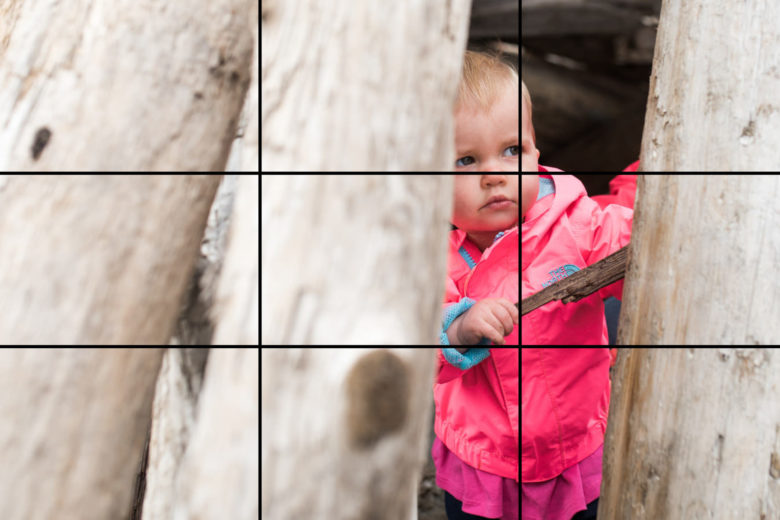
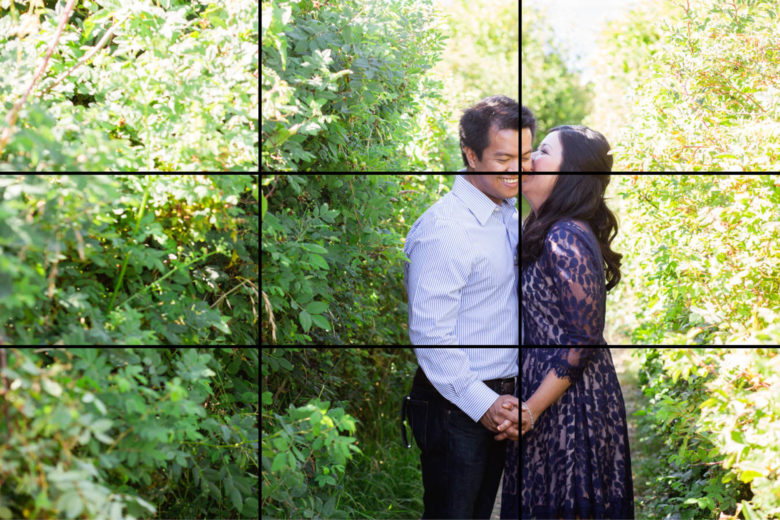
This week’s theme is rule of thirds. The rule of thirds is probably the most well-known composition rule in photography.
The basic principle behind the rule of thirds is to break an image down into thirds horizontally and vertically, like the diagram below.
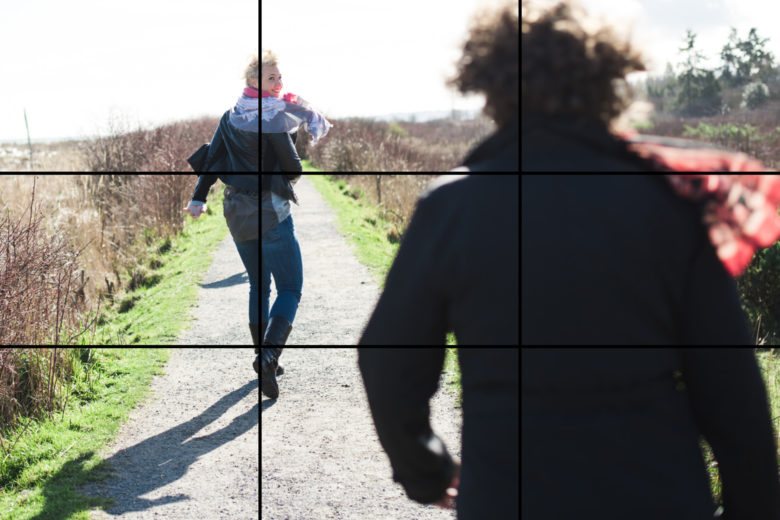
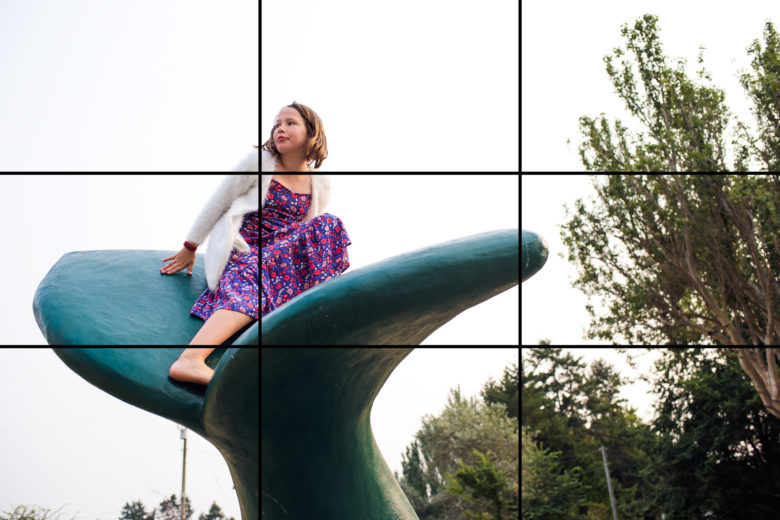
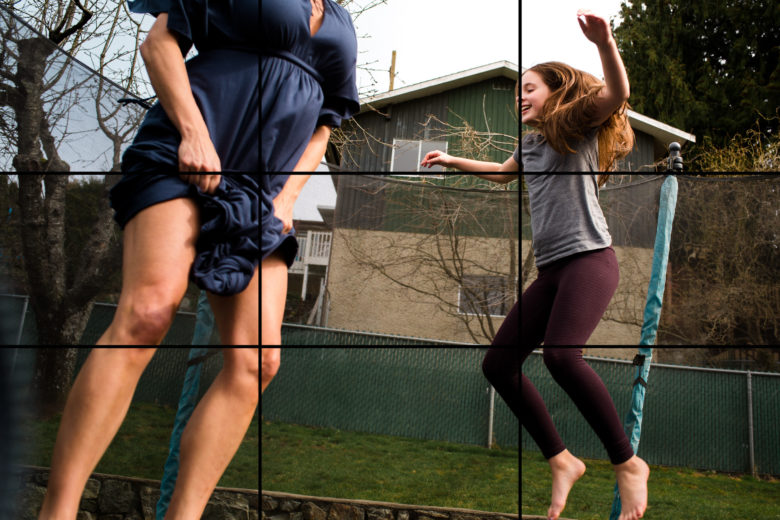
Placing the most important elements of your frame on one of the lines or at one of the intersections helps create an aesthetically pleasing and interesting image. See below for some examples.
I typically use this rule horizontally, but it can also be used vertically. It even works in an otherwise centered image, like the last example above. Playing with the rule of thirds is a good way to break out of a tendency to center everything all the time.
Rule of Thirds Tips
How to apply the rule using guidelines: you can imagine these lines while composing, but some cameras have the ability to turn on a grid in the viewfinder/LCD. Many editing programs also show this grid when cropping, which is a feature I use a lot when the in-camera crop doesn’t look quite right.
Try placing something on multiple points or lines across the frame creating balance in your composition. See the trampoline image and the one with the two women running above.
With landscape photos, try placing the horizon line on one of the horizontal lines on the grid.
As with any rules or guidelines in photography, feel free to break it if you want. It’s good to learn the rules first and then you can break them intentionally and know why you’re doing it. This also isn’t something you have to think about for every photo. There are many composition techniques out there that can result in interesting photos. We’ll get to some more of them later in this challenge.
If you have any questions, join us in the community. I’ll be checking in there daily to see your work and help you achieve the best results.
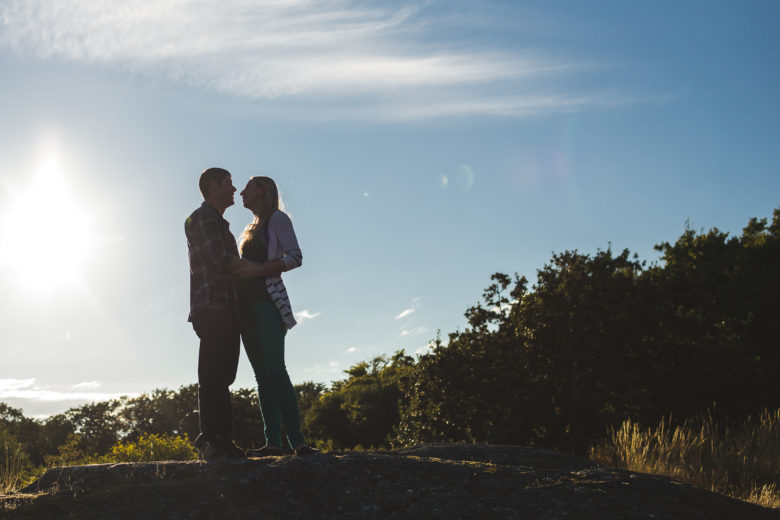
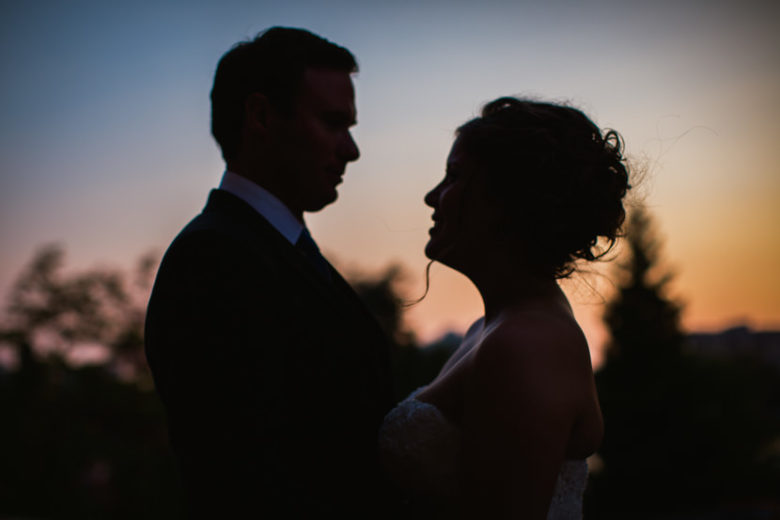
This week’s theme is silhouette. A silhouette is an outline that appears dark and without much detail against a lighter background.
Below are some examples of silhouette photos of people, though you can certainly make a silhouette of other things like trees, buildings, etc. Some of these have a little detail showing with light leaking in at the edges, which can help you see what’s going on a bit better than the traditional totally black silhouette. Find some tips on getting a great silhouette photo below the examples.
Silhouettes rely on backlighting, which means the light is coming from behind the subject. The light from behind puts the subject in the shadow of itself, so it appears dark.
You might have achieved this look accidentally when using automatic mode on your camera. That’s because your camera is exposing for an average brightness in your frame and if the background is larger in area than the subject(s), your camera will think the scene is very bright and expose for the bright areas, making the subjects dark.
How to Expose for a Silhouette
If your camera doesn’t automatically give you a silhouette (and with default settings and the subject not taking up the majority of the frame, you usually will get one), here’s how to get one intentionally. If you’re using a cell phone or similar touch screen device, tap on the light background instead of the subject and it will expose for the background, making the subject dark.
With a DSLR or other more advanced camera, there are two options that can work:
1) Point your camera at an area that’s mostly/only bright background and press the auto-exposure lock button (AE-L or * or check your manual) to lock in your exposure. Then move your camera back to your desired composition, press the shutter button halfway to focus, and you should be able to take a silhouette. This method is the simplest way to expose for the background and get your subject in focus.
2) If the above method doesn’t work or your camera doesn’t have auto-exposure lock, you can try this more complicated method. Set your exposure mode to program/P (manual/aperture-priority/shutter-priority if you know how to use them) and set your metering mode to spot (or center weighted if you don’t have spot). The exposure mode is usually a dial on top of the camera. If you don’t know how to set your metering mode, try searching for “how to change metering mode” and your camera model. Then move your focal point onto the background to expose for the background’s brightness (or for most Canon DSLRs, make sure the center of your frame is over the background because it determines exposure by the center point, not focal point).
Focus. For the cell phone method and second DSLR method above, you may have an issue with your subject being blurry or somewhat out of focus. If you want your subject to be sharp and background blurrier, look up how to separate exposing and focusing for your camera model (or your phone app – I use ProCamera, which lets you tap on different areas for focus and exposure). Alternatively, you can use manual focusing to change the focus after you get your exposure (or before if you switch the lens to M, otherwise pressing the shutter halfway will refocus). Another option is to use a higher aperture to get more of the frame in focus (in aperture-priority, just set the aperture to a higher number).
Other Silhouette Tips
You want your background to be brighter, preferably much brighter, than your subjects. The sky, with the sun behind your subjects, is usually a great background for silhouettes. Sunset or sunrise can make the sky look more interesting.
To get an interesting and clear silhouette of a person or people, try to get them posed in a way where their shapes are distinct and multiple subjects have some space between them. It’s helpful if they’re doing something you can recognize in silhouette so they don’t look like a big blob. Objects with interesting edges make good subjects as well.
Make sure there aren’t other shaded objects intersecting your subject or they won’t stand out. You may be able to get a slight outline of light around two subjects a distance away from each other, which is a little trickier to achieve.
Make sure your flash is turned off if it fires automatically. You want your subjects to be darker than the background, so try to not have any added light on them, including flash or indoor lights.
If you have any questions, join us in the community. I’ll be checking in there daily to see your work and help you achieve the best results.
Comments Off on Week 1 – Photograph Someone You Love
I’ve been a professional photographer for over a decade and over the years, I’ve learned how important it is to document the people in our lives. People change so quickly, even if it’s not apparent when you see them every day.
This week’s challenge is to photograph someone you love. If you don’t have anyone handy, you could choose a pet or do a self portrait instead. This image can be posed or candid, your choice.
Below is the photo I took for this theme in 2020. I was visiting my parents across the country and just had my cell phone, so it’s not up to my usual technical standards, but I still think it’s a great photo of him.
Below are some examples of candid photos of individuals. If you regularly photograph people, try taking a different type of portrait/candid than usual.
If you have any questions, join us in the community. I’ll be checking in there daily to see your work and help you achieve the best results.
Practice is the best way to get better at anything. This really applies to photography. There are so many technical things to learn, you need to practice them often to make the technical part second nature. Once you’ve got the technical parts down, you can focus solely on the creative. But of course, practicing the creative parts is important too (and fun).
I put together 52 weeks of photography assignments for 2020 so you can practice your photography skills, no matter what level you’re at. There aren’t any hard rules for this. If you don’t get a chance to do the challenge one week, you can always catch up the next, or just skip that week. The main point of this is to get you using your camera at least once a week, if not daily.
I’ve alternated the themes over four week sets of the following categories: subject/moment, lighting, composition, and technical. The technical prompts might be a little more challenging if you’re just using a cell phone camera, but I’ll offer some workarounds for that each week.
The full list is below, but I’ll be making a blog post every week to further explain and give some examples. You’ll find this especially handy with the more technical assignments.
Below are the blog posts for the weeks that have been posted so far:
You can follow me on Instagram at @documentyourdaytoday and use the hashtag #documentyour2020. I’ll feature some of your work on my Instagram (with permission), but check out the hashtag to see everyone’s work.
Week 1: Photograph Someone You Love
January 1-7, 2020
I’ve been a professional photographer for over a decade and over the years, I’ve learned how important it is to document the people in our lives. People change so quickly, even if it’s not apparent when you see them every day.
This week’s challenge is to photograph someone you love. If you don’t have anyone handy, you could choose a pet or do a self portrait instead. This image can be posed or candid, your choice.
Below are some examples of candid photos of individuals. I’m going to try to take a portrait this week, because I very rarely take individual portraits. If you regularly photograph people, try taking a different type of portrait/candid than usual.